
Showing posts with label 4. Show all posts

Thursday, November 20, 2014

Samsung Galaxy S 4 hard reset sgs4 reset i9500 resetting gt i9500 i9505 gt i9505 code


Samsung Galaxy S の4 hard reset :- by >wzmobile.asia<
Fast Reset  the device {press and hold POWER switch  for 9-11 second}
Unlock samsung Galaxy S4 using hard reset
samsung s4 hard reset  or のreset Galaxy S4 PRESS AND HOLD VOLUME UP key + Home switch  + Power switch 

Press Power key the phone on vibrate Waityou see for Android logo then release 
all the switchのの and keys.Select Wipe data/Factory reset with VOLUME DOWN. 
press Power key [right hand-side]Select YES -- delete all user dataŽwith VOLUME DOWN 
and then press Power After format. press Power key again to reboot phone. 
[select reboot system now]unlock i9500 galaxy samsung cell phone
Read More..

How to update Samsung Galaxy S3 to Android 4 1 2 Jelly Bean

Good news to all Samsung galaxy s3 users, the international version of Samsung galaxy s3, which have been the world’s best-selling smartphone, now already received the much anticipated Android 4.1.2 Jelly Bean update over-the-air. Many major national carriers has released Android Jelly for the device, and other Carrier-branded versions like Verizon Wireless should be able to receive the update soon as Samsung is railroading updates for its devices. But some only offer an update that must completed via Samsung Kies software and is not offered over the air.

The new Android 4.12 Jelly Bean Update brings a list of amazing features now only located in Samsung Galaxy Note 2 to Samsung S3, like highly-anticipated Multi View multitasking system, Smart Rotation function , camera filters, low-light photo mode, an easy mode and so on. For some people you may find it is difficult for you to update or wait any longer. So here I will show you How to update Android 4.1 Jelly Bean on Galaxy S3 immediately.Pre-requisites 
  1. Be sure to backup your data before starting the update
  2. Make sure your battery is at least 50% charged.
  3. Make sure that you have install Kies software on the computer, and if you dont have Kies, you can download it from Samsung website.
For international version: If the software update didn’t popped up in the notifications area, you can update your Samsung Galaxy S3 to Android 4.1.2 Jelly Bean by connecting the terminal to Kies or OTA, by manually checking for the update for the latter method. Just go to Settings > About Device > Software Update > Check for Updates and see whether the new firmware has rolled out for your device.

Heres How to Update Your AT&T Samsung Galaxy S III to Android 4.1 Jelly Bean
  • Connect your Samsung Galaxy S III to your PC or laptop using the supplied USB cable. Ensure that Kies recognizes your device by looking in the upper section of the left-bar navigation menu. Your device should be listed.
  • Kies Device Once Kies recognizes the device you will see a Lcd stating new firmware is available.
  • Click Update.
  • Read through the Caution pop-up and, if you agree, click to populate the I have read all of the above information checkbox.
  • Read the Allow saving of information statement and select Allow saving or Proceed without saving and then click Start upgrade.
  • After a few minutes, Kies will then begin transferring the firmware binary to the device.
  • Then after a while the upgrade is completed.
  • If completed a data backup from your device to Kies prior to performing the update, you can now restore that data back to the device under the new Jelly Bean operating system 
Read More..

Wednesday, November 19, 2014

Repair iPhone 4 Bettery Connector Problem


Repair iPhone 4 Bettery Connector Problem
Repair iPhone 4 Bettery Connector Solutions
Repair iPhone 4 Bettery Connector Not Working
Apple iPhone 4 Bettery Connector Problem
Read More..

Wednesday, October 22, 2014

Samsung Galaxy Note 10 1 SHW M480S Running 4 1 2 Jelly Bean Firmware Simple Tutorial How to Root

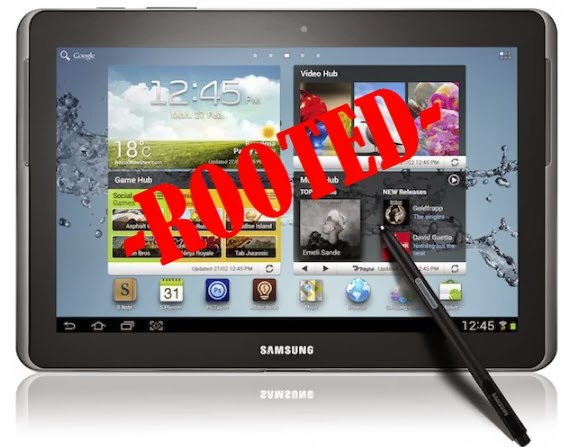
If you are looking for an easy and working method to root your Samsung Galaxy Note 10.1 SHW-M480S (South Korea) Tablet, then youre on right place. Here youll find a simple step by step guide to root Galaxy Note 10.1 M480S running on Android 4.1.2 Jelly Bean official firmware. The device was released with Android 4..0.4 ICS and last updated to Android 4.1.2 Jelly Bean (Latest Firmware for Galaxy Note 10.1 M480S). If you own the device, then you can now root it using the below tutorial.

After having an Android Tablet or, after updating official firmware, many of us prefer to root our device to enjoy some additional features that unrooted android Tablet doesnt offer. With a rooted android Tablet, you can install apps that ask root permission, flash various custom ROMs, install MODs and tweak various features. Root removes default bloatware apps that free-up lots of memory space and extend the battery life. To know more about benefits of rooting android Tablet, read- Complete Note on What is Rooting and Benefits of Rooting Android Tablet.

So, want to root your Galaxy Note 10.1 SHW-M480S? Continue reading this page to get all the necessary steps to successfully root your device. The root file (CF-Auto-Root) we used in this tutorial is safe and have nearly 100% success rate. Well use Odin software to flash the root file.

The tutorial is made with simple step by step guide, so that even an android newbie user can follow and successfully root his/her device. However, in this process you may loss your personal data and settings. So, we recommend you to follow all the backup instructions before proceed to rooting guide.

Caution

  • This rooting tutorial is only applicable for Samsung Galaxy Note 10.1 SHW-M480S model (p4noterfskt). So, dont try this in any other android device. Check your device model number from- Settings-About Tablet
  • Rooting voids your Tablets manufacturer warranty. However, you can get back the warranty anytime by flashing official firmware.
  • This guide is for educational purpose and you should try this at your own risk. We are not responsible if your device experience a soft brick after following this tutorial.

Pre-Requisites:

  • Check battery percentage, charge your device to a decent level of at least 60% battery power. Your device should not turn off during installation.
  • Turn on USB Debugging mode, go to Settings-Developer Options-USB Debugging
  • Backup important data and settings to external storage- follow this guide
  • Install USB driver for your device on your computer- Download Samsung USB Driver
All the above pre-requisites are very important and must be followed before proceed to installation guide. Hope you get all the above points and done as mentioned. Now, you are ready to move to the final step of this tutorial where we have arranged a step by step details guide on how to root Galaxy Note 10.1 SHW-M480S running on official firmware.

How to Root Galaxy Note 10.1 SHW-M480S Running Android 4.1.2 Jelly Bean through Odin:

  1. Download CF-Auto-Root for Galaxy Note 10.1 M480S and extract the Zip fileCF-Auto-Root-p4noterfskt-p4noterfskt-shwm480s.zip
  2. Download Odin 3.07 and extract the Zip file: Odin 3.07.Zip
  3. Now, Switch off your Tablet and boot Galaxy Note 10.1 M480S into Download Mode by pressing and holding the Volume Down and Power buttons together (long press until the boot screen appear), now press Volume Up key to proceed to Download Mode.
  4. Run the Odin3 v3.07.exe file as an administrator (Right click on the .exe file and click on Run as administrator)
  5. Now connect your Galaxy Note 10.1 M480S to your computer via USB cable
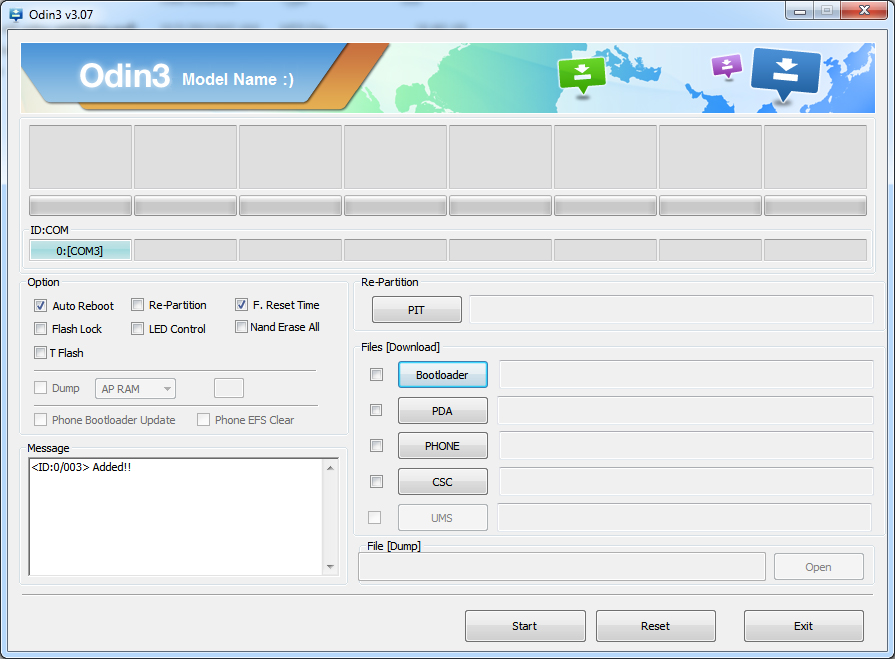
  6. In Odin3 screen, you should see a COM Port number like “0:[COM7]” at ID:COM section and “Added!” text at the message box. This means your device has been detected by Odin3.
  7. Make sure that, only the “Auto Reboot” and “F. Reset Time” options are checked.
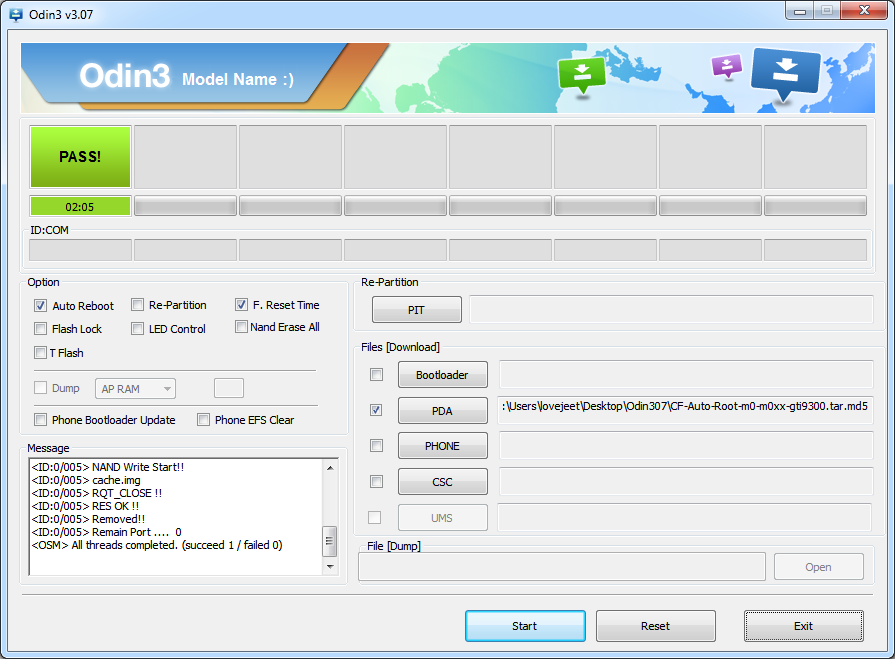
  8. Now, click on the PDA button and select the CF-Auto-Root-p4noterfskt-p4noterfskt-shwm480s.tar.md5 file.
  9. Finally, click on the Start button to begin the rooting process, wait few moments.
  10. Once completed, you would see “PASS!” message in ID:COM port having green background
  11. Your Tablet should automatically reboot after completion
  12. You can now disconnect your Tablet from computer
  13. Finish
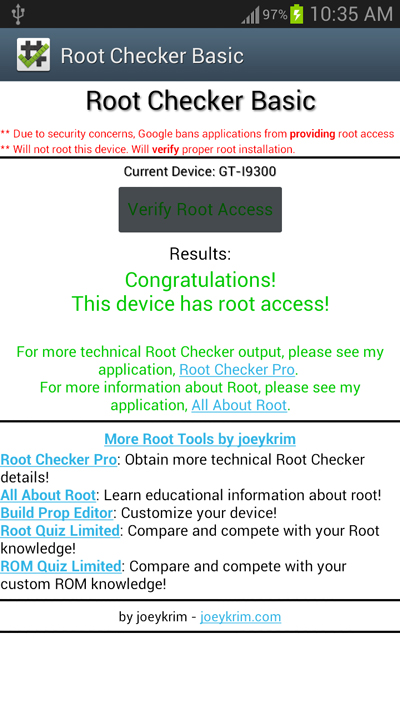
Congrats! You have completed the tutorial to root Galaxy Note 10.1 M480S running on official firmware. Hope you successfully done the rooting process. If you followed everything as mentioned in the above tutorial, then your Galaxy Note 10.1 M480S should now rooted and you have complete control over your device. Now, install apps that ask root permission or flash various custom ROMs. To verify your device is rooted or not, you can download and run the Root Checker App from Google Play Store. If you have any doubt or query about the tutorial, feel free to contact with us using the comment form below, and share your rooting experience with us.
Read More..

I Phone 4 detailed explanation of the and how to deal with him 2 100 working solution

I Phone 4 detailed explanation of the and how to deal with him 2 100% working solution,I Phone 4 detailed explanation of the and how to deal with him 2 100% working solution,
I Phone 4 detailed explanation of the and how to deal with him 100% working solution
 see this step i hope u think and i hope u have any idia,
Read More..

Thursday, September 25, 2014

How To UpdateAndroid 4 4 2 KitKat Mahdi ROM For Verizon LG G2 VS980

Google has recently launched its latest Android firmware 4.4.2 KitKat for many Nexus devices. Officials 4.4.2 AOSP release KitKat largely without much customization. If you want to enjoy a KitKat customized Android 4.4.2 on a Verizon LG VS980 G2 then flash or install a custom ROM Mahdi. The latest version of the Mahdi launched recently which is based on Android 4.4.2 KitKat and fully supports Verizon LG VS980 G2. Continue reading this guide to learn how to install Android 4.4.2 custom ROM based on the KitKat Mahdi G2 Verizon LG VS980.
Warning!

This tutorial is only for Verizon LG G2 VS980. Don’t try this guide on any other Android device. Also, we are not responsible for any damage caused due to the instruction given in this page. Try this at your own risk. However, it is very unlikely that your device will be damaged if you follow all the instructions as it is which are mentioned in procedure.

Pre Requisites:

1. Backup your device data. You can follow our ultimate backup guide.

2. Make sure your device have at least 60% battery power. You can install an app like Battery Notifier BT Free on your Android device to check it easily.

3. You already have USB Driver Installed for Verizon LG G2 VS980 in your PC. [Download USB Drivers]

4. Make sure USB Debugging is enabled otherwise you won’t able to transfer file between PC and Verizon LG G2 VS980.

5. Your device have latest CWM version 6.0.4.4 and up or TWRP 2.6.1 and up installed.

If you done everything that we mentioned above then you are ready to follow step-by-step guide on how to install Android 4.4.2 KitKat based MahdiROM on Verizon LG G2 VS980.

File Required(Download by clicking on it)
  1. Mahdi Android 4.4.2 KitKat ROM For Verizon LG G2 VS980 [Filename: mahdi-2.4-vs980-20140105.zip]
  2. Google Apps [Filename: gapps-kk-20131119.zip] or any other KitKat Gapps
How to Install Android 4.4.2 KitKat based Mahdi ROM on Verizon LG G2 VS980
  1. Connect your device to PC using USB cable and then copy downloaded files to the SD card of your device.Important: Don’t extract any files.
  2. Disconnect USB and then turn off your Verizon LG G2 VS980.
  3. Now, Boot into recovery mode. To do so, press and hold Volume down & Power, when the LG logo appears release and press them again, then press the Power button three times. In recovery use Volume Keys to navigate between option and Power or Home Key to select an option. 
  4. Perform a Nandroid backup of your existing ROM that you can restore later if this new ROM not work or you want to go back into your previous ROM. To perform a backup, select Backup and Restore, then on the next Lcd, select Backup again. Go back to main recovery menu after backup is complete.
  5. Now, perform data wiping task. To do so, select wipe data/factory reset, then select Yes on next Lcd to confirm your action. Wait few minutes till the data wipe is complete. Now come back to CWM recovery main menu. Select wipe cache partition and after wiping process done, select Wipe Dalvik Cache under advanceoption to perform Dalvik cache wiping.
  6. Select install zip from sdcard, then select choose zip from sdcard. Now, locate the Mahdi ROM Zip file that you copied earlier in Step 1 and select it by pressing Power button. Confirm installation by selecting Yes – Install _____.zip on the next Lcd. The ROM installation will begin.
  7. Once the ROM installation process end, repeat the step 6 but choose the gapps-kk-20131119.zip file instead of ROM zip to install the Google apps package.
  8. When installation is completed, go back to the main recovery menu and select reboot system now to reboot your Verizon LG G2 VS980 and boot up into rooted Android 4.4.2 KitKat ROM Mahdi. 
  9. Returning to Previous ROM: To go back to your previous ROM, boot into recovery, select backup and restore then restore your previous ROM by selecting it from the list.
Congrats! Android 4.4.2 KitKat firmware based custom ROM Mahdi is now installed and running on your Verizon LG G2 VS980. [Note: Root is turned off by default in CM derived ROMs, you must enable developer settings first (tap the build number 8 times under about device), then enable root under Developer Settings] [source]
Read More..

Wednesday, September 10, 2014

Easy Ways to Update Galaxy S4 Mini I9190 with Android 4 2 2 DXUAMK 2 Jelly Bean Official Firmware

For Samsung Galaxy S4 Mini with Model Number GT-I9190 has been getting updates Jelly Bean Android 4.2.2 with the latest firmware base I9195XXUBML1. The new firmware is now officially available as an Over-The-Air (OTA) and via the Samsung Kies update.


Firmware details
PDA: I9190DXUAMK2
CSC: I9190OLBAMK3
MODEM: I9190DXUAMK2
Version: Android 4.2.2
Build date: Nov 11, 2013
Regions: Indonesia, Malaysia, Singapore, Vietnam, Thailand

Samsung Galaxy S4 Mini I9190 users who missed the OTA update notification or unable to access the update over Samsung KIES, may follow our step-by-step guide to install the update manually.

Pre-requisites
1. Install USB Drivers for Samsung Galaxy S4 Mini on the computer.
2. Enable USB Debugging Mode on the phone by navigating to Settings >> Developer Options.
3. Make a backup of all your important data before following the guide.
4. The Galaxy S4 Mini should be factory unlocked and not locked to any particular carrier.
5. Ensure the battery of the phone is charged more than 80 percent.
6. The Android 4.2.2 DXUAMK2 Jelly Bean firmware is compatible only with the 3G version of the Samsung Galaxy S4 Mini (GT-I9190). Applying this to any incorrect variant might brick the device. Verify the model number of the Galaxy S4 Mini by navigating to Settings >> About Phone.

Files Required

1. Android 4.2.2 DXUAMK2 Jelly Bean Firmware for Galaxy S4 Mini I9190
2. Odin 3.07

Steps to Update Galaxy S4 Mini I9190 with Android 4.2.2 DXUAMK2 Jelly Bean Firmware
Step 1: Extract Firmware zip file using winrar/7zip/winzip or any other extracting tool, you will get a .tar.md5 file and some other files.
Step 2: Extract Odin zip file and you will get Odin3 v3.07.exe along with few other files.
Step 3: Switch off the Galaxy S4 Mini.
Step 4: Boot the device into Download Mode by pressing and holding Volume Down, Homeand Power buttons together until a construction Android robot icon with a warning triangle appears on Lcd. Now press the Volume Up button to enter Download Mode.
Step 5: Run Odin on the computer as an Administrator.
Step 6: Connect the Galaxy S4 Mini to the computer using USB cable while it is in the Download Mode. Wait until Odin detects the device. When the device is connected successfully, the ID: COM box will turn to light blue with the COM port number. Additionally, the successful connected will be indicated by a message saying Added.

Note: If the Added message does not appear, then try re-install USB drivers or changing the port on the computer.
Step 7: Select the following files in Odin from extracted I9190DXUAMK2 firmware folder:
  • Click the PDA button and select the .tar.md5 file.
  • Click the Phone button and select file with MODEM in its name. Ignore if there is no such file.
  • Click the CSC button and select file with CSC in its name. Ignore if there is no such file.
  • Click the PIT button and select the .pit file. Ignore if there is no such file.

Step 8: In Odin, enable Auto Reboot and F. Reset Time checkboxes. Also, ensure the Re-Partition checkbox is chosen only if a .pit file was chosen in the previous step.
Step 9: Verify everything suggested in Step 7 and Step 8 is done correctly. Then hit the Startbutton to begin the installation process.
Step 10: Once the installation process is completed, your phone will restart and soon you will see a PASS message with green background in the left-most box at the very top of the Odin. You can now unplug the USB cable to disconnect it from the computer.

Samsung Galaxy S4 Mini I9190 should be now updated with official Android 4.2.2 DXUAMK2 Jelly Bean. Head over to Settings >> About Phone to verify the software version running on the device.

Note: If Galaxy S4 Mini I9190 stuck at booting animation after Step 10 then go to recovery mode (press and hold the Volume Up, Home and Power buttons together) and perform Wipe data/Factory Reset and Wipe Cache Partition task before selecting reboot system now function. In recovery mode use Volume keys to navigate between options and Power key to select the option. Please note, performing wiping task will erase your device internal memory data and not external SD card data.
Read More..

balckberry Solution Latest OS 9500 4 7 0 141 4 7 0 100 Multilanguage

Software For BlackBerry® Storm(TM) smartphone
From Vodafone Greece

BlackBerry Handheld Software v4.7.0.141 (Multilanguage)

Package Version: 4.7.0.141
Consisting of:
Applications: 4.7.0.100
Software Platform: 4.0.0.124
File name: 9500_omadrmEuropean_PBr4.7.0_rel141_PL4.0.0.124_A4 .7.0.100_Vodafone_Greece.exe
File size: 116.19MB
Note: The Software Platform and Applications version numbers can be found under Options-About Lcd on the handheld
Instructions for installing either version on ANY carriers 9500:

1. Download the above OS file to the PC then install it to the PC by running (double clicking) the file you downloaded.
2. Go to c:program filescommon files esearch in motionapploader and delete the file named "vendor.xml."
3. Plug in BB and double click on "Loader.exe." Its located in the same place as the above vendor.xml file.

The process takes about 45 minutes to an hour depending on how much data you have to backup and restore during the process. Once its done loading the new OS it will reboot (it may do this twice during the entire process.) You will see a white Lcd with an hourglass for up to 20 minutes at a time while the DM says "waiting for initialization."
If, for some reason, you end up with a white Lcd with small icons and the number 507, simply connect to the PC again and run Loader.exe again and it should load the OS to the device.
Download here:
https://www.blackberry.com/Downloads...uaPgD5mHdfx15g7qcL2AaQ**
Read More..

Tuesday, September 2, 2014

CWM Based Recovery 6 0 4 6 Touch Recovery for Xperia Z2 How To Guide

CWM-Based Recovery 6.0.4.6 Touch Recovery for Xperia Z2 How To Guide
info:This Recovery is built from CWM 6.0.4.6 sources!
I dont have this device with me and but would love to have one!...
all the testing was done remotely on users devices... thanks to @yeeson for testing on his Z2 !!!
[ PROOF ]CWM-Based
[ credits / special thanks ]
  • Koush - for the brilliant work & coding on CWM recovery
  • CyanogenMod and FreeXperia Team (especially jerpelea) for too many things *
  • special thanks to @yeeson for helping out with testing and risking his devices for the sake of development!!! and NO, his phone was NOT damaged during testing
  • ME for creating this for u guys!

[ Requirements ]

  • Bootloader unlocked
  • working fastboot
  • STOCK ROM FW:
    • 4.4.2
      • 17.1.A.2.36 - v01
    or ROMS BASED ON THAT FIRMWARE

[ features ]

  1. standard CWM recovery 6.0.4.6 - TOUCH RECOVERY!
  2. kernel is insecure (ro.secure=0)
  3. adb debugging is enabled by default in OS
  4. TIP: if u are experiencing very slow backup in CWM do this

[ WARNING ]
for flashing this kernel you WILL NEED TO UNLOCK BOOTLOADER! Check this thread for more info (same steps as Xperia Z1 are used for Xperia Z2)


UNLOCKING BOOTLOADER WITHOUT TA BACKUP WILL LEAD TO IRREVERSIBLE LOSS OF DRM KEYS!!!

AND YES CAMERA STILL WORKS AFTER UNLOCKING BOOTLOADER!!!
[ known issues ]

  1. adb is not working in recovery (can be fixed later)

[ how to flash this kernel ] (via fastboot)

  1. download the kernel image
  2. save the boot.img to the folder containing fastboot binary
  3. flash the boot.img using fastboot:
    Code:
    fastboot flash boot boot.img
    reboot from fastboot Code:
    fastboot reboot
  4. the device should now start booting
  5. enjoy!
[ how to enter recovery ]

when you see the Sony logo and the LED light turns pink/amber/orange keep tapping/pressing VOLUME UP key
[ how to Root ]

for instructions on how to root please check this post
[ sources ]
https://github.com/DooMLoRD/android_device_sony_honami

for now recovery is same is same as honami

[ donations ]

Please do consider donating as I plan to get this device!

if u feel that this work has helped u OR u think that the work i put into making this is worthy of donations, then click on the following link for buying me some coffee/beer/etc

PAYPAL DONATION LINK

OR
you can buy one of my awesome apps from Play Store!

[ download links ]
PLEASE DO NOT MIRROR, REDISTRIBUTE, REPACK MY FILES
NEW:

Advance Stock Kernel with Recovery v01 (FW:17.1.A.2.36}
MD5HASH: 6e0c418d299780bd0ac74e69ff46a199
    Read More..

    Monday, September 1, 2014

    Tablet T733 MAINBORD v2 0 Update Done To 4 2 1 With Orginal Rom

    Tablet -T733 MAINBORD-v2.0 Update Done To 4.2.1 With Orginal Rom
    PCB ID -T733 Mainboard v2.0 , 2013/07/01

    T733 MAINBORD-v2.0 : Rom Link1

    Flashing Done


    PCB IMAGE
    Read More..

    Friday, August 29, 2014

    How To Root Your Galaxy Note 8 0 GT N5110 Android 4 2 2 Firmware Running on Guide

    Samsung Galaxy Note 8.0 GT-N5110 (WiFi) recently get updated to the N5110XXCMK1 4.2.2 Jelly Bean Firmware. If you yet to update the firmware, then update the same by following the above link. Hope you updated this latest firmware on your device and now you can root the same using our simple tutorial below. The below guide will help you to root XXCMK1 4.2.2 Jelly Bean Firmware running on Galaxy Note 8.0 GT-N5110. Continue reading the tutorial for complete guide.
    After updating official firmware, your device no longer belongs to rooted device. So, after official firmware update, many of us prefer to root our device to enjoy some additional features that unrooted android device doesnt offer. With a rooted android device, you can install apps that ask root permission, flash various custom ROMs, install MODs and tweak various features. Root removes default bloatware apps that free-up lots of memory space and extend the battery life. However, once rooted, manufacturer warranty will be void. But you can regain the warranty by following proper unroot process. To know more about benefits of rooting android device, read- Complete Note on What is Rooting and Benefits of Rooting Android Tablet.

    So, want to root Galaxy Note 8.0 GT-N5110 Running N5110XXCMK1 4.2.2 Jelly Bean Firmware? Continue reading this page to get all the necessary steps to successfully root your device. The root file (CF-Auto-Root) we used in this tutorial is safe and have nearly 100% success rate. Well use Odin software to flash the root file.

    The tutorial is made with simple step by step guide, so that even an android newbie user can follow and successfully root his/her device. However, in this process you may loss your personal data and settings. So, we recommend you to follow all the backup instructions before proceed to rooting guide.

    Warning!

    • This rooting tutorial is only applicable for Samsung Galaxy Note 8.0 GT-N5110 model (konawifi). So, dont try this in any other android device. Check your device model number from- Settings-About Tablet
    • Rooting voids your Tablets manufacturer warranty. However, you can get back the warranty anytime by following proper unroot process or by flashing official firmware.
    • This guide is for educational purpose and you should try this at your own risk. We are not responsible if your device experience a soft brick after following this tutorial.

    Pre-Requisites:

    • Check battery percentage, charge your device to a decent level of at least 60% battery power. Your device should not turn off during installation.
    • Turn on USB Debugging mode, go to Settings-Developer Options-USB Debugging
    • Backup important data and settings to external storage- follow this guide
    • Install USB driver for your device on your computer- Download Samsung USB Driver
    All the above pre-requisites are very important and must be followed before proceed to installation guide. Hope you get all the above points and done as mentioned. Now, you are ready to move to the final step of this tutorial where we have arranged a step by step details guide to root Galaxy Note 8.0 GT-N5110 running  N5110XXCMK1 4.2.2 Jelly Bean firmware.

    Steps to Root Galaxy Note 8.0 GT-N5110 Running N5110XXCMK1 4.2.2 Jelly Bean through Odin:

    1. Download CF-Auto-Root for Galaxy Note 8.0 N5110 and extract the Zip file: CF-Auto-Root-konawifi-konawifixx-gtn5110.zip
    2. Download Odin 3.09 and extract the Zip file: Odin3_V3.09.Zip
    3. Now, Switch off your Tablet and boot Galaxy Note 8.0 N5110 into Download Mode by pressing and holding the Volume Down+Power buttons together (long press until the boot screen appear), now press Volume Up key to proceed to Download Mode.
    4. Run the Odin3 v3.09.exe file as an administrator (Right click on the .exe file and click on Run as administrator)
    5. Now connect your Galaxy Note 8.0 N5110 to your computer via USB cable
    6. In Odin3 screen, you should see a COM Port number like “0:[COM7]” at ID:COM section and “Added!” text at the message box. This means your device has been detected by Odin3.
    7. Make sure that, only the “Auto Reboot” and “F. Reset Time” options are checked.
    8. Now, click on the PDA button and select the CF-Auto-Root-konawifi-konawifixx-gtn5110.tar.md5 file.
    9. Finally, click on the Start button to begin the rooting process, wait few moments.
    10. Once completed, you would see “PASS!” message in ID:COM port having green background
    11. Your Tablet should automatically reboot after completion
    12. You can now disconnect your Tablet from computer
    13. Finish
    Congrats! You have completed the tutorial to root Galaxy Note 8.0 N5110 running N5110XXCMK1 4.2.2 Jelly Bean Firmware. Hope you successfully done the rooting process. If you followed everything as mentioned in the above tutorial, then your Galaxy Note 8.0 N5110 should now rooted and you have complete control over your device. Now, install apps that ask root permission or flash various custom ROMs. To verify your device is rooted or not, you can download and run the Root Checker App from Google Play Store. If you have any doubt or query about the tutorial, feel free to contact with us using the comment form below, and share your rooting experience with us.
    Read More..

    Thursday, August 28, 2014

    How To Diassemble iPhone 4

    Step By Step Tutorial 4 iPhone Disassemble.

    Step 1.

    Pick your iPhone 4 ..
    Step 2
    Open on the 2 screw on  bottom of the your iPhone 4.

    Step 3.
    Remove back side of the iPhone 4.

    How To Remove Battery? Click Here For Tutorial

    Step 4.

        Use screw driver for removing screws.
       Remove top side screws.
    Remove left side screw .


    Step5.
      Use plastic stick for removing the jack and strips.Do not use screw driver it may be damage jack or strip.

    Step 6.
     Remove camera strip and remove camera. 

    Step7.
    Remove all jack connect to upper board an remove it.
    Remove the board
    Board Pictures
    Step 8.
     Remove All other connector from the top board

    Final Step.


    Read More..

    Monday, August 25, 2014

    Samsung Galaxy Ace 3 Latin S7270L Android 4 2 2 UBUANB1 Jelly Bean Official Firmware How to Update Guide


    Samsung has recently released a new Android 4.2.2 Jelly Bean update for the Latin version of Galaxy Ace 3 with model number GT-S7270L. The new official firmware is currently available as an Over-The-Air (OTA) update as well as through Samsung KIES.
    Firmware details
    PDA: S7270LUBUANB1
    CSC: S7270OXEANA3
    MODEM: S7270XXUANA2
    Version: Android 4.2.2
    Build date: Feb 26, 2014
    Regions: Panama
    Samsung Galaxy Ace 3 (Latin) S7270L users who missed the OTA update notification or unable to access the update over Samsung KIES, may follow our step-by-step guide to install the update manually.
    Pre-requisites
    1. Install USB Drivers for Samsung Galaxy Ace 3 on the computer.
    2. Enable USB Debugging Mode on the phone by navigating to Settings >> Developer Options.
    3. Make a backup of all your important data before following the guide.
    4. Ensure the battery of the phone is charged more than 80 percent.
    5. The Android 4.2.2 UBUANB1 Jelly Bean firmware is compatible only with the Latin version of Galaxy Ace 3 (GT-S7270L). Applying this to any incorrect variant might brick the device. Verify the model number of the Galaxy Ace 3 by navigating to Settings >> About Phone.

    Files Required
    1. Android 4.2.2 UBUANB1 Jelly Bean Firmware (Mirror Link) for Galaxy Ace 3 (Latin) S7270L
    2. Odin 3.07
    Steps to Update Galaxy Ace 3 (Latin) S7270L with Android 4.2.2 UBUANB1 Jelly Bean Firmware
    Step 1: Extract Firmware zip file using WinRAR/7-Zip/WinZip or any other extracting tool, you will get a .tar.md5 file and some other files (optional).
    Step 2: Extract Odin zip file and you will get Odin3 v3.07.exe along with few other files.
    Step 3: Switch off the Galaxy Ace 3.
    Step 4: Boot the device into Download Mode by pressing and holding Volume Down, Home and Power buttons together until a construction Android robot icon with a warning triangle appears on screen. Now press the Volume Up button to enter Download Mode.
    Step 5: Run Odin on the computer as an Administrator.
    Step 6: Connect the Galaxy Ace 3 to the computer using USB cable while it is in the Download Mode. Wait until Odin detects the device. When the device is connected successfully, the ID: COM box will turn to light blue with the COM port number. Additionally, the successful connected will be indicated by a message saying Added.

    Step 7: Select the following files in Odin from extracted S7270LUBUANB1 firmware folder:
    • Click the PDA button and select the .tar.md5 file.
    • Click the Phone button and select file with MODEM in its name. Ignore if there is no such file.
    • Click the CSC button and select file with CSC in its name. Ignore if there is no such file.
    • Click the PIT button and select the .pit file. Ignore if there is no such file.
    Step 8: In Odin, enable Auto Reboot and F. Reset Time checkboxes. Also, ensure the Re-Partition checkbox is chosen only if a .pit file was chosen in the previous step.
    Step 9: Verify everything suggested in Step 7 and Step 8 is done correctly. Then hit the Start button to begin the installation process.
    Step 10: Once the installation process is completed, your phone will restart and soon you will see a PASS message with green background in the left-most box at the very top of the Odin. You can now unplug the USB cable to disconnect it from the computer.

    Samsung Galaxy Ace 3 (Latin) S7270L should be now updated with Android 4.2.2 UBUANB1 Jelly Bean official firmware. Head over to Settings >> About Phone to verify the software version running on the device.

    Note: If Galaxy Ace 3 (Latin) S7270L stuck at booting animation after Step 10 then go to recovery mode (press and hold the Volume Up, Home and Power buttons together) and perform Wipe data/Factory Reset and Wipe Cache Partition task before selecting reboot system now function. In recovery mode use Volume keys to navigate between options and Power key to select the option. Please note, performing wiping task will erase your device internal memory data and not external SD card data.
    Read More..

    Sunday, August 24, 2014

    How to Update Samsung Galaxy Mega 6 3 I9200 with Android 4 4 2 XXUDNE4 KitKat Official Firmware Using Odin Guide


    Samsung Galaxy Mega 6.3 with model number GT-I9200 has started receiving Android 4.4.2 KitKat update with firmware build number I9200XXUDNE4. The new official firmware is currently available as an Over-The-Air (OTA) update as well as through Samsung KIES.
    Firmware details
    PDA: I9200XXUDNE4
    CSC: I9200SERDNE4
    MODEM: I9200XXUDNE4
    Version: Android 4.4.2
    Build date: May 21, 2014
    Regions: Russia
    Samsung Galaxy Mega 6.3 I9200 users who missed the OTA update notification or unable to access the update over Samsung KIES, can now download and install the same manually using our step-by-step guide.
    Pre-requisites
    1. Install USB Drivers for Samsung Galaxy Mega 6.3 on the computer.
    2. Enable USB Debugging Mode on the phone by navigating to Settings >> Developer Options.
    3. Make a backup of all your important data before following the guide.
    4. Ensure the battery of the phone is charged more than 80 percent.
    5. The Android 4.4.2 XXUDNE4 KitKat firmware is compatible only with the 3G version of Samsung Galaxy Mega 6.3 (GT-I9200). Applying this to any incorrect variant might brick the device. Verify the model number of the Galaxy Mega 6.3 by navigating to Settings >> About Phone.
    Files Required
    1. Android 4.4.2 XXUDNE4 KitKat Firmware (Mirror Link) for Galaxy Mega 6.3 I9200
    2. Odin 3.07
    Steps to Update Galaxy Mega 6.3 I9200 with Android 4.4.2 XXUDNE4 KitKat Firmware
    Step 1: Extract Firmware zip file using WinRAR/7-Zip/WinZip or any other extracting tool, you will get a .tar.md5 file and some other files (optional).
    Step 2: Extract Odin zip file and you will get Odin3 v3.07.exe along with few other files.
    Step 3: Switch off the Galaxy Mega 6.3.
    Step 4: Boot the device into Download Mode by pressing and holding Volume Down, Home and Power buttons together until a construction Android robot icon with a warning triangle appears on screen. Now press the Volume Up button to enter Download Mode.
    Step 5: Run Odin on the computer as an Administrator.
    Step 6: Connect the Galaxy Mega 6.3 to the computer using USB cable while it is in the Download Mode. Wait until Odin detects the device. When the device is connected successfully, the ID: COM box will turn to light blue with the COM port number. Additionally, the successful connected will be indicated by a message saying Added.
    Step 7: Select the following files in Odin from extracted I9200XXUDNE4 firmware folder:
    • Click the PDA button and select the .tar.md5 file.
    • Click the Phone button and select file with MODEM in its name. Ignore if there is no such file.
    • Click the CSC button and select file with CSC in its name. Ignore if there is no such file.
    • Click the PIT button and select the .pit file. Ignore if there is no such file.
    Step 8: In Odin, enable Auto Reboot and F. Reset Time checkboxes. Also, ensure the Re-Partition checkbox is chosen only if a .pit file was chosen in the previous step.
    Step 9: Verify everything suggested in Step 7 and Step 8 is done correctly. Then hit the Start button to begin the installation process.
    Step 10: Once the installation process completes, your phone will restart and soon you will see a PASS message with green background in the left-most box at the very top of the Odin. You can now unplug the USB cable to disconnect your device from the computer.
    Samsung Galaxy Mega 6.3 I9200 should be now updated with Android 4.4.2 XXUDNE4 KitKat official firmware. Head over to Settings >> About Phone to verify the software version running on the device.
    Note: If Galaxy Mega 6.3 I9200 stuck at booting animation after Step 10 then go to recovery mode (press and hold the Volume Up, Home and Power buttons together) and perform Wipe data/Factory Reset and Wipe Cache Partition task before selecting reboot system now function. In recovery mode use Volume keys to navigate between options and Power key to select the option. Please note, performing wiping task will erase your device internal memory data and not external SD card data.

    Read also: How to Root Galaxy Mega 6.3 I9200/I9205 on Android 4.2.2 Jelly Bean Firmware
    Read More..

    How to Install Android 4 4 2 Firmware for Galaxy Note Pro 12 2 SM0P905 Guide

    P905XXUANAF Android 4.4.2 KitKat Firmware Last Updated on 5-Feb-2014. Download and install the XXUANAF 4.4.2 KitKat Stock Firmware on Samsung Galaxy Note Pro 12.2 SM-P905 tablet. Samsung recently started rolling out an OTA update about the firmware. The firmware is also available for download for manual update. The Galaxy Note Pro 12.2 recently announced by Samsung with Android 4.4 KitKat and this is the first official Android 4.4.2 KitKat firmware update for the device. If you own the device and not yet updated this latest firmware, then update the same using our simple tutorial below. The below guide will help you to download and install the P905XXUANAF 4.4.2 KitKat firmware manually through Odin.
    Samsung
    As the Galaxy Note Pro 12.2 P905 released with the Android 4.4 KitKat, you can expect few bug fixes and performance enhancement with this latest update. It is always recommended to update your device to the latest available firmware to keep updated with the latest security changes.

    So, want to update your Galaxy Note Pro 12.2 P905 to the latest XXUANAF Android 4.4.2 KitKat firmware? To install in official way, you can either go for  OTA (over the air) from Settings-About Tablet-Software Update or download and install the firmware through the Samsung Kies utility. However, if prefer a manual way to update official firmware, then follow this article to find step by step manual guide to update the latest Android 4.4.2 XXUANAF firmware on your Galaxy Note Pro 12.2 P905 through Odin.

    Important Note:

    "The firmware is released only for the Samsung Galaxy Note Pro 12.2 SM-P905 model, so don’t try this in any other android device. Check your device model number from Settings-About Tablet. Also the tutorial is based on Windows PC. Follow all the pre-requisites, procedures and steps carefully to avoid breaking your Tablet".

    Android 4.4.2 KitKat P905XXUANAF Official Firmware Download List

    Samsung rolled out the firmware for the following countries. The firmware which are unbranded or not locked to any carrier, no matter of which country or region, can be flashed on any Galaxy Note Pro 12.2 SM-P905 model.

    [Firmware for rest of the countries will be update here when available]

    Pre-Requisites:

    • Check battery percentage, your device should have at least 90% battery power
    • Turn on USB Debugging mode, go to Settings-Developer Options-USB Debugging
    • Backup important data and settings to external storage- follow this guide
    • Install USB driver for your device on your computer- Download Samsung USB Driver

    Points to be noted:

    • If you are using any Custom ROM such as- CyanogenMod, Paranoid Android, AOKP, SLIM ROMs etc, then it’ll replaced by this official Stock ROM
    • Custom Recovery (CWM or TWRP Recovery) will be replaced by Stock Recovery
    • After flashing official firmware, your device will no longer belongs to rooted device. However you can root your device any time after flashing the firmware.
    All the above pre-requisites are very important and must follow before proceed to installation guide. Hope you get all the above points. Now, go through the below tutorial to install Android 4.4.2 P905XXUANAF official firmware on Galaxy Note Pro 12.2 P905.

    How to Install Android 4.4.2 KitKat Official Firmware on Galaxy Note Pro 12.2 P905 through Odin:

    1. Download Android 4.4.2 XXUANAF Firmware for Galaxy Note Pro 12.2 P905 from the above list
    2. Download Odin 3.07
    3. Switch off your Tablet and boot Galaxy Note Pro 12.2 P905 into Download Mode by pressing and holding the Volume Down and Power keys together until you get the warning message, now press Volume Up key to proceed to Download Mode.
    4. Extract the downloaded Odin3.07 zip file and run the Odin3 v3.07.exe file as an administrator (Right click on the .exe file and click on Run as administrator)
    5. Now connect your Galaxy Note Pro 12.2 P905 to your computer via USB cable
    6. In Odin3 screen, you should see a COM Port number like “0:[COM7]” at ID:COM section and “Added!” text at the message box. This means your device has been detected by Odin3.
    7. Make sure that, only the “Auto Reboot” and “F. Reset Time” options are checked.
    8. Now, extract the downloaded firmware zip file, you’ll find a firmware file with extension .tar.md5
    9. In Odin screen, click on PDA button (if you are using the latest Odin Version, then click on AP button instead of PDA) and select the firmware file with .tar.md5 extension (The firmware file look something like: P905XXDLJ5_P905ODDDLI7_INU.tar.md5)
    10. Now, click on the Start button to begin the installation process, wait few moments.
    11. Once completed, you would see “PASS!” message in ID:COM port having green background
    12. Your Tablet should automatically reboot after completion
    13. You can now disconnect your Tablet from computer
    14. Finish
    That’s all to update Android 4.4.2 KitKat official firmware on Galaxy Note Pro 12.2 SM-P905. Hope you get all the above points and successfully completed the tutorial. If you followed everything as mentioned in the above tutorial, then your Galaxy Note Pro 12.2 P905 should now running on the latest Android 4.4.2 KitKat build version XXUANAF. You can verify the firmware update details from Settings-About Tablet. If you have any query or problem with download link, feel free to contact with us and don’t forget to share your experience in the comment below. 
    Read More..

    Saturday, August 23, 2014

    How to Root Samsung Galaxy Note 3 Neo 3G SM N750 on Using Android 4 3 Jelly Bean Firmware

    How
    Samsung Galaxy Note 3 Neo (3G) SM-N750 users who wish to root their devices, may follow the tutorial below.

    This tutorial uses CF-Auto-Root file released by Senior Recognized XDA-Developers, Chainfire. Head over to the CF-Auto-Root main thread to learn more about the root method.

    Disclaimer: Rooting voids the warranty of your device. We and the developer of this rooting procedures shall not be held responsible if any undesirable outcomes may happen to your device. use of this root guide is solely at your own risk!
    Pre-requisites
    1. Install USB Driver for Samsung Galaxy Note 3 Neo on the computer.
    2. Enable USB Debugging Mode on the phone by navigating to Settings >> Developer Options.
    3. Make a backup of all your important data before following the guide.
    4. Ensure the battery of the phone is charged more than 80 percent.
    5. The CF-Auto-Root file works only on the 3G version of Galaxy Note 3 Neo (SM-N750). Applying this to any incorrect variant might brick the device. Verify the model number of the Galaxy Note 3 Neo by navigating to Settings >> About Phone.

    Files Required
    1. CF-Auto-Root (CF-Auto-Root-hl3g-hl3gub-smn750.zip)
    2. Odin 3.09

    Steps to Root Galaxy Note 3 Neo (3G) SM-N750 Running on Android 4.3 Jelly Bean Firmware
    Step 1: Extract CF-Auto-Root and Odin 3.09 files using WinRAR/7-Zip/WinZip or any other extracting tool.
    Step 2: Switch off the Galaxy Note 3 Neo. Then boot the device into Download Mode by pressing and holding Volume Down, Home and Power buttons together until a construction Android robot icon with a warning triangle appears on screen. Now press the Volume Up button to enter Download Mode.
    Step 3: Launch Odin on the computer as an Administrator.
    Step 4: Connect the Galaxy Note 3 Neo to the computer using USB cable while it is in the Download Mode. Wait until Odin detects the device. When the device is connected successfully, the ID: COM box will turn to light blue with the COM port number. Additionally, the successful connected will be indicated by a message saying Added.
    Step 5: In Odin, click the AP button and select the CF-Auto-Root-hl3g-hl3gub-smn750.tar.md5 file.
    Step 6: Verify that Auto Reboot and F. Reset Time checkboxes are selected in Odin. Also, ensure the Re-Partition option is NOT selected.
    Step 7: Double-check and click Start button in Odin. The installation process will now begin.
    Step 8: Once the installation process completes, your phone will restart and soon you will see a PASS message with green background in the left-most box at the very top of the Odin. You can now unplug the USB cable to disconnect your device from the computer.

    Samsung Galaxy Note 3 Neo (3G) SM-N750 running on Android 4.3 Jelly Bean is now rooted successfully. You can now install any app that requires root permission. Verify the root status of the device by downloading Root Checker app from Google Play Store.

    Note: Many Samsung devices store a flash counter that keeps track of how many times you have flashed custom firmwares to your device. Triangle Away can be used to reset the flash counter to zero.

    How to Fix "Unfortunately, SuperSU has stopped"?
    Step 1: Download and install the latest APK of SuperSU on your device.
    Step 2: Open SuperSU app (update the binary if prompted) and allow it to disable KNOX.
    Step 3: Reboot your device.
    Read More..

    Friday, August 22, 2014

    Rooting Galaxy S4 I9500 on Official JB 4 2 2 XXUBMGA OS

    Having a rooted handset means that you are an advanced Android user who is always trying to use its smartphone on full power by enjoying all the features, apps and capabilities that are available on the market. So, gaining root access is extremely important especially if you have a high end phone, like the Samsung Galaxy S4 I9500. That’s why by using this tutorial you will be able to learn how easily root the Galaxy S4 that runs on stock / official Android 4.2.2 Jelly Bean XXUBMGA firmware.
    This process will be easy to complete as Odin will be used for applying the root package on your SGS4. Actually you will flash a rooted JB 4.2.2 XXUBMGA OS on your device, which means that the operation will be similar with an update one. Do note that the root task in though unofficial, so the warranty of your S4 will get void. Anyway, this is not permanent, meaning that you can anytime choose to revoke the root access for reclaiming and regaining the warranty back. For revoking root access you will have to update your Galaxy S4 I9500 with an official release of the Android system, or you will have to downgrade to stock Jelly Bean 4.2.2 XXUBMGA software.
    The advantages of root are numerous, but I do have to mention the following ones: on a rooted system you can access the OS and the internal system of the device for performing different operations such as removing in built programs or customize the performances; also on rooted handsets you can install a custom recovery image which can then be used for flashing custom ROMs and custom kernels; then, of course you will be able to overckock your Android device, or undervolt the same in case you need to upgrade the battery life; finally and as you may know, rooting is the first step to do when trying to speed up and upgrade the battery life of your smartphone / tablet.
    Anyhow, before rooting your galaxy S4 just remember that the warranty will get void. So, be careful and try not to mess things up. Read the guidelines from below and everything will be fine.
    Backup the text messages, call logs, internet settings, market apps and everything that’s important for you as the Galaxy S4 system might get wiped out or your data might get corrupted while applying the steps from below. If you want to avoid the unpleasant situation in which you lose all of your personal saves, info and accounts, complete a full backup first. Then, complete the rest of the pre requisites from below:
    • Make sure that a Windows running computer can be used as you will have to download Odin and the root package suitable with your S4 on the same.
    • On the computer there shouldn’t be installed antivirus, antimalware or any other security programs; if different before starting the root operation, deactivate the security protection.
    • Since you will have to connect your phone with the computer, the USB cable should be near you; also due to same considerations, on your smartphone go to “Settings -> Applications -> Development” and enable the USB debugging option.
    • Then, the process will take a while which means that your device might get turned off due to lack of battery. For avoiding that (your handset might get bricked if not) you should charge your SGS4 if there is less than 60% power left.
    • Remember that this tutorial is compatible only with the Samsung Galaxy S4 I9500 that runs on stock / official Android 4.2.2 Jelly Bean XXUBMGA firmware. Trying to root a different device or a different Android software with the steps from below will most likely brick your Android based smartphone, or tablet.

    How to Root Galaxy S4 I9500 on Official JB 4.2.2 XXUBMGA OS

    1. Download the root package by using the link from here.
    2. Unzip the package on desktop.
    3. Then, download and unzip Odin.
    4. Also, launch / run the program.
    5. Download Samsung KIES and install the S4 drivers if on your computer the drivers are not already installed.
    6. Turn off your phone as the fun begins.
    7. Wait a few seconds and then press on Power, volume down and home buttons – the download mode will be displayed.
    8. Connect your phone with the computer – use the USB cable.
    9. On Odin now you should notice the following: ID:COM section is either yellow or blue; the “added” message is there.
    10. If not, try to reinstall the drivers and then repeat the steps from above.
    11. For starting the root operation, first you will have to click on the “PDA” option.
    12. Then, you will have to select the root file.
    13. Finally, select “start”, but don’t make any other changes on Odin.
    14. Wait while your smartphone is being unlocked.
    15. In the end, Odin will display the “pass” message while the ID:COM section will be green.
    16. You can unplug the USB cable and reboot your device.
    Perfect, you are done; so congratulations you have successfully rooted the Jelly Bean 4.2.2 XXUBMGA firmware that runs on your Samsung Galaxy S4 I9500. If you have encountered issues while trying to apply the up-explained steps, use this guide and learn how to resolve the possible problems. Then, return here and share your experience with our team (use the comments area from the end of the present tutorial) or with others that might want to use this step by step guide.
    Read More..

    Tuesday, August 19, 2014

    How to Root Samsung Galaxy S3 I9300 Android 4 1 2 With Guide

    Just a month back Samsung released a minor 40 MB update for Samsung Galaxy S3 I9300 running Android 4.1.2 (  Feels bad stuck on Android 4.1.2 for ages ) , Officially there were no change logs provided for the update but we can assume that it was probably an minor performance  upgrade . As it is with installing an Official software update , My Samsung galaxy S3 was unrooted in this process .
    Once again i had to source for the latest CF auto root and Odin to root my Samsung galaxy S3 . In fact i even tried Framaroot which had previously worked on my Samsung galaxy S3 , but after the update Framaroot was unable to root my Galaxy S3 . So the only option i had left was to root my Samsung Galaxy S3 through Odin .
    If you had installed the same update , then follow the instructions below to manually root your Samsung Galaxy S3 I9300 using Odin and CF-Auto-Root by Chainfire .
    NOTE: This guide is only for users having the international version of the Samsung Galaxy S3 I9300 .

    Instructions to Root Samsung Galaxy S3 using Odin

    • Step 1: Download CF-Auto-Root and Odin from the links below :
    Download CF-Autoroot
    Download Odin ( Use Odin 3.07 from this package )
    • Step 2: Install Odin on your PC and run it as Administrator . Now lets prepare your phone for rooting .
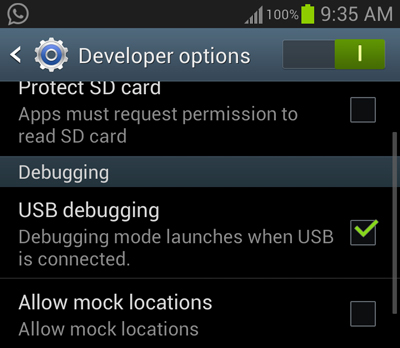
    • Step 3: Enable USB debugging in your phone . To enable USB debugging navigate to Settings > System > Developer options > Debugging > USB debugging .
    turn
    • Step 4: Turn off your phone and turn on your phone into download mode by pressing the Volume down + Home + Power keys together . When your phone displays a warning , press the Volume up button to continue into Download mode .
    • Step 5: Connect your Samsung galaxy S3 to your PC using a Data cable .
    • Step 6: You should now see the Odin’s ID:COM status change into blue and an Added message will be displayed .
    • Step 7: Check Auto reboot and F.Reset options in Odin .
    Samsung
    • Step 8: Click on the PDA button and select the CF-Autoroot file .
    • Step 9: Double check all the instructions above and Click Start to Root your Samsung Galaxy S3 . Wait for a few minutes and you will see a Success message as below :
    rooting
    If you want to confirm whether your Samsung Galaxy S3 is rooted not then Install the Root checker app from the Google play store .Here is a screenshot of root checker app on my Samsung Galaxy S3 .
    samsung

    Incoming search terms:

    • how to root samsung galaxy s3
    • how to root galaxy s3
    • root galaxy s3
    • how to root s3
    • root samsung galaxy s3
    Read More..