Showing posts with label to. Show all posts

Monday, November 24, 2014

Upgrade Nokia 3110c to Nokia 3500c

Nokia is a brand of mobile phones is very popular in the world. In the market, mobile phones Nokia has been circulating in various types. One of them is Nokia 3110c.
Damage that often occurs in Nokia 3110c is blinking and restart (at least thats what i often find). Maybe for people who have had experience in the world of mobile phone repair, damage symptoms of restart and blinking very recognizable, ie mobile phone screen flashes white.
To overcome this damage, we can do reflash. Well, at the time, we are not going to talk about how to repair damage to the Nokia 3110c mobile phone, but that we will discuss here is how to upgrade firmware from Nokia 3110c to the Nokia 3500c.
Ok, to do so, lets follow the following steps :
  1. For security, back up first RPL and PM before upgrade.
  2. Flash your Nokia 3110c using Nokia 3500c firmware
  3. Write Pm
  4. Unlock
  5. Reset full factory
After completion, the themes, screensavers, color schemes and ringtone will be the same as Nokia 3500c. One more thing thats most important, the quality of the Nokia 3110cs camera will be equal in quality to the camera Nokia 3500c which has a resolution of 2.0 megapixels.
The following are log information from the upload process is never done.
Read More..

Thursday, November 20, 2014

How to update Samsung Galaxy S3 to Android 4 1 2 Jelly Bean

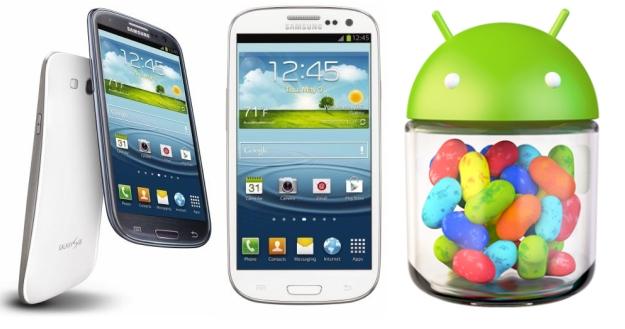
Good news to all Samsung galaxy s3 users, the international version of Samsung galaxy s3, which have been the world’s best-selling smartphone, now already received the much anticipated Android 4.1.2 Jelly Bean update over-the-air. Many major national carriers has released Android Jelly for the device, and other Carrier-branded versions like Verizon Wireless should be able to receive the update soon as Samsung is railroading updates for its devices. But some only offer an update that must completed via Samsung Kies software and is not offered over the air.

The new Android 4.12 Jelly Bean Update brings a list of amazing features now only located in Samsung Galaxy Note 2 to Samsung S3, like highly-anticipated Multi View multitasking system, Smart Rotation function , camera filters, low-light photo mode, an easy mode and so on. For some people you may find it is difficult for you to update or wait any longer. So here I will show you How to update Android 4.1 Jelly Bean on Galaxy S3 immediately.Pre-requisites 
  1. Be sure to backup your data before starting the update
  2. Make sure your battery is at least 50% charged.
  3. Make sure that you have install Kies software on the computer, and if you dont have Kies, you can download it from Samsung website.
For international version: If the software update didn’t popped up in the notifications area, you can update your Samsung Galaxy S3 to Android 4.1.2 Jelly Bean by connecting the terminal to Kies or OTA, by manually checking for the update for the latter method. Just go to Settings > About Device > Software Update > Check for Updates and see whether the new firmware has rolled out for your device.

Heres How to Update Your AT&T Samsung Galaxy S III to Android 4.1 Jelly Bean
  • Connect your Samsung Galaxy S III to your PC or laptop using the supplied USB cable. Ensure that Kies recognizes your device by looking in the upper section of the left-bar navigation menu. Your device should be listed.
  • Kies Device Once Kies recognizes the device you will see a Lcd stating new firmware is available.
  • Click Update.
  • Read through the Caution pop-up and, if you agree, click to populate the I have read all of the above information checkbox.
  • Read the Allow saving of information statement and select Allow saving or Proceed without saving and then click Start upgrade.
  • After a few minutes, Kies will then begin transferring the firmware binary to the device.
  • Then after a while the upgrade is completed.
  • If completed a data backup from your device to Kies prior to performing the update, you can now restore that data back to the device under the new Jelly Bean operating system 
Read More..

How to Fix Your Nokia Lumia unbootable after a hard reset or updating

Many users need to apply a hard reset our terminals, sometimes malfunction and others simply because we want to erase all personal content and leave no trace. But they have detected some problems with this process and some terminals do not get past the first step showing gears constantly turning. Then I discussed a method to try to recover the terminal.
Many of you know the procedure for performing a hard reset Nokia Lumia any terminal and I discussed a long article above. Thus, before an important event or simply because we want to delete the content problem, we apply the procedure and we can retrieve a phone. But, like everything related to the software, it is not without risks .
So many readers have reported that during the terminal remains unused in the initial state when the recovery is being implemented leaving only a gear on the screen that does not stop spinning for hours.This problem not only what we have when we performed a hard reset, but before a software update via OTA.
The good news is that, before taking the terminal to what Nokia will try to recover, you can now attempt a first terminal recovery at home, and try to fix it yourself. I count the steps.

Step 1: Install Nokia Software Updater for Retail

The first step is to download the software from Nokia that lets you install the firmware on our phone.This software was already discussed when we explain how to upgrade to Lumia Amber has been recently updated. As if you had not installed the hype download and if you had already, just open it and tell you that there is an update.
Updated : If you have problems installing this program, you can try the new software launched by Nokia and I discussed in another article .

Step 2: Connect the phone to your computer

The next step is simply to connect the phone to the computer with the USB cable. Of course, the terminal will light if it was not, but will not be recognized by any application (you may receive a message that a USB device is not recognized.) We start the Nokia Software Update for Retail application and see the image indicates that we connect the phone.
Underneath the drawing, we see a button that tells us: "my device does not boot" . Its what we choose to enter will use in the next step wizard.

Step 3: software reset terminal

In this step, you click Continue, the program tries to find the phone, and then you apply a soft reset . To do this, we pressed the buttons on and volume down until we noticed a vibration. When the phone starts to boot you again, you should see that is recognized by the program.

Step 4: Installing the firmware

In this step, if necessary, download the firmware needed Nokia server, and then proceed with the installation. By installing a complete firmware, is how to perform a clean installation of the software on the terminal, so if there is no hardware problem should be solved and recover your phone. The process is the same as mentioned for upgrade to Lumia Amber .
We hope the tutorial will serve as a support and allows you to recover those terminals that are giving you headaches after the hard reset.
Read More..

Sunday, November 9, 2014

How to Copy Files between your Android Mobile and PC

1.install AirDroid Apps On Your Android Device
2. Download Airdroid Apps click here 
ad

Open the app and start using it to connect your mobile to PC for copying files wirelessly and doing even more between the two platforms.
Read More..

Master Reset Samsung Gravity 2 SGH T469 Hard Reset Samsung Gravity 2 SGH T469


reset to factory settings
    To perform a Master Reset on your Samsung Gravity 2 reset follow the steps below:
    1. From the standby screen on your Samsung Gravity 2, press the left soft key for Menu
    2. Select Settings, which this the fourth one on the list on your Samsung gravity 2 hard reset
    3. Then Select Reset Settings, which is the ninth item on the list on your Samsung Gravity 2 reset
    4. Then you Select Master Reset, which is the second item on the list
    5. Enter the password then press the left soft key for Confirm - the default password on your Samsung Gravity 2 is 0000
    6. Then all you have to do is Press the left soft key for Yes to confirm the Master Reset on your Samsung Gravity 2 master reset
Read More..

Friday, October 31, 2014

Hard Reset a Sony Ericsson X1 or X1a

To perform a master/hard reset on your Sony Ericsson X1 or X1a you will need to:
1. Turn off the phone
2. Hold both right and left buttons(soft keys)
3. press power button, while still holding the other two
The other way to do this is by holding the two soft keys and hit reset button, then on your keyborad press "R"
Read More..

Thursday, October 30, 2014

How to Nokia Master reset or Hard Reset a Nokia N95 8GB

To perform a master Reset hard reset on your Hard Reset Nokia N95  you will need to:
Dial *#7370# and then enter your master code, by default it is 12345

NB: Performing a Master Reset Hard Reset on any Cell phone will Factory reset Master clear your cell phone and erase the cell phone completely including contacts, pictures, videos etc.  The Nokia N95 Master Reset cannot be undone! The Nokia N95 Hard Reset cannot be undone! The Nokia N95 Factory Reset cannot be undone! The Nokia N95 Factory clear cannot be undone!
Read More..

How to Hard Reset HTC Desire

How to Hard Reset HTC Desire

  • press and hold back & home buttons
  • press for a second power button
  • now a white screen will appear and with 4 options
    very easy to follow them 
  • you would use volume buttons to make a choice
  • then power button to confirm a choice
Read More..

Wednesday, October 29, 2014

How to Rooting HTC Dream G1 T Mobile G1

Rooting HTC Dream/G1/T-Mobile G1

Downgrading from RC30/RC9 and up

Format your phones SD card to FAT32 mode:
  • Hook your phone up to your computer using a USB cable and then wait for the notification to show up in your title bar of your phone.
  • Click the notification, and then click "Mount".
  • A new removable disk should show up on your computer. Right click it and select Format, and select FAT32 as the file system type.
  1. Download and unzip the RC29 or RC7 image file. Copy the DREAIMG.nbh file to the SD card. (RC29 for US, RC7 is for UK)
  2. Turn the device power off.
  3. Hold Camera button, and press Power button to entry bootloader mode. You should see a gray/white screen with instructions to flash your phone with the update on your SD card. If you dont see that, make sure you followed the instructions properly.
  4. As per the on-screen instructions, press the Power button to start upgrade procedure. DO NOT DO ANYTHING TO INTERRUPT THIS PROCESS.
  5. After it is finished, restart your phone by pressing the trackball button ("action button") and then press Call, Menu and End simultaneously.
  6. At the end of this process, youll now be running a build old enough to have the exploit we need to get root. Continue on with the next section.

Rooting RC29 and Lower

On RC29 phones and lower, a huge exploit existed where anything you typed into your keyboard was also being run in a hidden console with root permissions.

  • Download recovery.img and copy it to your SD card (see the previous section on how to copy from your computer to your Phones SD card).
  • Download the Hard SPL and copy the zip file to the SD card.
  • All files must be on the root of your SD card.
  • Restart your phone. Wait for your phone to start up fully and show the home screen.
  • After your phone starts up, type "telnetd" and press enter. (Yes, it will start up a contact search, dont worry. Just type it.)
  • Download an Android "Telnet" application from the Market and connect to localhost.
  • If you connect successfully, you will have a root prompt "#".
  • Type the following into Telnet (these commands will give you root access easier in the future):
  1. mount -o rw,remount -t yaffs2 /dev/block/mtdblock3 /system
  2. cd sdcard
  3. flash_image recovery recovery.img
  4. cat recovery.img > /system/recovery.img
Now you have root!

Next steps

Whether you gained root using RC29 or the downgrade method, the next steps are highly recommended. You will want to apply "Hard SPL" to your phone. HardSPL is what will allow you to apply flash images from other regions (like UK on US phones, and vice versa), create full backups of your phone, install the latest build from the Android source, and usually resurrect your phone if it is "bricked". You have already downloaded the file to your SD card, so now you can apply it.
  1. Power off your phone.
  2. Start up in recovery mode by holding home and pressing power.
  3. You will now enter recovery mode. You should see an exclamation.
  4. If you do not see a menu on screen, press Alt-L to show the menu.
  5. Press Alt-S to apply the update from the SD card.
  6. After the update is complete, hold Home and press Back to restart.
Read More..

Wednesday, October 22, 2014

Samsung Galaxy Note 10 1 SHW M480S Running 4 1 2 Jelly Bean Firmware Simple Tutorial How to Root

If you are looking for an easy and working method to root your Samsung Galaxy Note 10.1 SHW-M480S (South Korea) Tablet, then youre on right place. Here youll find a simple step by step guide to root Galaxy Note 10.1 M480S running on Android 4.1.2 Jelly Bean official firmware. The device was released with Android 4..0.4 ICS and last updated to Android 4.1.2 Jelly Bean (Latest Firmware for Galaxy Note 10.1 M480S). If you own the device, then you can now root it using the below tutorial.

After having an Android Tablet or, after updating official firmware, many of us prefer to root our device to enjoy some additional features that unrooted android Tablet doesnt offer. With a rooted android Tablet, you can install apps that ask root permission, flash various custom ROMs, install MODs and tweak various features. Root removes default bloatware apps that free-up lots of memory space and extend the battery life. To know more about benefits of rooting android Tablet, read- Complete Note on What is Rooting and Benefits of Rooting Android Tablet.

So, want to root your Galaxy Note 10.1 SHW-M480S? Continue reading this page to get all the necessary steps to successfully root your device. The root file (CF-Auto-Root) we used in this tutorial is safe and have nearly 100% success rate. Well use Odin software to flash the root file.

The tutorial is made with simple step by step guide, so that even an android newbie user can follow and successfully root his/her device. However, in this process you may loss your personal data and settings. So, we recommend you to follow all the backup instructions before proceed to rooting guide.

Caution

  • This rooting tutorial is only applicable for Samsung Galaxy Note 10.1 SHW-M480S model (p4noterfskt). So, dont try this in any other android device. Check your device model number from- Settings-About Tablet
  • Rooting voids your Tablets manufacturer warranty. However, you can get back the warranty anytime by flashing official firmware.
  • This guide is for educational purpose and you should try this at your own risk. We are not responsible if your device experience a soft brick after following this tutorial.

Pre-Requisites:

  • Check battery percentage, charge your device to a decent level of at least 60% battery power. Your device should not turn off during installation.
  • Turn on USB Debugging mode, go to Settings-Developer Options-USB Debugging
  • Backup important data and settings to external storage- follow this guide
  • Install USB driver for your device on your computer- Download Samsung USB Driver
All the above pre-requisites are very important and must be followed before proceed to installation guide. Hope you get all the above points and done as mentioned. Now, you are ready to move to the final step of this tutorial where we have arranged a step by step details guide on how to root Galaxy Note 10.1 SHW-M480S running on official firmware.

How to Root Galaxy Note 10.1 SHW-M480S Running Android 4.1.2 Jelly Bean through Odin:

  1. Download CF-Auto-Root for Galaxy Note 10.1 M480S and extract the Zip fileCF-Auto-Root-p4noterfskt-p4noterfskt-shwm480s.zip
  2. Download Odin 3.07 and extract the Zip file: Odin 3.07.Zip
  3. Now, Switch off your Tablet and boot Galaxy Note 10.1 M480S into Download Mode by pressing and holding the Volume Down and Power buttons together (long press until the boot screen appear), now press Volume Up key to proceed to Download Mode.
  4. Run the Odin3 v3.07.exe file as an administrator (Right click on the .exe file and click on Run as administrator)
  5. Now connect your Galaxy Note 10.1 M480S to your computer via USB cable
  6. In Odin3 screen, you should see a COM Port number like “0:[COM7]” at ID:COM section and “Added!” text at the message box. This means your device has been detected by Odin3.
  7. Make sure that, only the “Auto Reboot” and “F. Reset Time” options are checked.
  8. Now, click on the PDA button and select the CF-Auto-Root-p4noterfskt-p4noterfskt-shwm480s.tar.md5 file.
  9. Finally, click on the Start button to begin the rooting process, wait few moments.
  10. Once completed, you would see “PASS!” message in ID:COM port having green background
  11. Your Tablet should automatically reboot after completion
  12. You can now disconnect your Tablet from computer
  13. Finish
Congrats! You have completed the tutorial to root Galaxy Note 10.1 M480S running on official firmware. Hope you successfully done the rooting process. If you followed everything as mentioned in the above tutorial, then your Galaxy Note 10.1 M480S should now rooted and you have complete control over your device. Now, install apps that ask root permission or flash various custom ROMs. To verify your device is rooted or not, you can download and run the Root Checker App from Google Play Store. If you have any doubt or query about the tutorial, feel free to contact with us using the comment form below, and share your rooting experience with us.
Read More..

I Phone 4 detailed explanation of the and how to deal with him 2 100 working solution

I Phone 4 detailed explanation of the and how to deal with him 2 100% working solution,I Phone 4 detailed explanation of the and how to deal with him 2 100% working solution,
I Phone 4 detailed explanation of the and how to deal with him 100% working solution
 see this step i hope u think and i hope u have any idia,
Read More..

Thursday, September 25, 2014

How To UpdateAndroid 4 4 2 KitKat Mahdi ROM For Verizon LG G2 VS980

Google has recently launched its latest Android firmware 4.4.2 KitKat for many Nexus devices. Officials 4.4.2 AOSP release KitKat largely without much customization. If you want to enjoy a KitKat customized Android 4.4.2 on a Verizon LG VS980 G2 then flash or install a custom ROM Mahdi. The latest version of the Mahdi launched recently which is based on Android 4.4.2 KitKat and fully supports Verizon LG VS980 G2. Continue reading this guide to learn how to install Android 4.4.2 custom ROM based on the KitKat Mahdi G2 Verizon LG VS980.
Warning!

This tutorial is only for Verizon LG G2 VS980. Don’t try this guide on any other Android device. Also, we are not responsible for any damage caused due to the instruction given in this page. Try this at your own risk. However, it is very unlikely that your device will be damaged if you follow all the instructions as it is which are mentioned in procedure.

Pre Requisites:

1. Backup your device data. You can follow our ultimate backup guide.

2. Make sure your device have at least 60% battery power. You can install an app like Battery Notifier BT Free on your Android device to check it easily.

3. You already have USB Driver Installed for Verizon LG G2 VS980 in your PC. [Download USB Drivers]

4. Make sure USB Debugging is enabled otherwise you won’t able to transfer file between PC and Verizon LG G2 VS980.

5. Your device have latest CWM version 6.0.4.4 and up or TWRP 2.6.1 and up installed.

If you done everything that we mentioned above then you are ready to follow step-by-step guide on how to install Android 4.4.2 KitKat based MahdiROM on Verizon LG G2 VS980.

File Required(Download by clicking on it)
  1. Mahdi Android 4.4.2 KitKat ROM For Verizon LG G2 VS980 [Filename: mahdi-2.4-vs980-20140105.zip]
  2. Google Apps [Filename: gapps-kk-20131119.zip] or any other KitKat Gapps
How to Install Android 4.4.2 KitKat based Mahdi ROM on Verizon LG G2 VS980
  1. Connect your device to PC using USB cable and then copy downloaded files to the SD card of your device.Important: Don’t extract any files.
  2. Disconnect USB and then turn off your Verizon LG G2 VS980.
  3. Now, Boot into recovery mode. To do so, press and hold Volume down & Power, when the LG logo appears release and press them again, then press the Power button three times. In recovery use Volume Keys to navigate between option and Power or Home Key to select an option. 
  4. Perform a Nandroid backup of your existing ROM that you can restore later if this new ROM not work or you want to go back into your previous ROM. To perform a backup, select Backup and Restore, then on the next Lcd, select Backup again. Go back to main recovery menu after backup is complete.
  5. Now, perform data wiping task. To do so, select wipe data/factory reset, then select Yes on next Lcd to confirm your action. Wait few minutes till the data wipe is complete. Now come back to CWM recovery main menu. Select wipe cache partition and after wiping process done, select Wipe Dalvik Cache under advanceoption to perform Dalvik cache wiping.
  6. Select install zip from sdcard, then select choose zip from sdcard. Now, locate the Mahdi ROM Zip file that you copied earlier in Step 1 and select it by pressing Power button. Confirm installation by selecting Yes – Install _____.zip on the next Lcd. The ROM installation will begin.
  7. Once the ROM installation process end, repeat the step 6 but choose the gapps-kk-20131119.zip file instead of ROM zip to install the Google apps package.
  8. When installation is completed, go back to the main recovery menu and select reboot system now to reboot your Verizon LG G2 VS980 and boot up into rooted Android 4.4.2 KitKat ROM Mahdi. 
  9. Returning to Previous ROM: To go back to your previous ROM, boot into recovery, select backup and restore then restore your previous ROM by selecting it from the list.
Congrats! Android 4.4.2 KitKat firmware based custom ROM Mahdi is now installed and running on your Verizon LG G2 VS980. [Note: Root is turned off by default in CM derived ROMs, you must enable developer settings first (tap the build number 8 times under about device), then enable root under Developer Settings] [source]
Read More..

Wednesday, September 24, 2014

How to Make Your Nexus 5 a WiFi Hotspot

This feature allows for your other devices to pick up your mobile hotspot settings on your Nexus 5. This is more preferable when you’re in public trying to locate a WiFi connection. You can share your connection with up to 8 computers or other devices. Check out these steps for easy, convenient and a money-saver internet experience.

1. On your device, head on to Settings

2. Select Wireless and Networks. And tap on More options.

3. Go to Tethering and portable hotspot.

4. And finally check on Portable WiFi hotpost.

Wait for few seconds and your phone will start broadcasting its WiFi network name. Now you’re ready to connect your other device to your portable mobile wifi hotspot.
Read More..

Tuesday, September 23, 2014

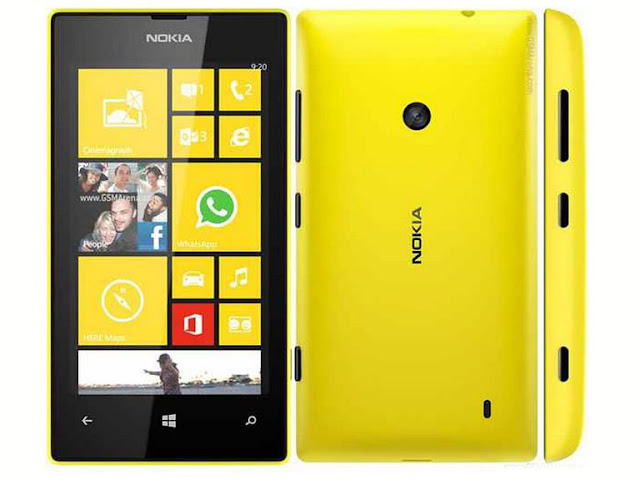
How to master reset Nokia lumia 520

Nokia is the most popular brand of the world.Till now nokia has made many model handset .Maximum phone has been popular.But Nokia windows phone has been more popular.Nokia windows phone have more advance feature so Its may be systemless for wrong operating.When a phone   has systemless then need master reset Now I showing How to master reset Nokia lumia 520 phone.


At first we will know details of nokia lumia 520


Processor  
Dual-core 1 GHz  
Ram
512mb
Internal memory
Memory card support
8Gb
64GB
Sim
Micro sim
One sim
DisplayIPS LCD capacitive touchLcd, 16M colors
480 x 800 pixels, 4.0 inches (~233 ppi pixel density)
Software platform 
Windows Phone 8 
Network850 MHz
900 MHz
1800 MHz
1900 MHz

Battery 

1430.0  mAh,3.7v,BL-5J  
Camera
5mp

we can Its master reset two ways
One of them:
Turn on the Nokia Lumia 520 then Go to menu: Setting > About > Reset Your Phone next give code then The process of formatting Nokia Lumia 520 will do by it self

Another of them :
Press and Hold the Power Button, do not release until the phone vibrate (if you feel the vibrate in Nokia Lumia 520 then release the Power Button)
Press and Hold the Volume Down Button, do not release until the LCD show the exclamation mark (if you see the exclamation mark in LCD, then release the Volume Down Button)

To continue reset, you have to do the last step bellow
Press Volume Up Button Key and release
Press Volume Down Button Key and release
Press Power Button Key and release
Press Volume Down Button Key and release
The the Nokia Lumia 520 will do the hard reset format

Read More..

Monday, September 22, 2014

How to Set Up Your Facebook Account on Sony Xperia S

We simply cant get enough of Facebook. And this social networking giant made sure that they still exist even on your smartphones. Now you can set up a Facebook Account right on your Xperia phone which will give you easy navigation on Facebook. Heres how you can set up your Facebook account to work on your Xperia device.

1. On your devices homeLcd tap on
2. Then tap on Settings and go to Accounts & sync.
3. The Active auto-sync checkbox should be marked to make sure that applications can synchronise data automatically.

4. Tap on Add Account and then Facebook.
5. Just follow the registration wizard to create an account or you can sign in if you already have one.
6. Once youre done, select a synchronisation option for your account and tap on Finish.
Your Facebook account is now set up to work on your phone.
Read More..

Sunday, September 21, 2014

How to Get More Storage on Motorola Moto G

Moto G has an internal storage capacity of 8GB or 16GB, and MicroSD card slot is not available on this device. But you do get 15GB of free storage on Google Drive and in some regions theres also an extra 50GB which is free for two years. You can redeem it within 30 days of activating your Moto G. Check Google Drive app for more information.
Read More..

Saturday, September 20, 2014

How to Hard Reset Sony Xperia M2 Using Buttons

1. Turned off your phone, then press and hold the Volume Up and Volume Down buttons.

2. Then press and release the Power button (just keep on holding the volume buttons). There should a menu will appear on your phone.

3. Press the Volume down button to navigate to the Recovery option. Press the Volume Up to select (if that doesnt work, use the Power button to select).

4. An Android logo will appear. Press the Volume Down and Volume Up button together and a recovery menu should appear. Use the Volume buttons to move to the Wipe data/Factory reset option and then press Power to select.

5. Use the Volume Down key to choose Yes and press the Power button again to select.

Read More..

Thursday, September 18, 2014

How to Start Conference Calls on Sony Xperia Z

To start a conference call

1. During an ongoing call, tap
2. Dial the number of the second participant and tap Call. After the second participant answers, the first participant is put on hold.
3. Tap  to add the second participant to the conference call.
4. Repeat steps 1 to 3 to add more call participants.

To have a private conversation with a conference call participant

1. During an ongoing conference call, tap {0} participants.
2. Tap the telephone number of the participant with whom you want to talk privately.
3. To end the private conversation and return to the conference call, tap .

To release a participant from a conference call

1. During an ongoing conference call, tap the button showing the number of participants. For example, tap 3 participants if there are three participants.
2. Tap  next to the participant you want to release.

To end a conference call

• During the conference call, tap End conference call.


Read More..

Monday, September 15, 2014

How To Update Galaxy Note 3 SM N900 via Kies

  1. Make sure you have stable internet connection on your computer.
  2. Now download and install Samsung Kies on your computer.
  3. Turn on your device (if it off) and then connect it to computer with USB cable.
  4. Run Samsung Kies and wait for it to detect your device.
  5. You should see a New Firmware Upgrade is available at Samsung Kies home Lcd.
  6. Press the Firmware Upgrade button to proceed.
  7. Follow on Lcd instruction and soon you will see your device running upgrade and reboot automatically. Once done, you can disconnect your device from computer.
Again! If you see “This is the latest firmware” in Samsung Kies, then your device yet to receive the latest update on Kies. Its good time to go for manual update instruction that located below.
N900XXUDNA6 Android 4.3 Jelly Bean Firmware Details:
PDA: N900XXUDNA6
CSC: N900SERDNA6
Download: N900XXUDNA6_N900SERDNA6_SER.zip

[Please Note: After flashing this firmware you will lost any installed custom ROM including CM10.2, AOKP, Avatar, Beanstalk, Omni ROM, Slim ROM, Pac-Man, Paranoid Android, LiquidSmooth or Carbon.
Read More..

Friday, September 12, 2014

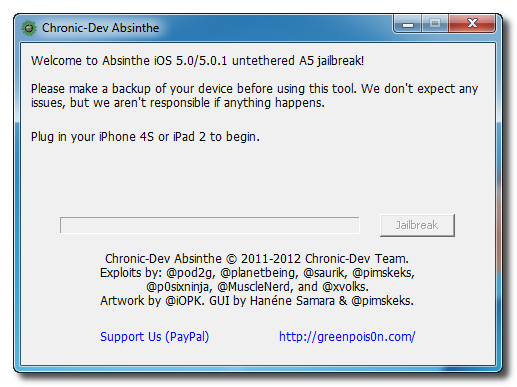
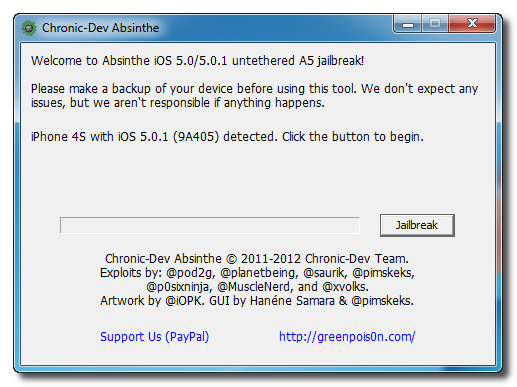
update 2 Chronic Dev Team Releases Update to Absinthe Jailbreak Utility

Chronic Dev-Team Releases Update to Absinthe Jailbreak Utility.

The Chronic Dev-Team has released an update to its Absinthe jailbreak utility that brings support for Mac OS X 10.5 (Intel + PPC).


Whats New in Version 0.4
● Mac: added support for OSX 10.5, PPC and Intel CPU
● added consistency check on startup to make sure required files are in place
● Windows: fixed bug in payload generator that might cause a crash

You can download the latest version of Absinthe from here.
Whats New in Version 0.4
● Mac: added support for OSX 10.5, PPC and Intel CPU
● added consistency check on startup to make sure required files are in place
● Windows: fixed bug in payload generator that might cause a crash

You can download the latest version of Absinthe from here.


Absinthe Jailbreak Gide
************************************************** ************************
Step One
Download the latest version of Absinthe from here.

Step Two
Double click to extract the downloaded archive and launch the Absinthe application.


Step Three
As prompted, connect your iPhone 4S to the computer via USB. Make sure to remove any passcodes or VPN settings youve previously set.


Step Four
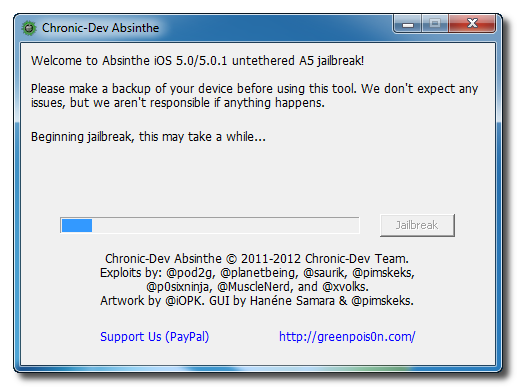
Click the Jailbreak button to begin


Step Five
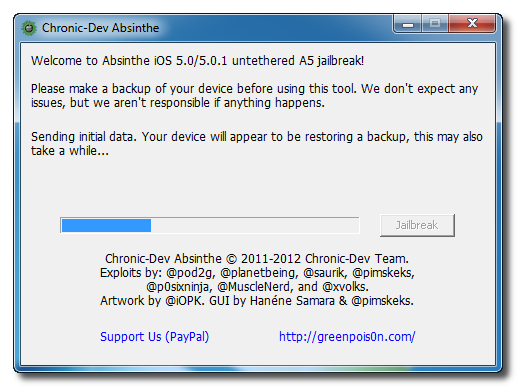
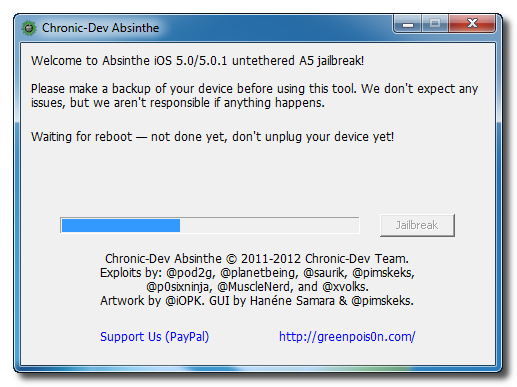
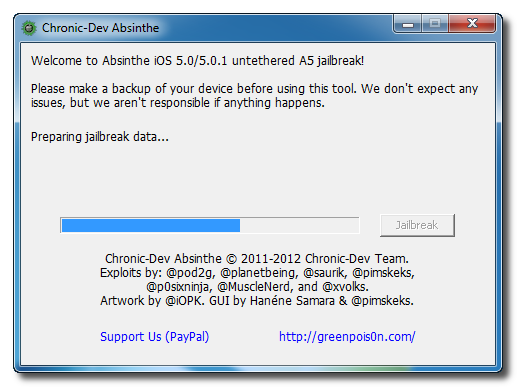
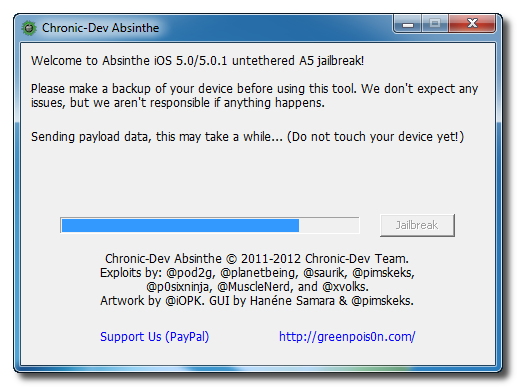
The application will take you through several steps of the jailbreak: Sending initial data, waiting for reboot, waiting for device to finish booting, Preparing jailbreak data, and Sending payload data.


tep Six
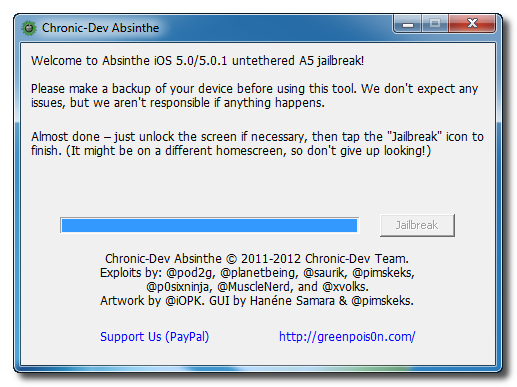
You will be informed that the jailbreak is Almost done.


Step Seven
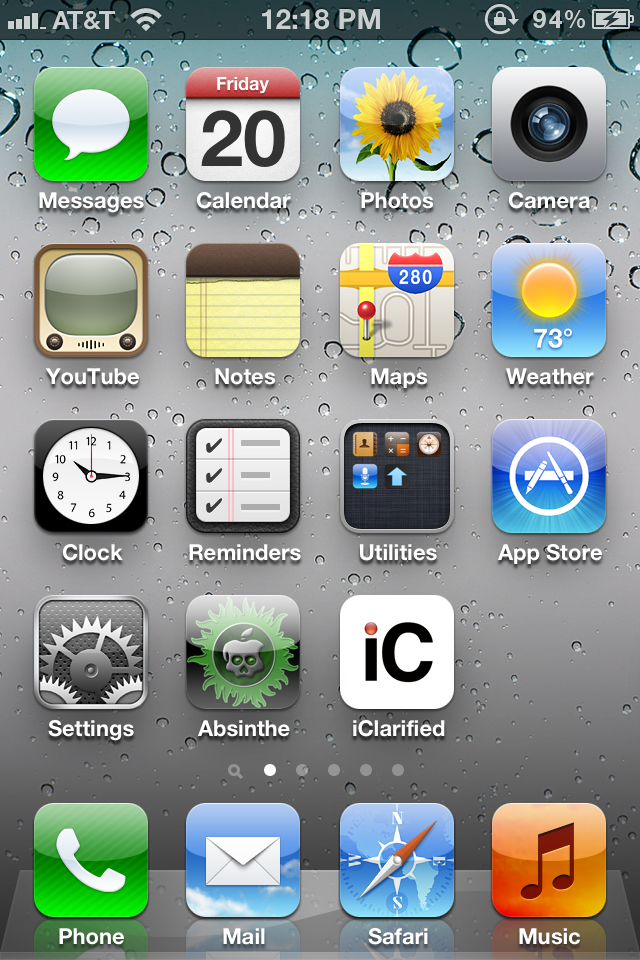
On your device, locate the Absinthe icon and press it to complete your jailbreak. It could be on any homeLcd.


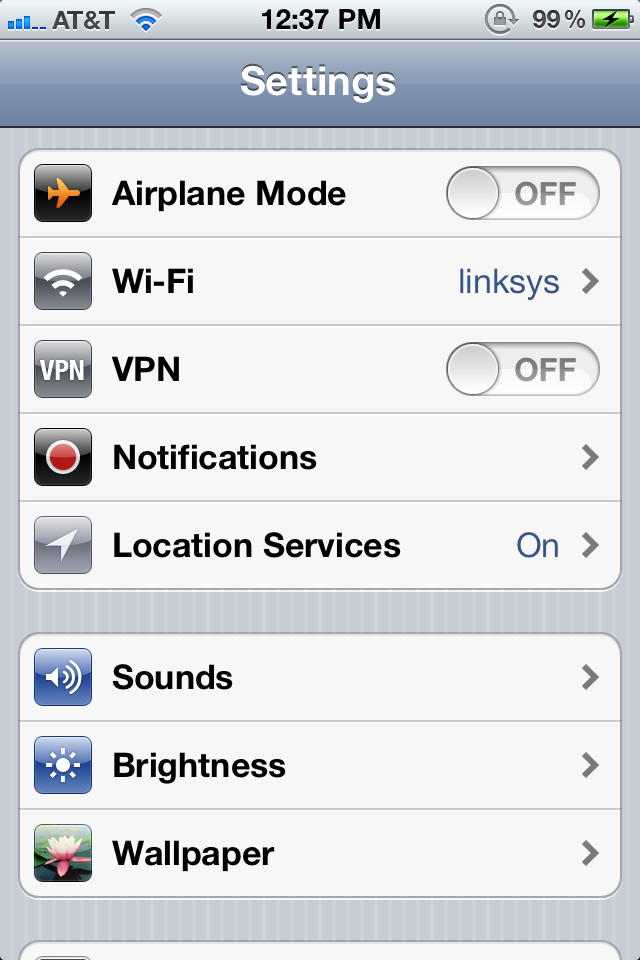
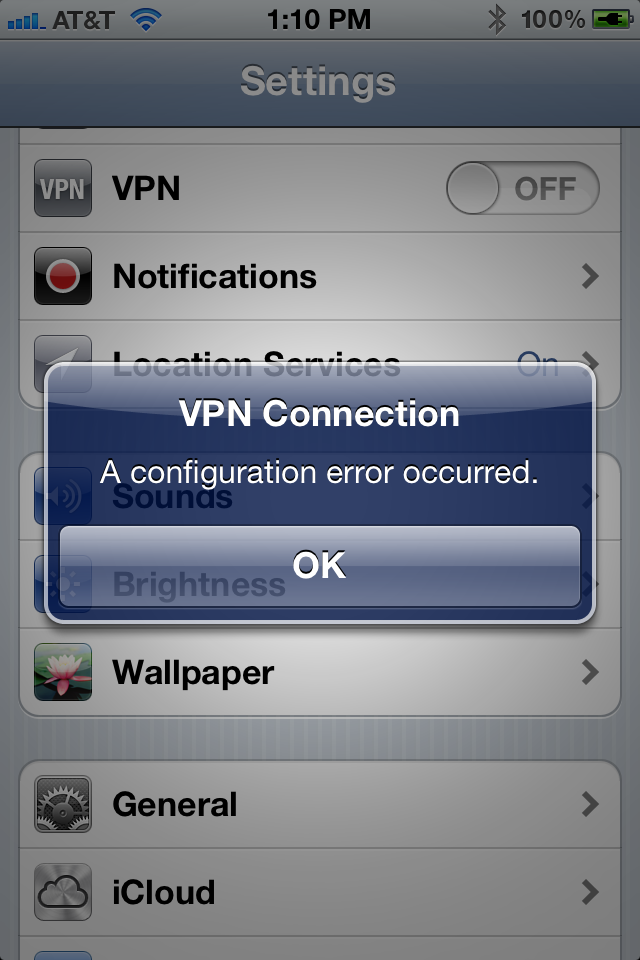
If the server is down and you get an Error establishing a database connection message then tap the Settings icon on your springboard and turn on VPN.


You will get a configuration error; however, after about a minute your device will reboot with Cydia on the Springboard!
Read More..