
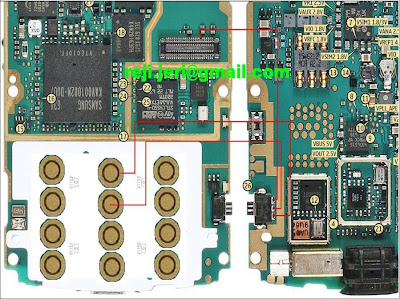
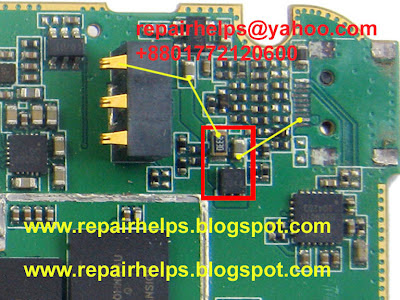
NOKIA N95 CAMERA KEY WAY
Samsung Galaxy Rugby Pro I547 Hard Reset Instructions - The Samsung Galaxy Rugby Pro I547 comes with GSM/HSDPA/LTE network. The phone was released on 2012, October. Its powered by Dual-core 1.5 GHz Krait processor and Qualcomm MSM8960 Snapdragon chipset. It runs on Android 4.0.4 (Ice Cream Sandwich) platform with 1 GB of RAM. The display screen of this phone is 4.0 inches, Super AMOLED capacitive touchscreen, also equiped with 5 MP camera. Ok, here below shows information about the Samsung Galaxy Rugby Pro I547 Hard Reset Instructions also factory data reset guide.
How to Hard Reset for Samsung Galaxy Rugby Pro I547
If you are owner of this phone and want to hard reset for Samsung Galaxy Rugby Pro I547, follow this instructions:
Enter *2767*3855#. Dont forget backup your necessary data/Contacts/Messages and other because all your data will be lost!
Once again, Copy all to SIM or make backup to your PC before full reset! Take out SIM card before full reset.
If your Samsung Galaxy Rugby Pro I547 hangs up, or freezes, you may need to reset the device. If your device is frozen and unresponsive, press and hold the Power/Lock Key for 8 to 10 seconds.
Factory Data Reset Tutorial
From this menu you can reset your phone and sound settings to the factory default settings. Follow this tutorial below:
First, from the Home screen, tap Apps ➔ Settings ➔ Backup and reset.
Then, Tap Factory data reset. The Factory data reset screen displays reset information.
Further, Tap Reset device, then follow the prompts to perform the reset.
Warning! Performing a Factory data reset will erase all data from your phone and internal SD card, including your Google account, system and application data and settings, and downloaded applications. It will not erase current system software, bundled applications, and external SD card files such as music and photos.
If you still confused, you can read the Samsung Galaxy Rugby Pro I547 manual or user guide. Download here


| Nokia C2-03, C2-06, C2-08 Memory Not Detected Solution |


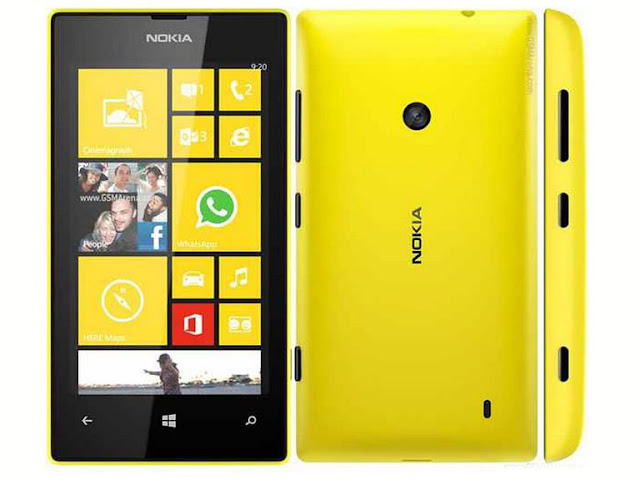
| Processor | Dual-core 1 GHz |
| Ram | 512mb |
| Internal memory Memory card support | 8Gb 64GB |
| Sim | Micro sim One sim |
| Display | IPS LCD capacitive touchLcd, 16M colors 480 x 800 pixels, 4.0 inches (~233 ppi pixel density) |
| Software platform | Windows Phone 8 |
| Network | 850 MHz 900 MHz 1800 MHz 1900 MHz |
Battery | 1430.0 mAh,3.7v,BL-5J |
| Camera | 5mp |

 |
| Nexus 7? WRONG! Its Just PiPO S1 Running Android 4.2.2 |
 |
| The Download Link I Gave You is Version 1.7 but It Works the Same Way. ON 3, CLICK RESTORE! NOT UPGRADE. |

 |
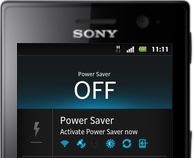
| Notifications on Phablet UI Works Pretty Well. Know that Guy from the Left? What Blog does he Came From? |


 Nokia Master Code Calculator Download,
 http://repairhelps.blogspot.com/2013/07/nokia-110-mic-problem-solution.html


 to add the second participant to the conference call..
 next to the participant you want to release.
| HTC Desire X Factory data reset |


