Showing posts with label galaxy. Show all posts

Thursday, November 20, 2014

Samsung Galaxy S 4 hard reset sgs4 reset i9500 resetting gt i9500 i9505 gt i9505 code


Samsung Galaxy S の4 hard reset :- by >wzmobile.asia<
Fast Reset  the device {press and hold POWER switch  for 9-11 second}
Unlock samsung Galaxy S4 using hard reset
samsung s4 hard reset  or のreset Galaxy S4 PRESS AND HOLD VOLUME UP key + Home switch  + Power switch 

Press Power key the phone on vibrate Waityou see for Android logo then release 
all the switchのの and keys.Select Wipe data/Factory reset with VOLUME DOWN. 
press Power key [right hand-side]Select YES -- delete all user dataŽwith VOLUME DOWN 
and then press Power After format. press Power key again to reboot phone. 
[select reboot system now]unlock i9500 galaxy samsung cell phone
Read More..

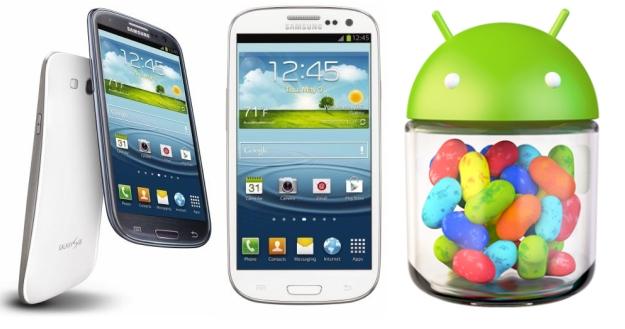
How to update Samsung Galaxy S3 to Android 4 1 2 Jelly Bean

Good news to all Samsung galaxy s3 users, the international version of Samsung galaxy s3, which have been the world’s best-selling smartphone, now already received the much anticipated Android 4.1.2 Jelly Bean update over-the-air. Many major national carriers has released Android Jelly for the device, and other Carrier-branded versions like Verizon Wireless should be able to receive the update soon as Samsung is railroading updates for its devices. But some only offer an update that must completed via Samsung Kies software and is not offered over the air.

The new Android 4.12 Jelly Bean Update brings a list of amazing features now only located in Samsung Galaxy Note 2 to Samsung S3, like highly-anticipated Multi View multitasking system, Smart Rotation function , camera filters, low-light photo mode, an easy mode and so on. For some people you may find it is difficult for you to update or wait any longer. So here I will show you How to update Android 4.1 Jelly Bean on Galaxy S3 immediately.Pre-requisites 
  1. Be sure to backup your data before starting the update
  2. Make sure your battery is at least 50% charged.
  3. Make sure that you have install Kies software on the computer, and if you dont have Kies, you can download it from Samsung website.
For international version: If the software update didn’t popped up in the notifications area, you can update your Samsung Galaxy S3 to Android 4.1.2 Jelly Bean by connecting the terminal to Kies or OTA, by manually checking for the update for the latter method. Just go to Settings > About Device > Software Update > Check for Updates and see whether the new firmware has rolled out for your device.

Heres How to Update Your AT&T Samsung Galaxy S III to Android 4.1 Jelly Bean
  • Connect your Samsung Galaxy S III to your PC or laptop using the supplied USB cable. Ensure that Kies recognizes your device by looking in the upper section of the left-bar navigation menu. Your device should be listed.
  • Kies Device Once Kies recognizes the device you will see a Lcd stating new firmware is available.
  • Click Update.
  • Read through the Caution pop-up and, if you agree, click to populate the I have read all of the above information checkbox.
  • Read the Allow saving of information statement and select Allow saving or Proceed without saving and then click Start upgrade.
  • After a few minutes, Kies will then begin transferring the firmware binary to the device.
  • Then after a while the upgrade is completed.
  • If completed a data backup from your device to Kies prior to performing the update, you can now restore that data back to the device under the new Jelly Bean operating system 
Read More..

Friday, November 7, 2014

Hard Reset Your Samsung Galaxy y Duos s6102

How To Hard Reset Your Samsung Galaxy Y Duos Gt-s6102 Device Easily

When You Have To Hard Reset Your Device ?

You Can Apply Hard Reset In Many Cases We Will Tell You Some Example
* Forgotten Pattern Lock
* Forgotten Phone Lock
* Forgotten User Code
* If Your Phone Seems Frozen Due To Any Cases.

Take Care oi These Factors Before You Reset Your Phone

* Please Backup Your Datas Using any Backup Software
* Please Maintain 50% Battory Charge

How To Hard Reset Your   Samsung Galaxy Y Duos 

* Switch Off Your Device 
* Take Out Your Sim And Memmory Card
* Press And Hold  Volume Up Key  +  Home Key    +  Then Power On Your Phone
* Hold Pressing Keys Untill The Second Logo Appears
* When Scond Logo . Release All Keys
* Then You Will Get Factory Reset Menu
* Select Wipe Data/ Factory Reset Option . Scroll Using Volume Key . Then Confirm
* By Select Yes Delete All User Data. Using Volume Down Key . Confirm It
* Wait Some Seconds. Then Select Reboot System Now Option And Confirm
* Now Your Phone Will Restarted. After Completing The Hard Reset Prosses
* Done ! 
Read More..

Thursday, November 6, 2014

Hard Reset For Samsung Galaxy S i9000

How to Hard Reset Your Samsung Galaxy S

When You Have To Hard Reset Your Samsung Galaxy S?

You Can Apply Hard Reset In Many Cases We Will Tell You Some Example
* Forgotten Pattern Lock
* Forgotten Phone Lock
* Forgotten User Code
* If Your Phone Seems Frozen Due To Any Cases. 

Take Care oi These Factors Before You Reset Your I9000

* Please Backup Your Data Using any Backup Software
* Please Maintain 90% Battery Charge  

How To Hard Reset Your Samsung Galaxy S

hard
* Switch Off Your Samsung Galaxy
* Take Out Your Sim And Memmory Card
* Press And Hold  Volume Up Key  +  Home Key    +  Then Power On Your Phone
* Hold Pressing Keys Untill The Second Logo Appears
* When Scond Logo . Release All Keys
* Then You Will Get Factory Reset Menu
* Select Wipe Data/ Factory Reset Option . Scroll Using Volume Key . Then Confirm Using Power Key       (Home Key)
* By Select Yes Delete All User Data Using Volume Down Key . Press Power key to confirm.
* Wait Some Seconds. Then Select Reboot System Now Option And Confirm
* Now Your Phone Will Restarted. After Completing The Hard Reset Proses
* Done !
Read More..

Wednesday, October 22, 2014

Samsung Galaxy Note 10 1 SHW M480S Running 4 1 2 Jelly Bean Firmware Simple Tutorial How to Root

If you are looking for an easy and working method to root your Samsung Galaxy Note 10.1 SHW-M480S (South Korea) Tablet, then youre on right place. Here youll find a simple step by step guide to root Galaxy Note 10.1 M480S running on Android 4.1.2 Jelly Bean official firmware. The device was released with Android 4..0.4 ICS and last updated to Android 4.1.2 Jelly Bean (Latest Firmware for Galaxy Note 10.1 M480S). If you own the device, then you can now root it using the below tutorial.

After having an Android Tablet or, after updating official firmware, many of us prefer to root our device to enjoy some additional features that unrooted android Tablet doesnt offer. With a rooted android Tablet, you can install apps that ask root permission, flash various custom ROMs, install MODs and tweak various features. Root removes default bloatware apps that free-up lots of memory space and extend the battery life. To know more about benefits of rooting android Tablet, read- Complete Note on What is Rooting and Benefits of Rooting Android Tablet.

So, want to root your Galaxy Note 10.1 SHW-M480S? Continue reading this page to get all the necessary steps to successfully root your device. The root file (CF-Auto-Root) we used in this tutorial is safe and have nearly 100% success rate. Well use Odin software to flash the root file.

The tutorial is made with simple step by step guide, so that even an android newbie user can follow and successfully root his/her device. However, in this process you may loss your personal data and settings. So, we recommend you to follow all the backup instructions before proceed to rooting guide.

Caution

  • This rooting tutorial is only applicable for Samsung Galaxy Note 10.1 SHW-M480S model (p4noterfskt). So, dont try this in any other android device. Check your device model number from- Settings-About Tablet
  • Rooting voids your Tablets manufacturer warranty. However, you can get back the warranty anytime by flashing official firmware.
  • This guide is for educational purpose and you should try this at your own risk. We are not responsible if your device experience a soft brick after following this tutorial.

Pre-Requisites:

  • Check battery percentage, charge your device to a decent level of at least 60% battery power. Your device should not turn off during installation.
  • Turn on USB Debugging mode, go to Settings-Developer Options-USB Debugging
  • Backup important data and settings to external storage- follow this guide
  • Install USB driver for your device on your computer- Download Samsung USB Driver
All the above pre-requisites are very important and must be followed before proceed to installation guide. Hope you get all the above points and done as mentioned. Now, you are ready to move to the final step of this tutorial where we have arranged a step by step details guide on how to root Galaxy Note 10.1 SHW-M480S running on official firmware.

How to Root Galaxy Note 10.1 SHW-M480S Running Android 4.1.2 Jelly Bean through Odin:

  1. Download CF-Auto-Root for Galaxy Note 10.1 M480S and extract the Zip fileCF-Auto-Root-p4noterfskt-p4noterfskt-shwm480s.zip
  2. Download Odin 3.07 and extract the Zip file: Odin 3.07.Zip
  3. Now, Switch off your Tablet and boot Galaxy Note 10.1 M480S into Download Mode by pressing and holding the Volume Down and Power buttons together (long press until the boot screen appear), now press Volume Up key to proceed to Download Mode.
  4. Run the Odin3 v3.07.exe file as an administrator (Right click on the .exe file and click on Run as administrator)
  5. Now connect your Galaxy Note 10.1 M480S to your computer via USB cable
  6. In Odin3 screen, you should see a COM Port number like “0:[COM7]” at ID:COM section and “Added!” text at the message box. This means your device has been detected by Odin3.
  7. Make sure that, only the “Auto Reboot” and “F. Reset Time” options are checked.
  8. Now, click on the PDA button and select the CF-Auto-Root-p4noterfskt-p4noterfskt-shwm480s.tar.md5 file.
  9. Finally, click on the Start button to begin the rooting process, wait few moments.
  10. Once completed, you would see “PASS!” message in ID:COM port having green background
  11. Your Tablet should automatically reboot after completion
  12. You can now disconnect your Tablet from computer
  13. Finish
Congrats! You have completed the tutorial to root Galaxy Note 10.1 M480S running on official firmware. Hope you successfully done the rooting process. If you followed everything as mentioned in the above tutorial, then your Galaxy Note 10.1 M480S should now rooted and you have complete control over your device. Now, install apps that ask root permission or flash various custom ROMs. To verify your device is rooted or not, you can download and run the Root Checker App from Google Play Store. If you have any doubt or query about the tutorial, feel free to contact with us using the comment form below, and share your rooting experience with us.
Read More..

Thursday, October 2, 2014

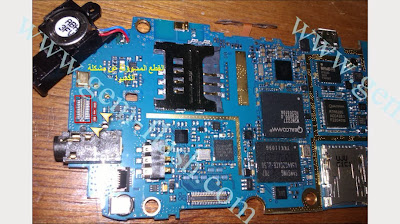
Samsung Galaxy S3 Touch Screen Not Working Solution

Samsung Galaxy S3 Touch Screen Not Working Solution,Samsung Galaxy S3 Touch Screen no response  Working Solution,Samsung Galaxy S3 Touch Screen ways Working Solution,Samsung Galaxy S3 how to working Touch Screen Not Working Solution,Samsung Galaxy S3 Touch Screen line was damage  Working Solution,Samsung Galaxy S3 Touch Screen Not Working which parts are problem to no working this Gui procedure here step by step.
Read More..

Friday, September 26, 2014

Samsung Galaxy Rugby Pro I547 Hard Reset Instructions

Samsung Galaxy Rugby Pro I547 Hard Reset Instructions - The Samsung Galaxy Rugby Pro I547 comes with GSM/HSDPA/LTE network. The phone was released on 2012, October. Its powered by Dual-core 1.5 GHz Krait processor and Qualcomm MSM8960 Snapdragon chipset. It runs on Android 4.0.4 (Ice Cream Sandwich) platform with 1 GB of RAM. The display screen of this phone is 4.0 inches, Super AMOLED capacitive touchscreen, also equiped with 5 MP camera. Ok, here below shows information about the Samsung Galaxy Rugby Pro I547 Hard Reset Instructions also factory data reset guide.

How to Hard Reset for Samsung Galaxy Rugby Pro I547
If you are owner of this phone and want to hard reset for Samsung Galaxy Rugby Pro I547, follow this instructions:
Enter *2767*3855#.  Dont forget backup your necessary data/Contacts/Messages and other because all your data will be lost!
Once again, Copy all  to SIM or make backup to your PC before full reset! Take out SIM card before full reset.

If your Samsung Galaxy Rugby Pro I547 hangs up, or freezes, you may need to reset the device. If your device is frozen and unresponsive, press and hold the Power/Lock Key for 8 to 10 seconds.

Factory Data Reset Tutorial
From this menu you can reset your phone and sound settings to the factory default settings. Follow this tutorial below:
First, from the Home screen, tap Apps ➔ Settings ➔ Backup and reset.
Then, Tap Factory data reset. The Factory data reset screen displays reset information.
Further, Tap Reset device, then follow the prompts to perform the reset.

Warning! Performing a Factory data reset will erase all data from your phone and internal SD card, including your Google account, system and application data and settings, and downloaded applications. It will not erase current system software, bundled applications, and external SD card files such as music and photos.

If you still confused, you can read the Samsung Galaxy Rugby Pro I547 manual or user guide. Download here

Read More..

Wednesday, September 24, 2014

Samsung Galaxy S3 Ringer Ways Solution

Samsung Galaxy S3 Ringer Ways Solution,Samsung Galaxy S3 no Ringer sound Solution,Samsung Galaxy S3 Ringer Ways damage Solution,Samsung Galaxy S3 Ringer Ways print missing Solution,Samsung Galaxy S3 Ringer bell not working Ways Solution Guide,Samsung Galaxy S3 Ringer area Ways Solution Step by step Procedure here.
Read More..

Tuesday, September 23, 2014

Root Samsung Galaxy S GT I9000


Today, we bring up the method to root Samsung Galaxy S GT I9000 as well as process to install CWM Recovery, which is essential to install Custom ROMs. So, in this article we will show you the most simplest way to root Samsung Galaxy S GT-I9000. As you will traverse below, we will surely guide you through the complete process on to how to root Samsung Galaxy S GT-I9000. But, before that please read the prerequisite, disclaimer and other important notes. Let’s start...

Prerequisite:

1. Make sure your mobile should possess 70 to 80% battery
2. Enable USB debugging mode (Menu (app drawer) > Settings > Manage Applications > Development > USB Debugging – check box)
3. Ensure that you have backed up your all important data.
4. Install Root Samsung Galaxy S GT-I9000 USB drivers. (Download USB drivers or download Samsung Kies (drivers included))

How to root Samsung Galaxy S GT-I9000 and Install CWM Recovery

Step 1: To root Samsung Galaxy S GT-I9000, first you have to download “CF-Root“, as per your Android 2.3.6 Gingerbread Firmware Baseband Version from Below: (To check baseband version: Go to Settings > About > Baseband Version)
After downloading CF-Root File, extract it on desktop.
Step 2: Download “Odin” extract it on the desktop.
Step 3: Switch Off your phone, take out the battery and insert it back. Now boot your phone into Download Mode by pressing and holding the Volume Down + Home button together, and then press the Power button till you see the Android Construction logo. Once again press Power/Volume Up button to confirm.
Step 4: Open “Odin.exe” (from extracted folder) and connect your phone via USB cable with your computer in download mode. If your phone is connected successfully the one of the ID:COM boxes will turn yellow.
Step 5: Click on “PDA” button and select file “cf-root-xx_oxa_xxx-xx.x-cwm3rfs.tar” (from extracted folder).
Step 6: Please make sure that only F. Reset Time and Auto Reboot options are checked on Odin.
Step 7: Now, click on the “Start button” on Odin to start the installation process. Installation will take a few minutes to complete so please wait for the complete process.
Step 8: Finally, when the installation process is completed successfully you will see the “PASS” message on Odin and then your device will reboot automatically.
Read More..

Sunday, September 21, 2014

Samsung Galaxy Note 3 the best phone ever

Samsung Galaxy Note 3 the best phone ever : Samsung Galaxy Note 3 is the best phone ever. Its contains 2G, 3G and 4G network.  It consists of Super AMOLED capacitive touchLcd, 16M colors and 1080 x 1920 pixels, 5.7 inches (~386 ppi pixel density) display quality. Corning Gorilla Glass 3, Vibration; MP3, WAV ringtones, loudspeaker and 3.55mm jack is also available. It contains also HSDPA, 42 Mbps; HSUPA; LTE, Cat4, 50 Mbps UL, 150 Mbps DL speed. Camera contains 13 MP, 4128 x 3096 pixels, autofocus, LED flash. Built in Micro SD card slot of 16/32/64 GB storage, 3 GB RAM upgradable to the 64 GB. Having also Dual Shot, Simultaneous HD video and image recording, geo-tagging, touch focus, face and smile detection, image stabilization, panorama, HDR. CPU can perrform Quad-core 2.3 GHz Krait 400 (N9005, N9002)/ Quad-core 1.9 GHz Cortex-A15 & quad-core 1.3 GHz Cortex-A7 (N9000)with Android OS, v4.3 (Jelly Bean), upgradable to v4.4.2 (KitKat) and HTML 5 Browser.

Feature of Samsung Galaxy Note 3 :
-ANT+ support
-S-Voice natural language commands and dictation
-Air gestures
-SNS integration
-Active noise cancellation with dedicated mic
-Dropbox (50 GB cloud storage)
-TV-out (via MHL A/V link)
-MP4/DivX/XviD/WMV/H.264/H.263 player
-MP3/WAV/eAAC+/AC3/FLAC player
-Organizer
-Image/video editor
-Document viewer(Word, Excel, PowerPoint, PDF)
-Google Search, Maps, Gmail,
- YouTube, Calendar, Google Talk, Picasa
- Voice memo/dial/commands
- Predictive text input (Swype)

Read More..

Monday, September 15, 2014

How To Update Galaxy Note 3 SM N900 via Kies

  1. Make sure you have stable internet connection on your computer.
  2. Now download and install Samsung Kies on your computer.
  3. Turn on your device (if it off) and then connect it to computer with USB cable.
  4. Run Samsung Kies and wait for it to detect your device.
  5. You should see a New Firmware Upgrade is available at Samsung Kies home Lcd.
  6. Press the Firmware Upgrade button to proceed.
  7. Follow on Lcd instruction and soon you will see your device running upgrade and reboot automatically. Once done, you can disconnect your device from computer.
Again! If you see “This is the latest firmware” in Samsung Kies, then your device yet to receive the latest update on Kies. Its good time to go for manual update instruction that located below.
N900XXUDNA6 Android 4.3 Jelly Bean Firmware Details:
PDA: N900XXUDNA6
CSC: N900SERDNA6
Download: N900XXUDNA6_N900SERDNA6_SER.zip

[Please Note: After flashing this firmware you will lost any installed custom ROM including CM10.2, AOKP, Avatar, Beanstalk, Omni ROM, Slim ROM, Pac-Man, Paranoid Android, LiquidSmooth or Carbon.
Read More..

Samsung Galaxy Fame Tips and Tricks

How to Factory Reset (Hard Reset) Samsung Galaxy Fame

We have our own reasons why we factory reset our device. Maybe we want to delete all the files and restore the device to its original state. It could also be the device may be malfunctioning or so slow and it needs to be reset.

Restoring the default settings or factory reset your Samsung Galaxy Fame will delete all your existing files. It is recommended to backup your important files on your computer before attempting to reset your device.

The steps below are the instructions on how to factory reset your Samsung Galaxy Fame:

Step 1. On your HomeLcd, tap on MENU icon.

Step 2. Select "Settings", then scroll down and tap "Backup and reset" option.

Step 3. Then tap on “Factory Data Reset”.

Step 4. Read warning carefully before tapping the “Reset Device”.

Step 5. If you want to proceed in resetting your device, tap on “Erase everything” to confirm the Reset.

Now, you just need to wait while your device is resetting. It should reboot itself and you will have a new start on your Samsung Galaxy Fame.

You may also use the shortcut method using the code: Enter *2767*3855# on your device.


Hard Reset:

1. Turn off your device.

2. Then press and hold Volume Down + Home Button + Power On.

3. Wait for a few seconds until the Factory reset menu appears.

4. Select "wipe data/factory reset" by using the Volume Down button.

How to Reduce the Battery Consumption on Samsung Galaxy Fame

Battery Life depends on how you use your device. For Samsung Galaxy Fame device, if you want to save your battery to last longer hours, you may need to adjust your settings.

All of us want to have a longer battery life on our phones. Follow these suggestions to reduce the battery consumption:

  • Switch to Sleep mode by pressing the Power key when you are not using your device. 
  • Close any apps or features when you are done using it so they will not continuously running in the background.
  • Turn off the network connection if you are out of range so that your device will stop searching for a network signal. (deactivate the Bluetooth feature, turn off the Wi-Fi feature when not in use, etc).
  • Deactivate auto-syncing of applications.
  • Decrease the backlight time.
  • Lessen the Lcd brightness and the Lcd lock timeout.


How to Reformat Memory Card on Samsung Galaxy Fame

Formatting the memory card on your Samsung Galaxy Fame will delete all the files that is stored on the memory card. It is recommended to backup your important files on your computer before attempting to format your memory card.

You may not be able to reformat your memory card on your computer. So try it through your device:

1. On your Home Lcd, tap Apps.

2. Select Settings.

3. Go to Storage.

4. Then tap Format SD card Format SD card.

5. Tap Erase everything to confirm the action.


How to Import Contacts From Old Phone to New Phone (on Sony, iPhone, Samsung, HTC and Nokia)

Contacts is very important for everyone of us. We cant connect to our friends without a contact number. If you have a new phone, saving contacts on the phone one by one is so hassle. But now, theres an easy way how to transfer or import your contacts from your old phone to your new phone.

Use your PC to transfer contacts to your new phone. This process is applicable in several phone brands, including iPhone, Samsung, HTC and Nokia.

You just need an Internet Connection on your PC, your old and new phone and their own USB cable.

Then you need to install the PC Companion program. This is a free application and the installation files are already saved on your new phone. This program can also be used in updating your phone software.

Please note that if you are using the Microsoft Windows 7 operating system on your PC, make sure that the AutoPlay setting is enabled.

To check your settings:

Click Start > Control Panel, then type "autoplay" on the search box. Click the AutoPlay, and mark the check box Use AutoPlay for all media and devices.

Installing the PC Companion:

  • Turn on your new Phone and connect it to your PC.
  • On your new Phone, tap "Install" to install PC Companion on the PC.
  • On your computer, if a pop-up window that appears notifies you about available PC Software, select Run Startme.exe.
  • Then click Install to start the installation and then follow the instructions to complete the installation.

If you are not prompted with a pop-up window to install the PC Companion, you can also download the PC Companion here.

Transferring your contacts to your new phone:

  • Make sure that PC Companion is installed on your PC.
  • Open the PC Companion application on your PC.
  • Then click Contacts Setup and follow the instructions to transfer your contacts.


How to Secure Your Samsung Galaxy Fame (Face Unlock, Face and Voice Unlock, Pattern and Password)

Securing your Samsung Galaxy Fame is also important, specially if you have a private files that you dont want others to access it. So to prevent others from using your or accessing your personal data without your permission, then you may need to activate the security features. The device requires an unlock code whenever unlocking it.

Setting a pattern:

1. On the Applications Lcd, tap Settings.
2. Select Lock Lcd.
3. Then choose Screen lock.
4. Tap Pattern.

Draw a pattern by connecting four dots or more, and then draw the pattern again to verify it. Set a backup unlock PIN to unlock the Lcd when you forget the pattern.


Setting a PIN:

1. On the Applications Lcd, tap Settings.
2. Select Lock Lcd.
3. Then choose Screen lock.
4. Tap PIN.

Enter at least four numbers, and then enter the password again to verify it.


Setting a password:

1. On the Applications Lcd, tap Settings.
2. Select Lock Lcd.
3. Then choose Screen lock.
4. Tap Password.

Enter at least four characters including numbers and symbols, and then enter the password again to verify it.


How to Upgrade With the Latest Software on Samsung Galaxy Fame

Keeping your device updated with the latest software fixes bugs on your handset thus contributing to its efficiency and life span. Samsung allows you to install those updates in two ways- through Samsung Kies or Over-the-Air. Well heres how you can install those latest software firmware using this two methods.

Upgrading with Samsung Kies

1. First launch Samsung Kies.

2. Then connect your phone to the computer using the USB cable that came with it.

3. Now Samsung Kies will automatically recognizes your device and a dialogue box
appears showing the available updates, if any.

4. Click the update button in the dialogue box to start upgrad ting to te latest software.

While youre upgrading the device, you shouldnt turn off the computer or disconnect
te USB cable and dont connect other media devices to the computer as it may interfere
the upgrading process.

Upgrading over-the-air

1. Go the Applications Lcd and then tap Settings.

2. Then go to About device.

3. Select Software Update then hit on Update.


How to Make Your Samsung Galaxy Fame a Portable Wi-Fi Hotspot

Smartphones these days can now share its mobile data connection and act as a portable Wi-Fi hotspot. And like those high-end gadgets, Samsung Galaxy Fame is sure to let you experience the benefits of making it as a portable Wi-Fi hotspot. Heres how you can make your Samsung phone the next Wi-Fi hotspot.

1. On your device, go to Settings Lcd first.

2. Then tap Wi-Fi and tap for more options.

3. Select Advanced options to customize your Wi-Fi settings.

4. Go to Tethering and portable hotspot.

5. And choose Portable Wi-Fi hotspot to share the devices mobile network connection.

And you now have a portable Wi-Fi hotspot using your Samsung Galaxy Fame.


How to Install and Uninstall Apps on Samsung Galaxy Fame

Apps developers are remarkably making good money out of every apps they build. No wonder online stores are mostly visited by smartphone users just to check on the hottest new apps online. If youve found the perfect app for your Samsung Galaxy Grand, then follow these steps in installing and perhaps uninstalling those unwanted apps.

Installing apps

1. First tap on Play Store on the applications Lcd to view available apps online.

2. You can browse available apps by category or simply tapto search with a keyword.

3. Then select an application to view. To download it on your phone, tap Install. Make sure to double check the app info like its price and ratings before hitting the install button.

4. If theres a charge for that app,tap the price and follow the onLcd instructions to purchase it.

5. To install apps that are from other sources, just go to Applications Settings Security Unknown sources.


Uninstalling apps

1. In uinstalling the apps purchased from the Play Store, tap

2. Then go to My Apps.

3. And select an application you want to delete, then tap Uninstall.


How to Change Font Size and Style on Samsung Galaxy Fame

Android phones running older version of OS can easily allow you to change its font size. However, changing its font style requires rooting of your device or installing 3rd party apps. Well the good news is, Samsung Galaxy Fame allows you to customize your phone’s font with just few taps. So if you think your Fame’s font is way too serious to fit your personality, then you can change into a more light-hearted one. Check out these steps on how to change Fame’s font size and style to suit your style.

To change the font size, follow these steps:

1. On your device, go to Settings menu by pulling down the Notification drawer.

2. Now you’re on the Settings menu, scroll down to Display and tap.

3. Under Font, tap on Font Size.

4. You’ll see five options (tiny, small, normal, large and huge) to choose from. Just choose from the list and you’ll immediately see the results within the Settings menu Lcd.


To change the font style, follow these steps:

1. Pull down the Notification drawer and tap on Settings icon.

2. Then scroll down to Display and tap.

3. Under Font section, tap on Font Style.

4. You’ll see four font style ( default font, Choco cooky, Helvetica S, Rosemary)

5. Choose the desired font style and tap on Yes to apply it. Take note that fonts on a web page will still be displayed as they always have.

6. Now if you wish to use other fonts, just tap on the tab Get fonts online at the bottom of the list for available font styles.

7. Once you tap that tab you’ll be redirected to Google Play Store where you can download additional fonts for Fame. Some are free and others cost on average of $0.99.


How to Activate NFC Feature


You can use this feature to make payments and buy tickets for transportation or events after downloading the required applications.

Note: If the Lcd is locked, your device will not read NFC tags or receive data.

  • On the Applications Lcd, tap Settings.
  • Select More settings.
  • And choose NFC
  • Drag the NFC switch to the right.


How to Activate S Beam Feature

Use this feature if you want to send data like music, videos, images, and documents.

Warning: You should not send copyright-protected data via S Beam. Doing so may violate copyright
laws.

  • On the Applications Lcd, tap Settings.
  • Select More settings.
  • And choose S Beam
  • Drag the S Beam to the right.


Read More..

Saturday, September 13, 2014

Samsung I5500 Galaxy 5 Fm Radio Not Working fix problem

 Samsung I5500 Galaxy 5 Fm Radio Not Working How to Fix problem, Samsung I5500 Galaxy 5 Fm Radio Not Open How to Fix problem, Samsung I5500 Galaxy 5 Fm Radio Not work How to Fix problem, Samsung I5500 Galaxy 5 Fm Radio No Response Search Station How to Fix problem, Samsung I5500 Galaxy 5 Fm Radio ic repair How to Fix problem, Samsung I5500 Galaxy 5 Fm Radio ic ways How to Fix problem, Samsung I5500 Galaxy 5 Fm Radio damage Working How to Fix problem Guide Step By Step Procedure Here.
Read More..

Wednesday, September 10, 2014

Samsung Galaxy S3 Camera Problem fix problem

Samsung Galaxy S3 Camera Problem How to Fix problem,Samsung Galaxy S3 Camera error Problem How to Fix problem,Samsung Galaxy S3 Camera not working Problem How to Fix problem,Samsung Galaxy S3 Camera hang Problem How to Fix problem,Samsung Galaxy S3 Camera ic ways repair How to Fix problem Guide How to Fix problem.

Read More..

Easy Ways to Update Galaxy S4 Mini I9190 with Android 4 2 2 DXUAMK 2 Jelly Bean Official Firmware

For Samsung Galaxy S4 Mini with Model Number GT-I9190 has been getting updates Jelly Bean Android 4.2.2 with the latest firmware base I9195XXUBML1. The new firmware is now officially available as an Over-The-Air (OTA) and via the Samsung Kies update.


Firmware details
PDA: I9190DXUAMK2
CSC: I9190OLBAMK3
MODEM: I9190DXUAMK2
Version: Android 4.2.2
Build date: Nov 11, 2013
Regions: Indonesia, Malaysia, Singapore, Vietnam, Thailand

Samsung Galaxy S4 Mini I9190 users who missed the OTA update notification or unable to access the update over Samsung KIES, may follow our step-by-step guide to install the update manually.

Pre-requisites
1. Install USB Drivers for Samsung Galaxy S4 Mini on the computer.
2. Enable USB Debugging Mode on the phone by navigating to Settings >> Developer Options.
3. Make a backup of all your important data before following the guide.
4. The Galaxy S4 Mini should be factory unlocked and not locked to any particular carrier.
5. Ensure the battery of the phone is charged more than 80 percent.
6. The Android 4.2.2 DXUAMK2 Jelly Bean firmware is compatible only with the 3G version of the Samsung Galaxy S4 Mini (GT-I9190). Applying this to any incorrect variant might brick the device. Verify the model number of the Galaxy S4 Mini by navigating to Settings >> About Phone.

Files Required

1. Android 4.2.2 DXUAMK2 Jelly Bean Firmware for Galaxy S4 Mini I9190
2. Odin 3.07

Steps to Update Galaxy S4 Mini I9190 with Android 4.2.2 DXUAMK2 Jelly Bean Firmware
Step 1: Extract Firmware zip file using winrar/7zip/winzip or any other extracting tool, you will get a .tar.md5 file and some other files.
Step 2: Extract Odin zip file and you will get Odin3 v3.07.exe along with few other files.
Step 3: Switch off the Galaxy S4 Mini.
Step 4: Boot the device into Download Mode by pressing and holding Volume Down, Homeand Power buttons together until a construction Android robot icon with a warning triangle appears on Lcd. Now press the Volume Up button to enter Download Mode.
Step 5: Run Odin on the computer as an Administrator.
Step 6: Connect the Galaxy S4 Mini to the computer using USB cable while it is in the Download Mode. Wait until Odin detects the device. When the device is connected successfully, the ID: COM box will turn to light blue with the COM port number. Additionally, the successful connected will be indicated by a message saying Added.

Note: If the Added message does not appear, then try re-install USB drivers or changing the port on the computer.
Step 7: Select the following files in Odin from extracted I9190DXUAMK2 firmware folder:
  • Click the PDA button and select the .tar.md5 file.
  • Click the Phone button and select file with MODEM in its name. Ignore if there is no such file.
  • Click the CSC button and select file with CSC in its name. Ignore if there is no such file.
  • Click the PIT button and select the .pit file. Ignore if there is no such file.

Step 8: In Odin, enable Auto Reboot and F. Reset Time checkboxes. Also, ensure the Re-Partition checkbox is chosen only if a .pit file was chosen in the previous step.
Step 9: Verify everything suggested in Step 7 and Step 8 is done correctly. Then hit the Startbutton to begin the installation process.
Step 10: Once the installation process is completed, your phone will restart and soon you will see a PASS message with green background in the left-most box at the very top of the Odin. You can now unplug the USB cable to disconnect it from the computer.

Samsung Galaxy S4 Mini I9190 should be now updated with official Android 4.2.2 DXUAMK2 Jelly Bean. Head over to Settings >> About Phone to verify the software version running on the device.

Note: If Galaxy S4 Mini I9190 stuck at booting animation after Step 10 then go to recovery mode (press and hold the Volume Up, Home and Power buttons together) and perform Wipe data/Factory Reset and Wipe Cache Partition task before selecting reboot system now function. In recovery mode use Volume keys to navigate between options and Power key to select the option. Please note, performing wiping task will erase your device internal memory data and not external SD card data.
Read More..

Tuesday, September 9, 2014

Samsung I5500 Galaxy 5 Camera Not Working fix problem

Samsung I5500 Galaxy 5 Camera Not Working How to Fix problem,Samsung I5500 Galaxy 5 Camera eror Not Working How to Fix problem,Samsung I5500 Galaxy 5 Camera Not open Working How to Fix problem,Samsung I5500 Galaxy 5 Camera Not Working repair Guide How to Fix problem,Samsung I5500 Galaxy 5 Camera Not Show Working How to Fix problem,Samsung I5500 Galaxy 5 Camera Blank Screen Not Working How to Fix problem,Samsung I5500 Galaxy 5 Camera open then hang Working How to Fix problem,Samsung I5500 Galaxy 5 Camera Not Working properly Step By Step Procedure Here How to Fix problem.
Read More..

Monday, September 8, 2014

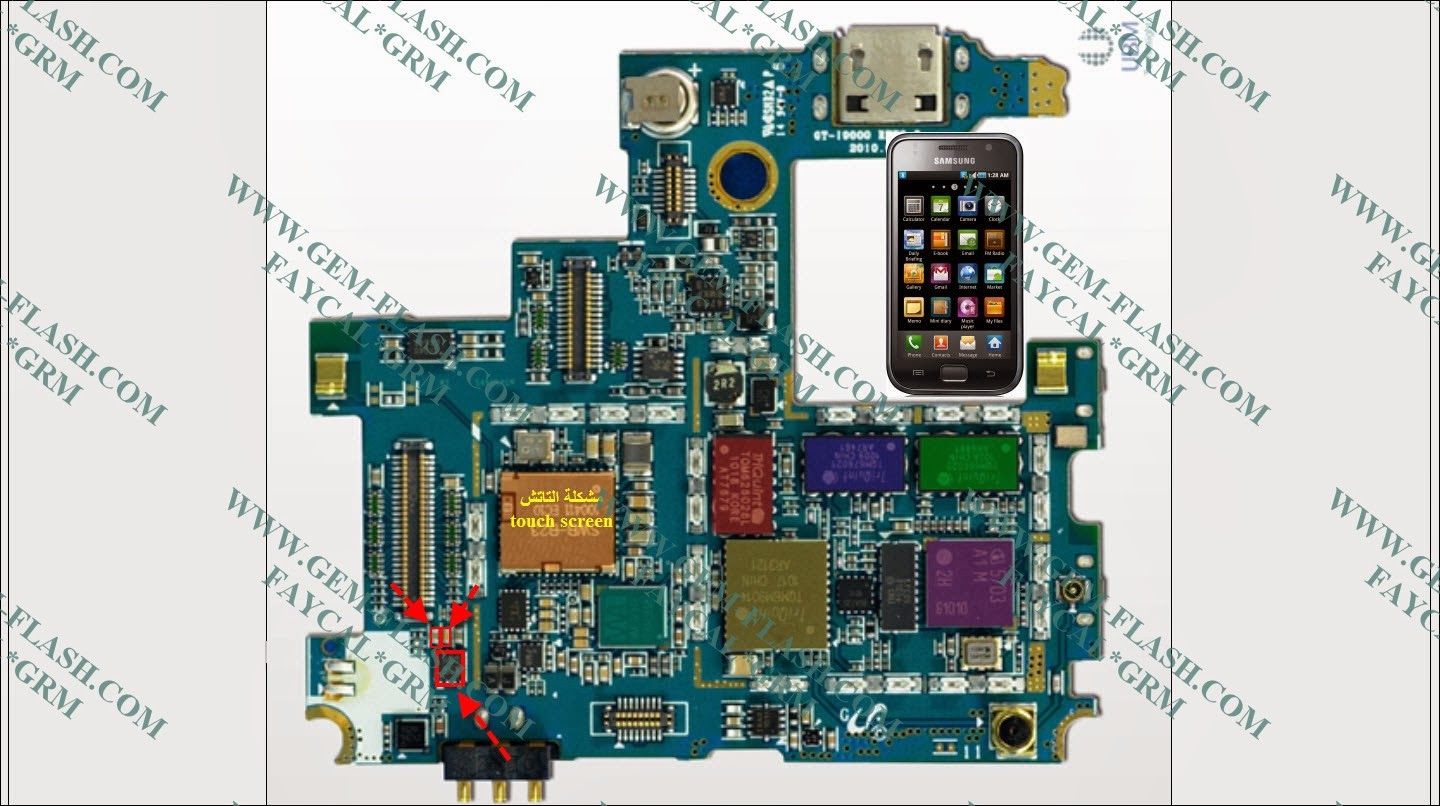
Samsung Galaxy S i9000 touch screen not working Solution

Samsung Galaxy S i9000 touch Lcd not working Solution,Samsung Galaxy S i9000 touch Lcd not working Solution Ways Jumper,Samsung Galaxy S i9000 touch Lcd not working Solution Repair,Samsung Galaxy S i9000 touch Lcd no Response working Solution,Samsung Galaxy S i9000 touch Lcd not working Problem Guide Solution Step By Step Procedure Here.
Read More..

Samsung Galaxy S3 Flash Light Problem fix problem

Samsung Galaxy S3 Flash Light Problem How to Fix problem,Samsung Galaxy S3 Flash Light no work Problem How to Fix problem,Samsung Galaxy S3 Flash Light ic damage Problem How to Fix problem,Samsung Galaxy S3 Flash Light ways Problem How to Fix problem,Samsung Galaxy S3 Flash Light no indicator Problem How to Fix problem,Samsung Galaxy S3 Flash Light Problem How to Fix problem Ways Repair Guide.
Read More..

Sunday, September 7, 2014

Samsung Galaxy S3 Fm Radio Not Working fix problem

Samsung Galaxy S3 Fm Radio Not Working How to Fix problem,Samsung Galaxy S3 Fm Radio Not Working How to Fix problem ways ,Samsung Galaxy S3 Fm Radio Not Working ic ways How to Fix problem,Samsung Galaxy S3 Fm Radio Not Working ic repair How to Fix problem,Samsung Galaxy S3 Fm Radio Not Working ic damage replace tricks How to Fix problem.
Read More..

Saturday, September 6, 2014

Samsung I5500 Galaxy 5 No Network Solution

Samsung I5500 Galaxy 5 No Network Solution,Samsung I5500 Galaxy 5 Network Weak Solution,Samsung I5500 Galaxy 5 No Service  Network Solution,Samsung I5500 Galaxy 5 Network Emergency Solution,Samsung I5500 Galaxy 5 Limited Service Network Solution,Samsung I5500 Galaxy 5 Network Low Solution.
Read More..