Showing posts with label 0. Show all posts
Showing posts with label 0. Show all posts
Thursday, September 25, 2014
Easy JTAG Daily Updates v1 0 95 0 v1 0 96 0 box firmware 1 48
Easy-JTAG Daily Updates v1.0.95.0 & v1.0.96.0, box firmware 1.48 
BOX Firmware Update:
The firmware of box updated to 1.48 version.
You can update it via shell or use latest build 1.0.95/96.
Firmware will be updated automaticaly.
In firmware update - improved emmc direct protocol, more stable now.
Emmc Direct changes:
Added:
- access to boot2 , gp1 , gp2 , gp3 and gp4 partitions. You will know soon why need this
- Improved stability of writing some eMMC devices
- NVIDIA Tegra 3 devices are now fully supported ( we working now on sec bypass)
ADDED new devices/phones via JTAG connect:
- Anycall SHW-m200K (Read/Write,OneClickRepair)
- LG D500 (Read/Write,OneClickRepair)
- HTC one XL PJ831000 (Read/Write,OneClickRepair)
Read More..
BOX Firmware Update:
The firmware of box updated to 1.48 version.
You can update it via shell or use latest build 1.0.95/96.
Firmware will be updated automaticaly.
In firmware update - improved emmc direct protocol, more stable now.
Emmc Direct changes:
Added:
- access to boot2 , gp1 , gp2 , gp3 and gp4 partitions. You will know soon why need this
- Improved stability of writing some eMMC devices
- NVIDIA Tegra 3 devices are now fully supported ( we working now on sec bypass)
ADDED new devices/phones via JTAG connect:
- Anycall SHW-m200K (Read/Write,OneClickRepair)
- LG D500 (Read/Write,OneClickRepair)
- HTC one XL PJ831000 (Read/Write,OneClickRepair)

Wednesday, September 10, 2014
balckberry Solution Latest OS 9500 4 7 0 141 4 7 0 100 Multilanguage
Software For BlackBerry® Storm(TM) smartphone
From Vodafone Greece
BlackBerry Handheld Software v4.7.0.141 (Multilanguage)
Package Version: 4.7.0.141
Consisting of:
Applications: 4.7.0.100
Software Platform: 4.0.0.124
File name: 9500_omadrmEuropean_PBr4.7.0_rel141_PL4.0.0.124_A4 .7.0.100_Vodafone_Greece.exe
File size: 116.19MB
Note: The Software Platform and Applications version numbers can be found under Options-About Lcd on the handheld
Instructions for installing either version on ANY carriers 9500:
1. Download the above OS file to the PC then install it to the PC by running (double clicking) the file you downloaded.
2. Go to c:program filescommon files esearch in motionapploader and delete the file named "vendor.xml."
3. Plug in BB and double click on "Loader.exe." Its located in the same place as the above vendor.xml file.
The process takes about 45 minutes to an hour depending on how much data you have to backup and restore during the process. Once its done loading the new OS it will reboot (it may do this twice during the entire process.) You will see a white Lcd with an hourglass for up to 20 minutes at a time while the DM says "waiting for initialization."
If, for some reason, you end up with a white Lcd with small icons and the number 507, simply connect to the PC again and run Loader.exe again and it should load the OS to the device.
Download here:
https://www.blackberry.com/Downloads...uaPgD5mHdfx15g7qcL2AaQ**
Read More..
From Vodafone Greece
BlackBerry Handheld Software v4.7.0.141 (Multilanguage)
Package Version: 4.7.0.141
Consisting of:
Applications: 4.7.0.100
Software Platform: 4.0.0.124
File name: 9500_omadrmEuropean_PBr4.7.0_rel141_PL4.0.0.124_A4 .7.0.100_Vodafone_Greece.exe
File size: 116.19MB
Note: The Software Platform and Applications version numbers can be found under Options-About Lcd on the handheld
Instructions for installing either version on ANY carriers 9500:
1. Download the above OS file to the PC then install it to the PC by running (double clicking) the file you downloaded.
2. Go to c:program filescommon files esearch in motionapploader and delete the file named "vendor.xml."
3. Plug in BB and double click on "Loader.exe." Its located in the same place as the above vendor.xml file.
The process takes about 45 minutes to an hour depending on how much data you have to backup and restore during the process. Once its done loading the new OS it will reboot (it may do this twice during the entire process.) You will see a white Lcd with an hourglass for up to 20 minutes at a time while the DM says "waiting for initialization."
If, for some reason, you end up with a white Lcd with small icons and the number 507, simply connect to the PC again and run Loader.exe again and it should load the OS to the device.
Download here:
https://www.blackberry.com/Downloads...uaPgD5mHdfx15g7qcL2AaQ**
Tuesday, September 2, 2014
VRoot 1 7 0 1 Click Root Method mostly All android phone not metter which brand Free Download This Software
VRoot 1.7.0 - 1-Click Root technique principally All robot phone not matter that complete and that modal
Supported devices:lot of devices up to robot four.x (4.0~4.3)
download this software system
Download
after this software system are motorcar update to one.6.-
producer for install as a result of chines language thus i post all step
Next.

Dont create start menu. (as you wish)

Create desktop icon.

Finish. Uncheck if you dont want to start the rooting app now.

after this open software and connect phone(must enable usb debugging)

then click on Root during root phone will be restart
note:after root superuser will be display in English language not in chines
more shocking news on the way
Supported devices:lot of devices up to robot four.x (4.0~4.3)
download this software system
Download
after this software system are motorcar update to one.6.-
producer for install as a result of chines language thus i post all step
Next.
Dont create start menu. (as you wish)
Create desktop icon.
Finish. Uncheck if you dont want to start the rooting app now.
after this open software and connect phone(must enable usb debugging)
then click on Root during root phone will be restart
note:after root superuser will be display in English language not in chines
more shocking news on the way
CWM Based Recovery 6 0 4 6 Touch Recovery for Xperia Z2 How To Guide
CWM-Based Recovery 6.0.4.6 Touch Recovery for Xperia Z2 How To Guide
info:This Recovery is built from CWM 6.0.4.6 sources!
I dont have this device with me and but would love to have one!...
all the testing was done remotely on users devices... thanks to @yeeson for testing on his Z2 !!![ PROOF ]![CWM-Based]()
[ credits / special thanks ]
I dont have this device with me and but would love to have one!...
all the testing was done remotely on users devices... thanks to @yeeson for testing on his Z2 !!![ PROOF ]
[ credits / special thanks ]
- Koush - for the brilliant work & coding on CWM recovery
- CyanogenMod and FreeXperia Team (especially jerpelea) for too many things *
- special thanks to @yeeson for helping out with testing and risking his devices for the sake of development!!! and NO, his phone was NOT damaged during testing
- ME for creating this for u guys!

[ Requirements ]
- Bootloader unlocked
- working fastboot
- STOCK ROM FW:
- 4.4.2
- 17.1.A.2.36 - v01
- 4.4.2
[ features ]
- standard CWM recovery 6.0.4.6 - TOUCH RECOVERY!
- kernel is insecure (ro.secure=0)
- adb debugging is enabled by default in OS
- TIP: if u are experiencing very slow backup in CWM do this
[ WARNING ]
for flashing this kernel you WILL NEED TO UNLOCK BOOTLOADER! Check this thread for more info (same steps as Xperia Z1 are used for Xperia Z2)
UNLOCKING BOOTLOADER WITHOUT TA BACKUP WILL LEAD TO IRREVERSIBLE LOSS OF DRM KEYS!!!
AND YES CAMERA STILL WORKS AFTER UNLOCKING BOOTLOADER!!!
[ known issues ]
for flashing this kernel you WILL NEED TO UNLOCK BOOTLOADER! Check this thread for more info (same steps as Xperia Z1 are used for Xperia Z2)
UNLOCKING BOOTLOADER WITHOUT TA BACKUP WILL LEAD TO IRREVERSIBLE LOSS OF DRM KEYS!!!
AND YES CAMERA STILL WORKS AFTER UNLOCKING BOOTLOADER!!!
[ known issues ]
- adb is not working in recovery (can be fixed later)
[ how to flash this kernel ] (via fastboot)
- download the kernel image
- save the boot.img to the folder containing fastboot binary
- flash the boot.img using fastboot:Code:reboot from fastboot Code:
fastboot flash boot boot.img
fastboot reboot
- the device should now start booting
- enjoy!
when you see the Sony logo and the LED light turns pink/amber/orange keep tapping/pressing VOLUME UP key
[ how to Root ]
for instructions on how to root please check this post
[ sources ]
https://github.com/DooMLoRD/android_device_sony_honami
for now recovery is same is same as honami
[ donations ]
Please do consider donating as I plan to get this device!
if u feel that this work has helped u OR u think that the work i put into making this is worthy of donations, then click on the following link for buying me some coffee/beer/etc

PAYPAL DONATION LINK
OR
you can buy one of my awesome apps from Play Store!
[ download links ]
PLEASE DO NOT MIRROR, REDISTRIBUTE, REPACK MY FILES
NEW:
Advance Stock Kernel with Recovery v01 (FW:17.1.A.2.36}
MD5HASH: 6e0c418d299780bd0ac74e69ff46a199
Monday, September 1, 2014
Tablet T733 MAINBORD v2 0 Update Done To 4 2 1 With Orginal Rom
Tablet -T733 MAINBORD-v2.0 Update Done To 4.2.1 With Orginal Rom
PCB ID -T733 Mainboard v2.0 , 2013/07/01
T733 MAINBORD-v2.0 : Rom Link1
Flashing Done

PCB IMAGE

Read More..
PCB ID -T733 Mainboard v2.0 , 2013/07/01
T733 MAINBORD-v2.0 : Rom Link1
Flashing Done
PCB IMAGE

Friday, August 29, 2014
How To Root Your Galaxy Note 8 0 GT N5110 Android 4 2 2 Firmware Running on Guide
Samsung Galaxy Note 8.0 GT-N5110 (WiFi) recently get updated to the N5110XXCMK1 4.2.2 Jelly Bean Firmware. If you yet to update the firmware, then update the same by following the above link. Hope you updated this latest firmware on your device and now you can root the same using our simple tutorial below. The below guide will help you to root XXCMK1 4.2.2 Jelly Bean Firmware running on Galaxy Note 8.0 GT-N5110. Continue reading the tutorial for complete guide.
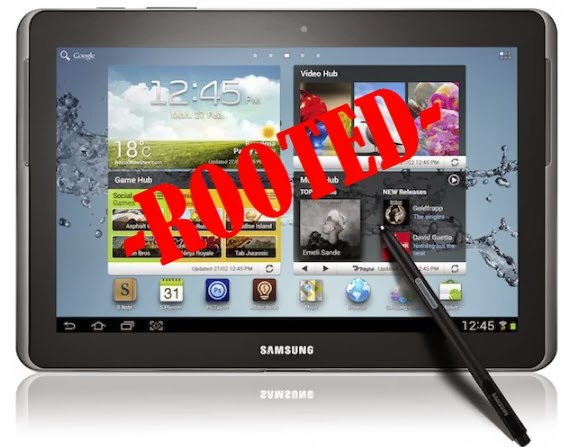 After updating official firmware, your device no longer belongs to rooted device. So, after official firmware update, many of us prefer to root our device to enjoy some additional features that unrooted android device doesnt offer. With a rooted android device, you can install apps that ask root permission, flash various custom ROMs, install MODs and tweak various features. Root removes default bloatware apps that free-up lots of memory space and extend the battery life. However, once rooted, manufacturer warranty will be void. But you can regain the warranty by following proper unroot process. To know more about benefits of rooting android device, read- Complete Note on What is Rooting and Benefits of Rooting Android Tablet.
So, want to root Galaxy Note 8.0 GT-N5110 Running N5110XXCMK1 4.2.2 Jelly Bean Firmware? Continue reading this page to get all the necessary steps to successfully root your device. The root file (CF-Auto-Root) we used in this tutorial is safe and have nearly 100% success rate. Well use Odin software to flash the root file.
The tutorial is made with simple step by step guide, so that even an android newbie user can follow and successfully root his/her device. However, in this process you may loss your personal data and settings. So, we recommend you to follow all the backup instructions before proceed to rooting guide.
So, want to root Galaxy Note 8.0 GT-N5110 Running N5110XXCMK1 4.2.2 Jelly Bean Firmware? Continue reading this page to get all the necessary steps to successfully root your device. The root file (CF-Auto-Root) we used in this tutorial is safe and have nearly 100% success rate. Well use Odin software to flash the root file.
The tutorial is made with simple step by step guide, so that even an android newbie user can follow and successfully root his/her device. However, in this process you may loss your personal data and settings. So, we recommend you to follow all the backup instructions before proceed to rooting guide.
All the above pre-requisites are very important and must be followed before proceed to installation guide. Hope you get all the above points and done as mentioned. Now, you are ready to move to the final step of this tutorial where we have arranged a step by step details guide to root Galaxy Note 8.0 GT-N5110 running N5110XXCMK1 4.2.2 Jelly Bean firmware.
Steps to Root Galaxy Note 8.0 GT-N5110 Running N5110XXCMK1 4.2.2 Jelly Bean through Odin:
- Download CF-Auto-Root for Galaxy Note 8.0 N5110 and extract the Zip file: CF-Auto-Root-konawifi-konawifixx-gtn5110.zip
- Download Odin 3.09 and extract the Zip file: Odin3_V3.09.Zip
- Now, Switch off your Tablet and boot Galaxy Note 8.0 N5110 into Download Mode by pressing and holding the Volume Down+Power buttons together (long press until the boot screen appear), now press Volume Up key to proceed to Download Mode.
- Run the Odin3 v3.09.exe file as an administrator (Right click on the .exe file and click on Run as administrator)
- Now connect your Galaxy Note 8.0 N5110 to your computer via USB cable
- In Odin3 screen, you should see a COM Port number like “0:[COM7]” at ID:COM section and “Added!” text at the message box. This means your device has been detected by Odin3.
- Make sure that, only the “Auto Reboot” and “F. Reset Time” options are checked.
- Now, click on the PDA button and select the CF-Auto-Root-konawifi-konawifixx-gtn5110.tar.md5 file.
- Finally, click on the Start button to begin the rooting process, wait few moments.
- Once completed, you would see “PASS!” message in ID:COM port having green background
- Your Tablet should automatically reboot after completion
- You can now disconnect your Tablet from computer
- Finish
Sunday, August 24, 2014
Latest Release JURASSIC UniAndroid Tool v 5 0 3 Full Version Free Download

Improved and updated ADB_USB.INI READER/WRITER
Now can detect/read Android Device ID and write as adb_usb.ini

This update comes with Android VCF Reader
1. In your Android device import contacts to sd card
2. A VCF file will be created
3. Copy that file using Jurassic Droid Explorer
4. Read VCF entries using the VCF Reader
DOWNLOAD HERE
Additional Info:
1. Fixed more bugs found.
2. Improve read/write of adb_usb.ini
PLEASE THIS IS A FREE TOOL, DONT SELL IT
YOU CAN EDIT THIS, PUT YOUR NAME, PUT YOUR PICTURE, BUT PLEASE DONT SELL IT. THIS IS FOR FREE.
1. In your Android device import contacts to sd card
2. A VCF file will be created
3. Copy that file using Jurassic Droid Explorer
4. Read VCF entries using the VCF Reader
DOWNLOAD HERE
Additional Info:
1. Fixed more bugs found.
2. Improve read/write of adb_usb.ini
PLEASE THIS IS A FREE TOOL, DONT SELL IT
YOU CAN EDIT THIS, PUT YOUR NAME, PUT YOUR PICTURE, BUT PLEASE DONT SELL IT. THIS IS FOR FREE.
Subscribe to:
Posts (Atom)
