Showing posts with label 2. Show all posts

Thursday, November 20, 2014

How to update Samsung Galaxy S3 to Android 4 1 2 Jelly Bean

Good news to all Samsung galaxy s3 users, the international version of Samsung galaxy s3, which have been the world’s best-selling smartphone, now already received the much anticipated Android 4.1.2 Jelly Bean update over-the-air. Many major national carriers has released Android Jelly for the device, and other Carrier-branded versions like Verizon Wireless should be able to receive the update soon as Samsung is railroading updates for its devices. But some only offer an update that must completed via Samsung Kies software and is not offered over the air.

The new Android 4.12 Jelly Bean Update brings a list of amazing features now only located in Samsung Galaxy Note 2 to Samsung S3, like highly-anticipated Multi View multitasking system, Smart Rotation function , camera filters, low-light photo mode, an easy mode and so on. For some people you may find it is difficult for you to update or wait any longer. So here I will show you How to update Android 4.1 Jelly Bean on Galaxy S3 immediately.Pre-requisites 
  1. Be sure to backup your data before starting the update
  2. Make sure your battery is at least 50% charged.
  3. Make sure that you have install Kies software on the computer, and if you dont have Kies, you can download it from Samsung website.
For international version: If the software update didn’t popped up in the notifications area, you can update your Samsung Galaxy S3 to Android 4.1.2 Jelly Bean by connecting the terminal to Kies or OTA, by manually checking for the update for the latter method. Just go to Settings > About Device > Software Update > Check for Updates and see whether the new firmware has rolled out for your device.

Heres How to Update Your AT&T Samsung Galaxy S III to Android 4.1 Jelly Bean
  • Connect your Samsung Galaxy S III to your PC or laptop using the supplied USB cable. Ensure that Kies recognizes your device by looking in the upper section of the left-bar navigation menu. Your device should be listed.
  • Kies Device Once Kies recognizes the device you will see a Lcd stating new firmware is available.
  • Click Update.
  • Read through the Caution pop-up and, if you agree, click to populate the I have read all of the above information checkbox.
  • Read the Allow saving of information statement and select Allow saving or Proceed without saving and then click Start upgrade.
  • After a few minutes, Kies will then begin transferring the firmware binary to the device.
  • Then after a while the upgrade is completed.
  • If completed a data backup from your device to Kies prior to performing the update, you can now restore that data back to the device under the new Jelly Bean operating system 
Read More..

Sunday, November 9, 2014

Master Reset Samsung Gravity 2 SGH T469 Hard Reset Samsung Gravity 2 SGH T469


reset to factory settings
    To perform a Master Reset on your Samsung Gravity 2 reset follow the steps below:
    1. From the standby screen on your Samsung Gravity 2, press the left soft key for Menu
    2. Select Settings, which this the fourth one on the list on your Samsung gravity 2 hard reset
    3. Then Select Reset Settings, which is the ninth item on the list on your Samsung Gravity 2 reset
    4. Then you Select Master Reset, which is the second item on the list
    5. Enter the password then press the left soft key for Confirm - the default password on your Samsung Gravity 2 is 0000
    6. Then all you have to do is Press the left soft key for Yes to confirm the Master Reset on your Samsung Gravity 2 master reset
Read More..

Wednesday, October 22, 2014

Samsung Galaxy Note 10 1 SHW M480S Running 4 1 2 Jelly Bean Firmware Simple Tutorial How to Root

If you are looking for an easy and working method to root your Samsung Galaxy Note 10.1 SHW-M480S (South Korea) Tablet, then youre on right place. Here youll find a simple step by step guide to root Galaxy Note 10.1 M480S running on Android 4.1.2 Jelly Bean official firmware. The device was released with Android 4..0.4 ICS and last updated to Android 4.1.2 Jelly Bean (Latest Firmware for Galaxy Note 10.1 M480S). If you own the device, then you can now root it using the below tutorial.

After having an Android Tablet or, after updating official firmware, many of us prefer to root our device to enjoy some additional features that unrooted android Tablet doesnt offer. With a rooted android Tablet, you can install apps that ask root permission, flash various custom ROMs, install MODs and tweak various features. Root removes default bloatware apps that free-up lots of memory space and extend the battery life. To know more about benefits of rooting android Tablet, read- Complete Note on What is Rooting and Benefits of Rooting Android Tablet.

So, want to root your Galaxy Note 10.1 SHW-M480S? Continue reading this page to get all the necessary steps to successfully root your device. The root file (CF-Auto-Root) we used in this tutorial is safe and have nearly 100% success rate. Well use Odin software to flash the root file.

The tutorial is made with simple step by step guide, so that even an android newbie user can follow and successfully root his/her device. However, in this process you may loss your personal data and settings. So, we recommend you to follow all the backup instructions before proceed to rooting guide.

Caution

  • This rooting tutorial is only applicable for Samsung Galaxy Note 10.1 SHW-M480S model (p4noterfskt). So, dont try this in any other android device. Check your device model number from- Settings-About Tablet
  • Rooting voids your Tablets manufacturer warranty. However, you can get back the warranty anytime by flashing official firmware.
  • This guide is for educational purpose and you should try this at your own risk. We are not responsible if your device experience a soft brick after following this tutorial.

Pre-Requisites:

  • Check battery percentage, charge your device to a decent level of at least 60% battery power. Your device should not turn off during installation.
  • Turn on USB Debugging mode, go to Settings-Developer Options-USB Debugging
  • Backup important data and settings to external storage- follow this guide
  • Install USB driver for your device on your computer- Download Samsung USB Driver
All the above pre-requisites are very important and must be followed before proceed to installation guide. Hope you get all the above points and done as mentioned. Now, you are ready to move to the final step of this tutorial where we have arranged a step by step details guide on how to root Galaxy Note 10.1 SHW-M480S running on official firmware.

How to Root Galaxy Note 10.1 SHW-M480S Running Android 4.1.2 Jelly Bean through Odin:

  1. Download CF-Auto-Root for Galaxy Note 10.1 M480S and extract the Zip fileCF-Auto-Root-p4noterfskt-p4noterfskt-shwm480s.zip
  2. Download Odin 3.07 and extract the Zip file: Odin 3.07.Zip
  3. Now, Switch off your Tablet and boot Galaxy Note 10.1 M480S into Download Mode by pressing and holding the Volume Down and Power buttons together (long press until the boot screen appear), now press Volume Up key to proceed to Download Mode.
  4. Run the Odin3 v3.07.exe file as an administrator (Right click on the .exe file and click on Run as administrator)
  5. Now connect your Galaxy Note 10.1 M480S to your computer via USB cable
  6. In Odin3 screen, you should see a COM Port number like “0:[COM7]” at ID:COM section and “Added!” text at the message box. This means your device has been detected by Odin3.
  7. Make sure that, only the “Auto Reboot” and “F. Reset Time” options are checked.
  8. Now, click on the PDA button and select the CF-Auto-Root-p4noterfskt-p4noterfskt-shwm480s.tar.md5 file.
  9. Finally, click on the Start button to begin the rooting process, wait few moments.
  10. Once completed, you would see “PASS!” message in ID:COM port having green background
  11. Your Tablet should automatically reboot after completion
  12. You can now disconnect your Tablet from computer
  13. Finish
Congrats! You have completed the tutorial to root Galaxy Note 10.1 M480S running on official firmware. Hope you successfully done the rooting process. If you followed everything as mentioned in the above tutorial, then your Galaxy Note 10.1 M480S should now rooted and you have complete control over your device. Now, install apps that ask root permission or flash various custom ROMs. To verify your device is rooted or not, you can download and run the Root Checker App from Google Play Store. If you have any doubt or query about the tutorial, feel free to contact with us using the comment form below, and share your rooting experience with us.
Read More..

I Phone 4 detailed explanation of the and how to deal with him 2 100 working solution

I Phone 4 detailed explanation of the and how to deal with him 2 100% working solution,I Phone 4 detailed explanation of the and how to deal with him 2 100% working solution,
I Phone 4 detailed explanation of the and how to deal with him 100% working solution
 see this step i hope u think and i hope u have any idia,
Read More..

Thursday, September 25, 2014

How To UpdateAndroid 4 4 2 KitKat Mahdi ROM For Verizon LG G2 VS980

Google has recently launched its latest Android firmware 4.4.2 KitKat for many Nexus devices. Officials 4.4.2 AOSP release KitKat largely without much customization. If you want to enjoy a KitKat customized Android 4.4.2 on a Verizon LG VS980 G2 then flash or install a custom ROM Mahdi. The latest version of the Mahdi launched recently which is based on Android 4.4.2 KitKat and fully supports Verizon LG VS980 G2. Continue reading this guide to learn how to install Android 4.4.2 custom ROM based on the KitKat Mahdi G2 Verizon LG VS980.
Warning!

This tutorial is only for Verizon LG G2 VS980. Don’t try this guide on any other Android device. Also, we are not responsible for any damage caused due to the instruction given in this page. Try this at your own risk. However, it is very unlikely that your device will be damaged if you follow all the instructions as it is which are mentioned in procedure.

Pre Requisites:

1. Backup your device data. You can follow our ultimate backup guide.

2. Make sure your device have at least 60% battery power. You can install an app like Battery Notifier BT Free on your Android device to check it easily.

3. You already have USB Driver Installed for Verizon LG G2 VS980 in your PC. [Download USB Drivers]

4. Make sure USB Debugging is enabled otherwise you won’t able to transfer file between PC and Verizon LG G2 VS980.

5. Your device have latest CWM version 6.0.4.4 and up or TWRP 2.6.1 and up installed.

If you done everything that we mentioned above then you are ready to follow step-by-step guide on how to install Android 4.4.2 KitKat based MahdiROM on Verizon LG G2 VS980.

File Required(Download by clicking on it)
  1. Mahdi Android 4.4.2 KitKat ROM For Verizon LG G2 VS980 [Filename: mahdi-2.4-vs980-20140105.zip]
  2. Google Apps [Filename: gapps-kk-20131119.zip] or any other KitKat Gapps
How to Install Android 4.4.2 KitKat based Mahdi ROM on Verizon LG G2 VS980
  1. Connect your device to PC using USB cable and then copy downloaded files to the SD card of your device.Important: Don’t extract any files.
  2. Disconnect USB and then turn off your Verizon LG G2 VS980.
  3. Now, Boot into recovery mode. To do so, press and hold Volume down & Power, when the LG logo appears release and press them again, then press the Power button three times. In recovery use Volume Keys to navigate between option and Power or Home Key to select an option. 
  4. Perform a Nandroid backup of your existing ROM that you can restore later if this new ROM not work or you want to go back into your previous ROM. To perform a backup, select Backup and Restore, then on the next Lcd, select Backup again. Go back to main recovery menu after backup is complete.
  5. Now, perform data wiping task. To do so, select wipe data/factory reset, then select Yes on next Lcd to confirm your action. Wait few minutes till the data wipe is complete. Now come back to CWM recovery main menu. Select wipe cache partition and after wiping process done, select Wipe Dalvik Cache under advanceoption to perform Dalvik cache wiping.
  6. Select install zip from sdcard, then select choose zip from sdcard. Now, locate the Mahdi ROM Zip file that you copied earlier in Step 1 and select it by pressing Power button. Confirm installation by selecting Yes – Install _____.zip on the next Lcd. The ROM installation will begin.
  7. Once the ROM installation process end, repeat the step 6 but choose the gapps-kk-20131119.zip file instead of ROM zip to install the Google apps package.
  8. When installation is completed, go back to the main recovery menu and select reboot system now to reboot your Verizon LG G2 VS980 and boot up into rooted Android 4.4.2 KitKat ROM Mahdi. 
  9. Returning to Previous ROM: To go back to your previous ROM, boot into recovery, select backup and restore then restore your previous ROM by selecting it from the list.
Congrats! Android 4.4.2 KitKat firmware based custom ROM Mahdi is now installed and running on your Verizon LG G2 VS980. [Note: Root is turned off by default in CM derived ROMs, you must enable developer settings first (tap the build number 8 times under about device), then enable root under Developer Settings] [source]
Read More..

Thursday, September 18, 2014

AT T Samsung Infuse 4G I997 Android 2 3 6 Gingerbread Stock ROMs


Stock ROM I997UCKK3 [Android 2.3.6] 21.11.2011
Stock ROM I997UCKK2 [Android 2.3.6] 09.11.2011
Stock ROM I997UCKK1 [Android 2.3.6] 09.11.2011
Stock ROM I997UCKJ4 [Android 2.3.6] 28.10.2011
Stock ROM I997UCKJ2 [Android 2.3.6]14.10.2011

Odin Guide for Flashing the Stock ROMs
1) Install Kies on your PC just to ensure that the drivers for the Infuse 4G are already installed
2) Download and unzip the stock ROM files packaged
3) Use and run Odin3 v1.7.exe
4) Set the Infuse 4G into download mode - turn it off or pull battery then in-place it back again ,
( Just press and hold both Volume Buttons while plugging in the USB cable cord)
5) In Odin, the COM: Port box will display that your phone is already connected
If there is multiple files in the packaged you may just put the desired files on each designated slots.
6) Click the PDA button and choose the PDA_.tar.md5
7) Click the PHONE button and choose MODEM_.tar.md5
Bootloader for APBOOT_.tar.md5 and CSC file for CSC slots.
8) Press Start
9) Once it finishes, it will reboot to recovery. Just select "delete all user data" and then select reboot system now.

Heres the stock rooted version, deodexed with busybox and SU and Zipalligned installed. The installation is simple - just download the Zip, Boot into recovery, wipe data and dalvik cache then flash and reboot.

Stock I997UCKK3 Rooted, Deodexed, Busybox, Zipaligned, 2.3.6
by dman3285  
Stock I997UCKJ4 Rooted, Deodexed, Busybox, 2.3.6 
Stock I997UCKJ2 Rooted, Deodexed, Busybox, 2.3.6
Stock I997UCKK1 Rooted, Deodexed, Busybox, ZipAligned 2.3.6
Read More..

Friday, September 12, 2014

update 2 Chronic Dev Team Releases Update to Absinthe Jailbreak Utility

Chronic Dev-Team Releases Update to Absinthe Jailbreak Utility.

The Chronic Dev-Team has released an update to its Absinthe jailbreak utility that brings support for Mac OS X 10.5 (Intel + PPC).


Whats New in Version 0.4
● Mac: added support for OSX 10.5, PPC and Intel CPU
● added consistency check on startup to make sure required files are in place
● Windows: fixed bug in payload generator that might cause a crash

You can download the latest version of Absinthe from here.
Whats New in Version 0.4
● Mac: added support for OSX 10.5, PPC and Intel CPU
● added consistency check on startup to make sure required files are in place
● Windows: fixed bug in payload generator that might cause a crash

You can download the latest version of Absinthe from here.


Absinthe Jailbreak Gide
************************************************** ************************
Step One
Download the latest version of Absinthe from here.

Step Two
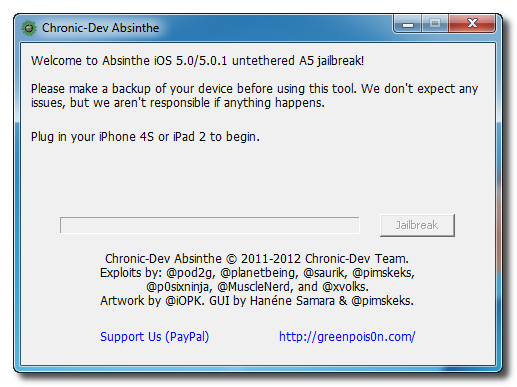
Double click to extract the downloaded archive and launch the Absinthe application.


Step Three
As prompted, connect your iPhone 4S to the computer via USB. Make sure to remove any passcodes or VPN settings youve previously set.


Step Four
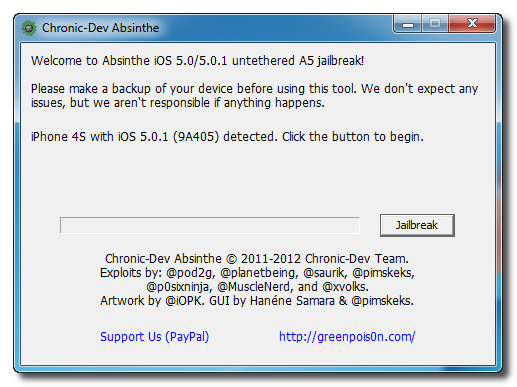
Click the Jailbreak button to begin


Step Five
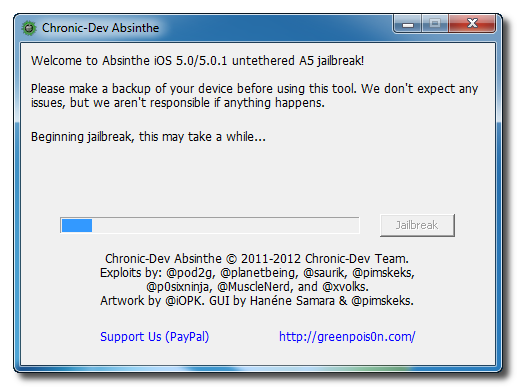
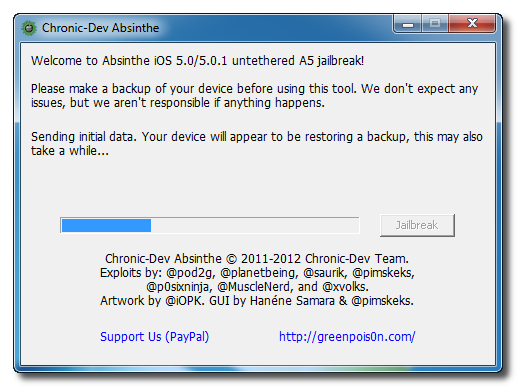
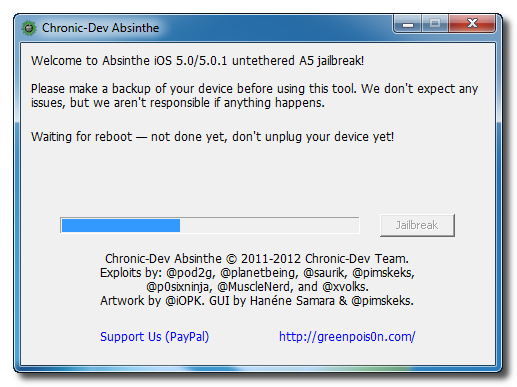
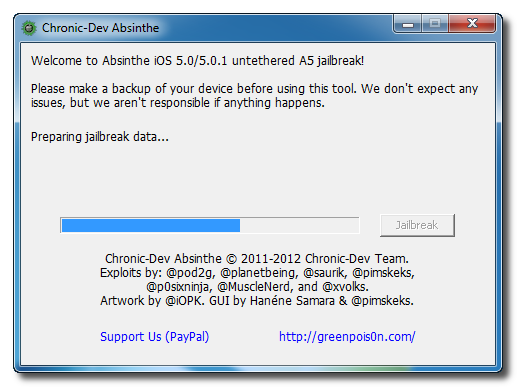
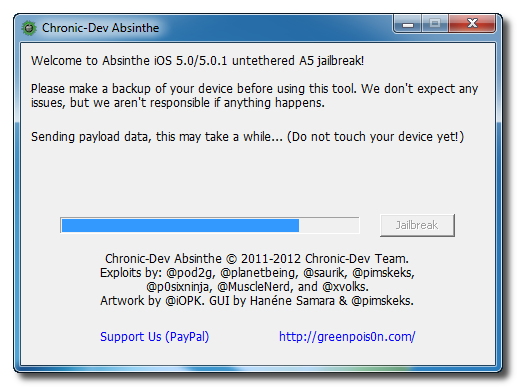
The application will take you through several steps of the jailbreak: Sending initial data, waiting for reboot, waiting for device to finish booting, Preparing jailbreak data, and Sending payload data.


tep Six
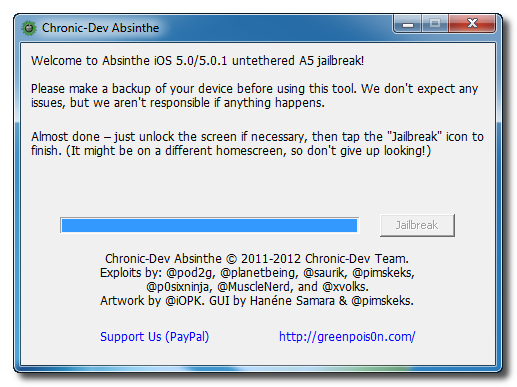
You will be informed that the jailbreak is Almost done.


Step Seven
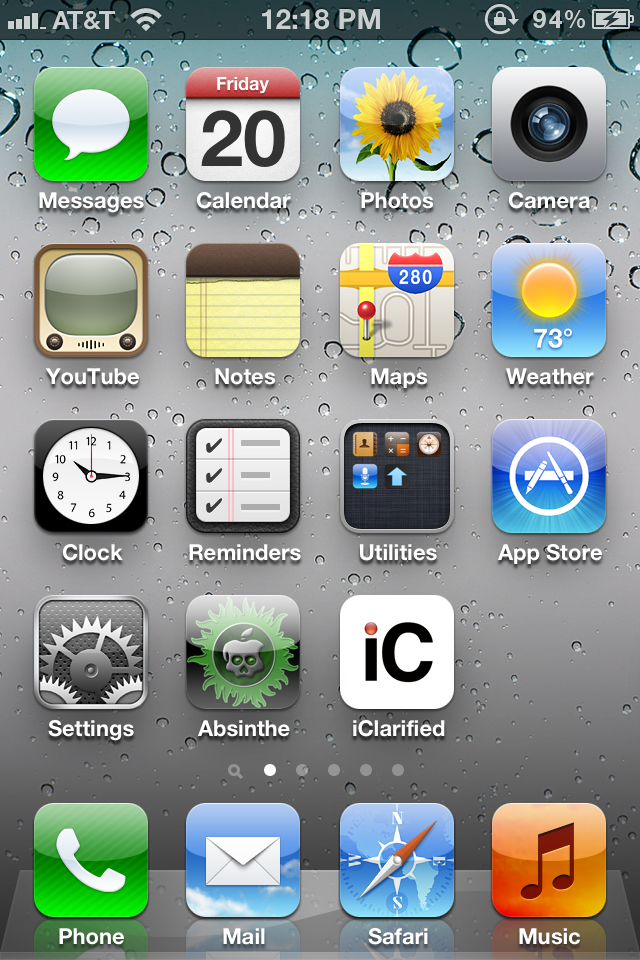
On your device, locate the Absinthe icon and press it to complete your jailbreak. It could be on any homeLcd.


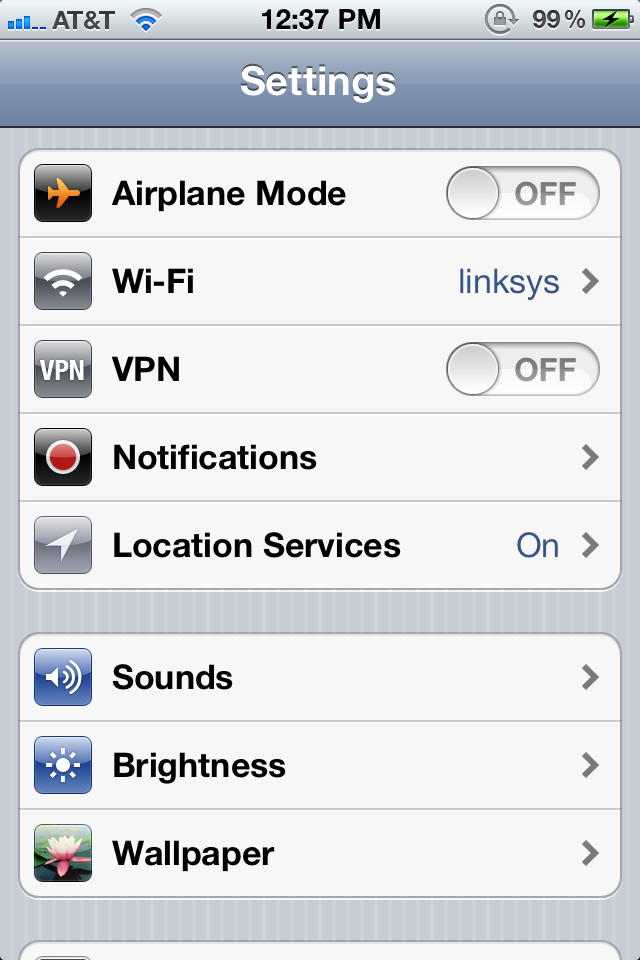
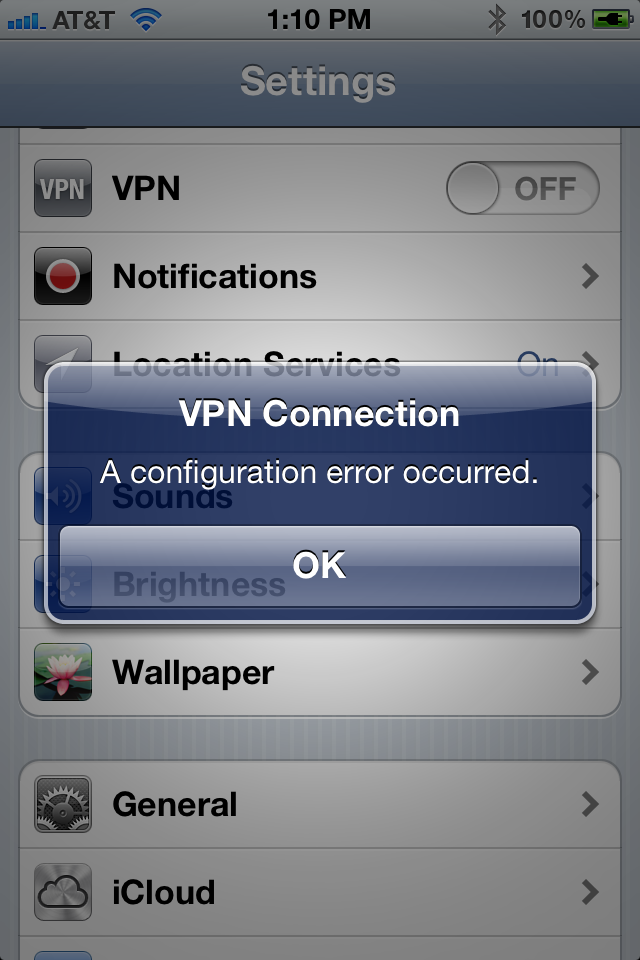
If the server is down and you get an Error establishing a database connection message then tap the Settings icon on your springboard and turn on VPN.


You will get a configuration error; however, after about a minute your device will reboot with Cydia on the Springboard!
Read More..

Wednesday, September 10, 2014

Easy Ways to Update Galaxy S4 Mini I9190 with Android 4 2 2 DXUAMK 2 Jelly Bean Official Firmware

For Samsung Galaxy S4 Mini with Model Number GT-I9190 has been getting updates Jelly Bean Android 4.2.2 with the latest firmware base I9195XXUBML1. The new firmware is now officially available as an Over-The-Air (OTA) and via the Samsung Kies update.


Firmware details
PDA: I9190DXUAMK2
CSC: I9190OLBAMK3
MODEM: I9190DXUAMK2
Version: Android 4.2.2
Build date: Nov 11, 2013
Regions: Indonesia, Malaysia, Singapore, Vietnam, Thailand

Samsung Galaxy S4 Mini I9190 users who missed the OTA update notification or unable to access the update over Samsung KIES, may follow our step-by-step guide to install the update manually.

Pre-requisites
1. Install USB Drivers for Samsung Galaxy S4 Mini on the computer.
2. Enable USB Debugging Mode on the phone by navigating to Settings >> Developer Options.
3. Make a backup of all your important data before following the guide.
4. The Galaxy S4 Mini should be factory unlocked and not locked to any particular carrier.
5. Ensure the battery of the phone is charged more than 80 percent.
6. The Android 4.2.2 DXUAMK2 Jelly Bean firmware is compatible only with the 3G version of the Samsung Galaxy S4 Mini (GT-I9190). Applying this to any incorrect variant might brick the device. Verify the model number of the Galaxy S4 Mini by navigating to Settings >> About Phone.

Files Required

1. Android 4.2.2 DXUAMK2 Jelly Bean Firmware for Galaxy S4 Mini I9190
2. Odin 3.07

Steps to Update Galaxy S4 Mini I9190 with Android 4.2.2 DXUAMK2 Jelly Bean Firmware
Step 1: Extract Firmware zip file using winrar/7zip/winzip or any other extracting tool, you will get a .tar.md5 file and some other files.
Step 2: Extract Odin zip file and you will get Odin3 v3.07.exe along with few other files.
Step 3: Switch off the Galaxy S4 Mini.
Step 4: Boot the device into Download Mode by pressing and holding Volume Down, Homeand Power buttons together until a construction Android robot icon with a warning triangle appears on Lcd. Now press the Volume Up button to enter Download Mode.
Step 5: Run Odin on the computer as an Administrator.
Step 6: Connect the Galaxy S4 Mini to the computer using USB cable while it is in the Download Mode. Wait until Odin detects the device. When the device is connected successfully, the ID: COM box will turn to light blue with the COM port number. Additionally, the successful connected will be indicated by a message saying Added.

Note: If the Added message does not appear, then try re-install USB drivers or changing the port on the computer.
Step 7: Select the following files in Odin from extracted I9190DXUAMK2 firmware folder:
  • Click the PDA button and select the .tar.md5 file.
  • Click the Phone button and select file with MODEM in its name. Ignore if there is no such file.
  • Click the CSC button and select file with CSC in its name. Ignore if there is no such file.
  • Click the PIT button and select the .pit file. Ignore if there is no such file.

Step 8: In Odin, enable Auto Reboot and F. Reset Time checkboxes. Also, ensure the Re-Partition checkbox is chosen only if a .pit file was chosen in the previous step.
Step 9: Verify everything suggested in Step 7 and Step 8 is done correctly. Then hit the Startbutton to begin the installation process.
Step 10: Once the installation process is completed, your phone will restart and soon you will see a PASS message with green background in the left-most box at the very top of the Odin. You can now unplug the USB cable to disconnect it from the computer.

Samsung Galaxy S4 Mini I9190 should be now updated with official Android 4.2.2 DXUAMK2 Jelly Bean. Head over to Settings >> About Phone to verify the software version running on the device.

Note: If Galaxy S4 Mini I9190 stuck at booting animation after Step 10 then go to recovery mode (press and hold the Volume Up, Home and Power buttons together) and perform Wipe data/Factory Reset and Wipe Cache Partition task before selecting reboot system now function. In recovery mode use Volume keys to navigate between options and Power key to select the option. Please note, performing wiping task will erase your device internal memory data and not external SD card data.
Read More..

Thursday, September 4, 2014

T679MUGKK1 Samsung Galaxy W SGH T679M Bell Canada Android 2 3 5 Stock ROM

Bell

I got this info with AnTuTu, so I figured out that this is an Android 2.3.5 Gingerbread firmware version.
GT-I8150 Board
ARMv7 Processor (VFPv3,NEON)
122.88 ~ 1024.0 Mhz
480x800
GPU - Qualcomm Adreno (TM) 205
OpenGL ES-CM 1.1
Android 2.3.5
GINGERBREAD.UGKK1
Linux version 2.6.35.7-perf-T679MUGKK1-CL677250 (se.infra@SEP-73) (gcc version 4.4.0 (GCC)) #3

This stock ROM is useful for returning back the device into original factory default firmware setting, just in-case in need of warranty back purposes after installing any unofficial ROM, rooting and also useful to fix softbrick. Just use the ROM carefully, you at your own.

Firmware info:
PDA: T679MUGKK1 CSC: T679MBMCKK1
Phone: T679MUGKK1
Version: Android 2.3.5 Gingebread
Stock ROM Download link:
SGH-T679_BMC_T679MUGKK1_T679MBMCKK1
Read More..

Monday, September 1, 2014

Tablet T733 MAINBORD v2 0 Update Done To 4 2 1 With Orginal Rom

Tablet -T733 MAINBORD-v2.0 Update Done To 4.2.1 With Orginal Rom
PCB ID -T733 Mainboard v2.0 , 2013/07/01

T733 MAINBORD-v2.0 : Rom Link1

Flashing Done


PCB IMAGE
Read More..

Saturday, August 30, 2014

LG G Pro 2 Tips and Tricks

How to Factory Reset LG G Pro 2

Resetting your LG G Pro 2 will restore the default settings of your device. It will also delete all your files on your phone, so it is recommended to backup all your important files on your computer.

Luckily in LG G Pro 2, you can backup your data through your phone on privacy settings before wiping all the data on your phone. But if you want to erase all the content on your phone, then there’s no need for you to backup your data.

To backup your data:

You can only backup app data, Wi-Fi passwords, and other settings to Google servers.

Step 1. Tap on the Home Icon > Menu icon.

Step 2. Select System settings > Backup & reset.

Step 3. Double check if the Backup account is correct.

Step 4. Then tap Back up my data. (A blue checkmark will appear.)

Step 5. If you want to set to the automatic restore backups, tap Automatic restore. (A blue checkmark will appear.)


To Factory Reset Your LG G Pro 2:

Step 1. Tap on the Home Icon Menu icon.

Step 2. Select System settings > Backup & reset.

Step 3. If you want to proceed in restoring the factory settings, tap Factory data reset.

Step 4. Then tap Reset phone.

Step 5. Enter the unlock sequence if you have, then tap Erase everything to confirm.


How to Hard Reset LG G Pro 2

We have our own reasons why we hard reset our device. Maybe we want to delete all the files and restore the device to its original state. It could also be the device may be malfunctioning or so slow and it needs to be reset. Use this method only if the factory reset wont work.

Restoring the default settings or factory reset your LG G Pro 2 will delete all your existing files. It is recommended to backup your important files on your computer before attempting to reset your device.

Step 1. Turn the phone off.

Step 2. Press and hold Volume Down Key and Power/Lock Key at the same time.

Step 3. Release the keys when the FACTORY HARD RESET screen appears.

Step 4. Read the warning and press the Power/Lock Key to confirm. Press the Volume Keys to cancel.

Step 5. Press the Power/Lock Key to confirm once more or press the Volume Keys to cancel.

Step 6. Your device will perform a hard reset.


How To Make Your LG G Pro 2 a WiFi Hotspot

Do you want to share your Internet connection for your friends? With LG G Pro 2, you can now share your connection with up to 5-8 devices by turning on the portable Wi-Fi hotspot. You will notice an icon in the Status bar when your phone is sharing a data connection.

Follow these steps on how to make your LG G Pro 2 a WiFi hotspot:

Step 1. Tap on the Home Icon > Menu icon.

Step 2. Select All settings > Tap Networks tab.

Step 3. Then choose Tethering & Networks.

Step 4. Go to Mobile Hotspot checkbox to activate the feature.

A blue checkmark indicates that the feature is active. Tap Set up Mobile Hotspot to change the SSID, password, security type, and other hotspot options.


Setting Swipe, Face Unlock, Pattern, PIN, Password to Unlock Your LG G Pro 2

You can slide the screen without entering any information, utilize facial recognition, draw your own unlock Pattern or enter a PIN or Password to add more security to your device.

To set Swipe, Face Unlock, Pattern, PIN, or Password:
  • From the Home screen tap the Menu icon.
  • Select Lock screen settings.
  • Go to Select screen lock
  • Then choose from Swipe, Face Unlock, Pattern, PIN, or Password and enter the desired information.

WARNING: You are allowed 5 attempts to enter your screen unlock information. If you used up all 5
opportunities, you will have to wait 30 seconds to attempt unlocking the phone again.


How to Add Applications to the Homescreen on LG G Pro 2

By adding applications on your homescreen, youre creating a hassle-free phone experience. Important apps or apps that you usually open are accessible if you put it right on your homescreen instead of going thru lot of  tapping and clicking. Now heres how you can add applications that you use most often on your LG G Pro 2 smartphone.

To add shortcuts to apps or Widgets on the Home screen:

1 Select a location (Home screen canvas) to add an item by swiping the Home screen from left to right or vice versa.

2 Touch and hold an empty part of the Home screen.

3 Tap the type of item you want to add on the screen: Apps, Downloads, Widgets, or Wallpapers.

4 Tap the desired App or Widget.

5 You will see a new icon on the Home screen.

To place it on a different canvas, touch and hold it to drag it to the desired location and release your finger from the screen.

TIP: To add a preloaded application or an application you have downloaded from Play Store to the Home screen, simply touch and hold the icon you want in the Apps screen and drag it to the desired Home screen canvas.


How to Turn On Direct/Android Beam on LG G Pro 2

When this feature is turned on, you can beam app content to another NFC-capable device by holding the devices close together. For example, you can beam Browser pages, YouTube videos, contacts, Polaris Office 4 files, and more. Just bring the devices together (typically back to back) and then touch your screen. The app determines what gets beamed.
    To activate Direct/Android Beam:

    • From the Home screen, tap the Menu icon.
    • Select All settings, then go to Share & Connect 
    • Finally, Direct/Android Beam.


    NOTE: You must enable NFC to activate Direct/Android Beam.


    How to Connect a Wi-Fi Network on LG G Pro 2

    To use Wi-Fi on your phone, you need access to a wireless access point, or "hotspot." Some access points are open and you can simply connect to them. Others are hidden or implement other security features, so you must configure your phone in order to connect to them.

    Turn on Wi-Fi:

    From the Home Screen , open the Notifications panel and tap on the Wi-Fi icon to turn Wi-Fi on. A blue colored Wi-Fi icon indicates that Wi-Fi is on.

    You can also use this method:


    • From the Home screen, tap the Menu icon.
    • Tap All settings.
    • Choose Networks tab. 
    • Then tap the Wi-Fi switch to turn it on.


    To connect to a Wi-Fi Network

    Turn off Wi-Fi when youre not using it to extend the life of your battery.

    Step 1. From the Home screen, tap the Menu icon and tap All settings > Networks tab.

    Step 2. Tap the Wi-Fi switch to turn it on and begin scanning for available Wi-Fi networks.


    How to Extend Battery Life of LG G Pro 2

    Battery Life depends on how you use your device. For LG G Pro 2 device, if you want to save your battery to last longer hours, you may need to adjust your settings. Follow these suggestions:


    • Turn off radio communications that you arent using, such as Wi-Fi, Bluetooth, or GPS.  Wi-Fi will be set to On the first time you use your newly purchased phone.
    • Lower screen brightness and set a shorter screen timeout.
    • Turn off automatic syncing for Gmail, Calendar, Contacts, and other applications.
    • Some applications you have downloaded may cause your battery power to be reduced.
    • While using downloaded applications, check the battery charge level.


    To view the battery charge level

    Step 1. From the Home screen, tap the Menu icon and tap All settings > General tab > Battery.

    Step 2. The battery status (charging or discharging) and level are displayed on the screen.

    To monitor and control what uses the battery

    Step 1. From the Home screen, tap the Menu icon and tap All settings > General tab > Battery .

    Step 2. Tap the battery icon.

    Step 3. A list all of the applications or services using battery power from the greatest amount of energy used to the least amount. You can also use it to turn off applications or services, if they are consuming too much power. Tap any of the listed items for more options.


    Creating Application Folders on the Home screen of Your LG G Pro 2

    You can create application folders to hold similar applications if you wish. 

    On the Home screen:

    Step 1. Touch and hold an icon to unlock it from its positions. Then drag it over another icon and release it.

    Step 2. A folder will be created.

    On the Apps screen:

    Step 1. From the Home screen, tap the Menu icon to open the Apps screen.

    Step 2. Tap , then touch and hold the desired icon to release it from its position.

    Step 3. Drag the icon over another icon and release it to create a folder.


    Customizing the Apps screen on Your LG G Pro 2

    Step 1. From the Home screen, tap the Menu icon

    Step 2. Tap the Apps tab at the top of the screen to go to the Apps screen, if it is not already selected. 

    Step 3 Touch the Menu Key to customize the Apps screen using Search, Sort by, Show large icons, App menu wallpaper, Hide/Show apps.

    Adding and Editing Email Accounts 

    To add an email account:

    1. From the Home screen, tap the Apps Key  > Email icon.
    2. Select the desired email provider.

    If an email account is already set up, the wizard is not activated automatically.

    In this case, tap the Menu Key > Settings + sign.

    To change account settings

    1. Open the Email application.
    2. Tap the Menu Key > Settings.
    3. Tap General settings to adjust the settings that affect all accounts. Or tap an individual account to adjust settings only for that account.

    To delete an email account

    1. Open the Email application.
    2. Tap the Menu Key > Settings > Trash bin icon.
    3. Select the account(s) you want to delete and tap Remove.
    4. Tap Yes to confirm.

    Adding an account to your phone

    1. From the Home screen, tap the Menu Key > All settings > General tab > Accounts & sync.
    2. Tap ADD ACCOUNT.
    3. Tap any social networking service you want to use.
    4. Enter your email address and password that you set up for your social networking account, then tap Log in.

    Syncing accounts on your phone

    You can sync information from your social networking accounts with your Contacts and other functions on your phone, if applicable.

    1. From the Home screen, tap the Menu Key > All settings > General tab > Accounts & sync.
    2. Checkmark Auto-sync data to activate automatic synchronization.
    3. Tap the account you want to sync.
    4. Check the desired options, such as Contacts.

    A checkmark indicates that synchronization has been enabled.

    Removing accounts on your phone

    1. From the Home screen, tap the Menu Key > All settings > General tab > Accounts & sync.
    2. Tap the account(s) you want to delete, then Menu Key > Remove account > OK.

    Setting a photo as the wallpaper

    1. Tap the photo you want to set as wallpaper to open it.
    2. Tap the Menu Key > Set image as > Home screen wallpaper.
    3. Crop the image as desired and tap OK.

    Recording a video and taking a picture while recording

    1. From the Home screen, tap Camera icon and slide the Mode Switch button down to change to Video mode. The Capture icon will change to Record icon.
    2. The video camera’s viewfinder will appear on the screen.
    3. Holding the phone horizontally, point the lens towards the subject of the video.
    4. Tap Record icon once to start recording.
    5. A timer showing the length of the video is displayed at the top left corner of the screen.
    6. Tap Stop to stop recording.

    TIP: Tap the Picture icon on the screen to take a picture while youre recording.

    How to save music/video files to the phone

    Connect your phone to the PC using the USB cable.
    Youll receive a notification that the USB is connected and the USB connection type prompt is displayed. Tap Media sync (MTP) or Camera (PTP) and open the folder you wish to view from your computer.

    Save music or video files from the PC to the phone.
    - You may copy or move files from the PC to the phones removable storage using a card reader.
    - If there is a video file with a subtitle file (.smi file with the same name as the video file), place them in the same folder to display the subtitle automatically when playing the video file.
    - When downloading music or video files, copyright must be secured. Please note that a corrupted file or file with a wrong extension may cause damage to the phone.

    Using SmartShare

    The SmartShare application uses DLNA (Digital Living Network Alliance) technology to share digital content through a wireless network. Both Phones must be DLNA certified to support this feature. 

    To turn SmartShare on and allow sharing contents

    1. From the Home screen, tap the Apps Key > SmartShare .
    2. Tap the Menu Key > Settings.
    3. Tap Contents share to allows sharing contents with nearby devices. 
     - Tap Sharing requests to select an action to perform when receiving sharing requests.
     - Tap Receive files if you would like to allow the other devices to upload media files to my phone.
    4. Tap Shared contents and select what type of file you want to share.
    NOTE: Make sure that the Receive files option in the Settings menu is checked.
    5. SmartShare is now activated and ready to share contents.

    To control your renderer devices

    Let your renderer device (e.g. TV) play multimedia contents from your remote content library (e.g. PC)

    NOTE: Make sure that the DLNA functionality of your devices is properly configured (e.g. TV and PC)

    1. From the Home screen, tap the Apps Key > SmartShare icon.
    2. Tap the Player button and select the device from the renderer device list.
    3. Tap the Library button and select the device from the remote content library.
    4. You can browse the content library.
    5. Tap the Menu Key > Play.

    To share contents from your phone to your renderer device (e.g. TV) 

    NOTE: Make sure that your renderer device is properly configured.

    1. While viewing pictures and videos in the Gallery application, tap at the top of the screen.
    2. Select the device from the renderer device list to play the files.

    NOTE: Follow the similar steps to use the Music, Videos or Polaris Office to share contents.

    NOTICE: Check that your device is connected with your home network using Wi-Fi connection to use this application. Some DLNA enabled devices (e.g. TV) support only the DMP feature of DLNA and will
    not appear in the renderer device list. Your device might not be able to play some contents.

    To download contents from the remote content library

    1. From the Home screen, tap the Apps Key > SmartShare .
    2. Tap the Library button and select the device from the remote content library.
    3. You can browse the content library.
    4. Tap and hold a content thumbnail and then touch Download.

    NOTICE: A few types of contents are not supported.

    To upload contents from the remote content library

    1. From the Home screen, tap the Apps Key > SmartShare .
    2. Tap the Library button and select My phone.
    3. You can browse the content library.
    4. Tap and hold a content thumbnail and then touch Upload.
    5 Select a device from the remote content library to be uploaded.

    NOTICE: Some DLNA enabled devices do not support the DMS upload functionality and will not upload files. A few types of contents are not supported.


    Read More..

    Friday, August 29, 2014

    How To Root Your Galaxy Note 8 0 GT N5110 Android 4 2 2 Firmware Running on Guide

    Samsung Galaxy Note 8.0 GT-N5110 (WiFi) recently get updated to the N5110XXCMK1 4.2.2 Jelly Bean Firmware. If you yet to update the firmware, then update the same by following the above link. Hope you updated this latest firmware on your device and now you can root the same using our simple tutorial below. The below guide will help you to root XXCMK1 4.2.2 Jelly Bean Firmware running on Galaxy Note 8.0 GT-N5110. Continue reading the tutorial for complete guide.
    After updating official firmware, your device no longer belongs to rooted device. So, after official firmware update, many of us prefer to root our device to enjoy some additional features that unrooted android device doesnt offer. With a rooted android device, you can install apps that ask root permission, flash various custom ROMs, install MODs and tweak various features. Root removes default bloatware apps that free-up lots of memory space and extend the battery life. However, once rooted, manufacturer warranty will be void. But you can regain the warranty by following proper unroot process. To know more about benefits of rooting android device, read- Complete Note on What is Rooting and Benefits of Rooting Android Tablet.

    So, want to root Galaxy Note 8.0 GT-N5110 Running N5110XXCMK1 4.2.2 Jelly Bean Firmware? Continue reading this page to get all the necessary steps to successfully root your device. The root file (CF-Auto-Root) we used in this tutorial is safe and have nearly 100% success rate. Well use Odin software to flash the root file.

    The tutorial is made with simple step by step guide, so that even an android newbie user can follow and successfully root his/her device. However, in this process you may loss your personal data and settings. So, we recommend you to follow all the backup instructions before proceed to rooting guide.

    Warning!

    • This rooting tutorial is only applicable for Samsung Galaxy Note 8.0 GT-N5110 model (konawifi). So, dont try this in any other android device. Check your device model number from- Settings-About Tablet
    • Rooting voids your Tablets manufacturer warranty. However, you can get back the warranty anytime by following proper unroot process or by flashing official firmware.
    • This guide is for educational purpose and you should try this at your own risk. We are not responsible if your device experience a soft brick after following this tutorial.

    Pre-Requisites:

    • Check battery percentage, charge your device to a decent level of at least 60% battery power. Your device should not turn off during installation.
    • Turn on USB Debugging mode, go to Settings-Developer Options-USB Debugging
    • Backup important data and settings to external storage- follow this guide
    • Install USB driver for your device on your computer- Download Samsung USB Driver
    All the above pre-requisites are very important and must be followed before proceed to installation guide. Hope you get all the above points and done as mentioned. Now, you are ready to move to the final step of this tutorial where we have arranged a step by step details guide to root Galaxy Note 8.0 GT-N5110 running  N5110XXCMK1 4.2.2 Jelly Bean firmware.

    Steps to Root Galaxy Note 8.0 GT-N5110 Running N5110XXCMK1 4.2.2 Jelly Bean through Odin:

    1. Download CF-Auto-Root for Galaxy Note 8.0 N5110 and extract the Zip file: CF-Auto-Root-konawifi-konawifixx-gtn5110.zip
    2. Download Odin 3.09 and extract the Zip file: Odin3_V3.09.Zip
    3. Now, Switch off your Tablet and boot Galaxy Note 8.0 N5110 into Download Mode by pressing and holding the Volume Down+Power buttons together (long press until the boot screen appear), now press Volume Up key to proceed to Download Mode.
    4. Run the Odin3 v3.09.exe file as an administrator (Right click on the .exe file and click on Run as administrator)
    5. Now connect your Galaxy Note 8.0 N5110 to your computer via USB cable
    6. In Odin3 screen, you should see a COM Port number like “0:[COM7]” at ID:COM section and “Added!” text at the message box. This means your device has been detected by Odin3.
    7. Make sure that, only the “Auto Reboot” and “F. Reset Time” options are checked.
    8. Now, click on the PDA button and select the CF-Auto-Root-konawifi-konawifixx-gtn5110.tar.md5 file.
    9. Finally, click on the Start button to begin the rooting process, wait few moments.
    10. Once completed, you would see “PASS!” message in ID:COM port having green background
    11. Your Tablet should automatically reboot after completion
    12. You can now disconnect your Tablet from computer
    13. Finish
    Congrats! You have completed the tutorial to root Galaxy Note 8.0 N5110 running N5110XXCMK1 4.2.2 Jelly Bean Firmware. Hope you successfully done the rooting process. If you followed everything as mentioned in the above tutorial, then your Galaxy Note 8.0 N5110 should now rooted and you have complete control over your device. Now, install apps that ask root permission or flash various custom ROMs. To verify your device is rooted or not, you can download and run the Root Checker App from Google Play Store. If you have any doubt or query about the tutorial, feel free to contact with us using the comment form below, and share your rooting experience with us.
    Read More..

    Monday, August 25, 2014

    Samsung Galaxy Ace 3 Latin S7270L Android 4 2 2 UBUANB1 Jelly Bean Official Firmware How to Update Guide


    Samsung has recently released a new Android 4.2.2 Jelly Bean update for the Latin version of Galaxy Ace 3 with model number GT-S7270L. The new official firmware is currently available as an Over-The-Air (OTA) update as well as through Samsung KIES.
    Firmware details
    PDA: S7270LUBUANB1
    CSC: S7270OXEANA3
    MODEM: S7270XXUANA2
    Version: Android 4.2.2
    Build date: Feb 26, 2014
    Regions: Panama
    Samsung Galaxy Ace 3 (Latin) S7270L users who missed the OTA update notification or unable to access the update over Samsung KIES, may follow our step-by-step guide to install the update manually.
    Pre-requisites
    1. Install USB Drivers for Samsung Galaxy Ace 3 on the computer.
    2. Enable USB Debugging Mode on the phone by navigating to Settings >> Developer Options.
    3. Make a backup of all your important data before following the guide.
    4. Ensure the battery of the phone is charged more than 80 percent.
    5. The Android 4.2.2 UBUANB1 Jelly Bean firmware is compatible only with the Latin version of Galaxy Ace 3 (GT-S7270L). Applying this to any incorrect variant might brick the device. Verify the model number of the Galaxy Ace 3 by navigating to Settings >> About Phone.

    Files Required
    1. Android 4.2.2 UBUANB1 Jelly Bean Firmware (Mirror Link) for Galaxy Ace 3 (Latin) S7270L
    2. Odin 3.07
    Steps to Update Galaxy Ace 3 (Latin) S7270L with Android 4.2.2 UBUANB1 Jelly Bean Firmware
    Step 1: Extract Firmware zip file using WinRAR/7-Zip/WinZip or any other extracting tool, you will get a .tar.md5 file and some other files (optional).
    Step 2: Extract Odin zip file and you will get Odin3 v3.07.exe along with few other files.
    Step 3: Switch off the Galaxy Ace 3.
    Step 4: Boot the device into Download Mode by pressing and holding Volume Down, Home and Power buttons together until a construction Android robot icon with a warning triangle appears on screen. Now press the Volume Up button to enter Download Mode.
    Step 5: Run Odin on the computer as an Administrator.
    Step 6: Connect the Galaxy Ace 3 to the computer using USB cable while it is in the Download Mode. Wait until Odin detects the device. When the device is connected successfully, the ID: COM box will turn to light blue with the COM port number. Additionally, the successful connected will be indicated by a message saying Added.

    Step 7: Select the following files in Odin from extracted S7270LUBUANB1 firmware folder:
    • Click the PDA button and select the .tar.md5 file.
    • Click the Phone button and select file with MODEM in its name. Ignore if there is no such file.
    • Click the CSC button and select file with CSC in its name. Ignore if there is no such file.
    • Click the PIT button and select the .pit file. Ignore if there is no such file.
    Step 8: In Odin, enable Auto Reboot and F. Reset Time checkboxes. Also, ensure the Re-Partition checkbox is chosen only if a .pit file was chosen in the previous step.
    Step 9: Verify everything suggested in Step 7 and Step 8 is done correctly. Then hit the Start button to begin the installation process.
    Step 10: Once the installation process is completed, your phone will restart and soon you will see a PASS message with green background in the left-most box at the very top of the Odin. You can now unplug the USB cable to disconnect it from the computer.

    Samsung Galaxy Ace 3 (Latin) S7270L should be now updated with Android 4.2.2 UBUANB1 Jelly Bean official firmware. Head over to Settings >> About Phone to verify the software version running on the device.

    Note: If Galaxy Ace 3 (Latin) S7270L stuck at booting animation after Step 10 then go to recovery mode (press and hold the Volume Up, Home and Power buttons together) and perform Wipe data/Factory Reset and Wipe Cache Partition task before selecting reboot system now function. In recovery mode use Volume keys to navigate between options and Power key to select the option. Please note, performing wiping task will erase your device internal memory data and not external SD card data.
    Read More..

    Sunday, August 24, 2014

    How to Update Samsung Galaxy Mega 6 3 I9200 with Android 4 4 2 XXUDNE4 KitKat Official Firmware Using Odin Guide


    Samsung Galaxy Mega 6.3 with model number GT-I9200 has started receiving Android 4.4.2 KitKat update with firmware build number I9200XXUDNE4. The new official firmware is currently available as an Over-The-Air (OTA) update as well as through Samsung KIES.
    Firmware details
    PDA: I9200XXUDNE4
    CSC: I9200SERDNE4
    MODEM: I9200XXUDNE4
    Version: Android 4.4.2
    Build date: May 21, 2014
    Regions: Russia
    Samsung Galaxy Mega 6.3 I9200 users who missed the OTA update notification or unable to access the update over Samsung KIES, can now download and install the same manually using our step-by-step guide.
    Pre-requisites
    1. Install USB Drivers for Samsung Galaxy Mega 6.3 on the computer.
    2. Enable USB Debugging Mode on the phone by navigating to Settings >> Developer Options.
    3. Make a backup of all your important data before following the guide.
    4. Ensure the battery of the phone is charged more than 80 percent.
    5. The Android 4.4.2 XXUDNE4 KitKat firmware is compatible only with the 3G version of Samsung Galaxy Mega 6.3 (GT-I9200). Applying this to any incorrect variant might brick the device. Verify the model number of the Galaxy Mega 6.3 by navigating to Settings >> About Phone.
    Files Required
    1. Android 4.4.2 XXUDNE4 KitKat Firmware (Mirror Link) for Galaxy Mega 6.3 I9200
    2. Odin 3.07
    Steps to Update Galaxy Mega 6.3 I9200 with Android 4.4.2 XXUDNE4 KitKat Firmware
    Step 1: Extract Firmware zip file using WinRAR/7-Zip/WinZip or any other extracting tool, you will get a .tar.md5 file and some other files (optional).
    Step 2: Extract Odin zip file and you will get Odin3 v3.07.exe along with few other files.
    Step 3: Switch off the Galaxy Mega 6.3.
    Step 4: Boot the device into Download Mode by pressing and holding Volume Down, Home and Power buttons together until a construction Android robot icon with a warning triangle appears on screen. Now press the Volume Up button to enter Download Mode.
    Step 5: Run Odin on the computer as an Administrator.
    Step 6: Connect the Galaxy Mega 6.3 to the computer using USB cable while it is in the Download Mode. Wait until Odin detects the device. When the device is connected successfully, the ID: COM box will turn to light blue with the COM port number. Additionally, the successful connected will be indicated by a message saying Added.
    Step 7: Select the following files in Odin from extracted I9200XXUDNE4 firmware folder:
    • Click the PDA button and select the .tar.md5 file.
    • Click the Phone button and select file with MODEM in its name. Ignore if there is no such file.
    • Click the CSC button and select file with CSC in its name. Ignore if there is no such file.
    • Click the PIT button and select the .pit file. Ignore if there is no such file.
    Step 8: In Odin, enable Auto Reboot and F. Reset Time checkboxes. Also, ensure the Re-Partition checkbox is chosen only if a .pit file was chosen in the previous step.
    Step 9: Verify everything suggested in Step 7 and Step 8 is done correctly. Then hit the Start button to begin the installation process.
    Step 10: Once the installation process completes, your phone will restart and soon you will see a PASS message with green background in the left-most box at the very top of the Odin. You can now unplug the USB cable to disconnect your device from the computer.
    Samsung Galaxy Mega 6.3 I9200 should be now updated with Android 4.4.2 XXUDNE4 KitKat official firmware. Head over to Settings >> About Phone to verify the software version running on the device.
    Note: If Galaxy Mega 6.3 I9200 stuck at booting animation after Step 10 then go to recovery mode (press and hold the Volume Up, Home and Power buttons together) and perform Wipe data/Factory Reset and Wipe Cache Partition task before selecting reboot system now function. In recovery mode use Volume keys to navigate between options and Power key to select the option. Please note, performing wiping task will erase your device internal memory data and not external SD card data.

    Read also: How to Root Galaxy Mega 6.3 I9200/I9205 on Android 4.2.2 Jelly Bean Firmware
    Read More..

    How to Install Android 4 4 2 Firmware for Galaxy Note Pro 12 2 SM0P905 Guide

    P905XXUANAF Android 4.4.2 KitKat Firmware Last Updated on 5-Feb-2014. Download and install the XXUANAF 4.4.2 KitKat Stock Firmware on Samsung Galaxy Note Pro 12.2 SM-P905 tablet. Samsung recently started rolling out an OTA update about the firmware. The firmware is also available for download for manual update. The Galaxy Note Pro 12.2 recently announced by Samsung with Android 4.4 KitKat and this is the first official Android 4.4.2 KitKat firmware update for the device. If you own the device and not yet updated this latest firmware, then update the same using our simple tutorial below. The below guide will help you to download and install the P905XXUANAF 4.4.2 KitKat firmware manually through Odin.
    Samsung
    As the Galaxy Note Pro 12.2 P905 released with the Android 4.4 KitKat, you can expect few bug fixes and performance enhancement with this latest update. It is always recommended to update your device to the latest available firmware to keep updated with the latest security changes.

    So, want to update your Galaxy Note Pro 12.2 P905 to the latest XXUANAF Android 4.4.2 KitKat firmware? To install in official way, you can either go for  OTA (over the air) from Settings-About Tablet-Software Update or download and install the firmware through the Samsung Kies utility. However, if prefer a manual way to update official firmware, then follow this article to find step by step manual guide to update the latest Android 4.4.2 XXUANAF firmware on your Galaxy Note Pro 12.2 P905 through Odin.

    Important Note:

    "The firmware is released only for the Samsung Galaxy Note Pro 12.2 SM-P905 model, so don’t try this in any other android device. Check your device model number from Settings-About Tablet. Also the tutorial is based on Windows PC. Follow all the pre-requisites, procedures and steps carefully to avoid breaking your Tablet".

    Android 4.4.2 KitKat P905XXUANAF Official Firmware Download List

    Samsung rolled out the firmware for the following countries. The firmware which are unbranded or not locked to any carrier, no matter of which country or region, can be flashed on any Galaxy Note Pro 12.2 SM-P905 model.

    [Firmware for rest of the countries will be update here when available]

    Pre-Requisites:

    • Check battery percentage, your device should have at least 90% battery power
    • Turn on USB Debugging mode, go to Settings-Developer Options-USB Debugging
    • Backup important data and settings to external storage- follow this guide
    • Install USB driver for your device on your computer- Download Samsung USB Driver

    Points to be noted:

    • If you are using any Custom ROM such as- CyanogenMod, Paranoid Android, AOKP, SLIM ROMs etc, then it’ll replaced by this official Stock ROM
    • Custom Recovery (CWM or TWRP Recovery) will be replaced by Stock Recovery
    • After flashing official firmware, your device will no longer belongs to rooted device. However you can root your device any time after flashing the firmware.
    All the above pre-requisites are very important and must follow before proceed to installation guide. Hope you get all the above points. Now, go through the below tutorial to install Android 4.4.2 P905XXUANAF official firmware on Galaxy Note Pro 12.2 P905.

    How to Install Android 4.4.2 KitKat Official Firmware on Galaxy Note Pro 12.2 P905 through Odin:

    1. Download Android 4.4.2 XXUANAF Firmware for Galaxy Note Pro 12.2 P905 from the above list
    2. Download Odin 3.07
    3. Switch off your Tablet and boot Galaxy Note Pro 12.2 P905 into Download Mode by pressing and holding the Volume Down and Power keys together until you get the warning message, now press Volume Up key to proceed to Download Mode.
    4. Extract the downloaded Odin3.07 zip file and run the Odin3 v3.07.exe file as an administrator (Right click on the .exe file and click on Run as administrator)
    5. Now connect your Galaxy Note Pro 12.2 P905 to your computer via USB cable
    6. In Odin3 screen, you should see a COM Port number like “0:[COM7]” at ID:COM section and “Added!” text at the message box. This means your device has been detected by Odin3.
    7. Make sure that, only the “Auto Reboot” and “F. Reset Time” options are checked.
    8. Now, extract the downloaded firmware zip file, you’ll find a firmware file with extension .tar.md5
    9. In Odin screen, click on PDA button (if you are using the latest Odin Version, then click on AP button instead of PDA) and select the firmware file with .tar.md5 extension (The firmware file look something like: P905XXDLJ5_P905ODDDLI7_INU.tar.md5)
    10. Now, click on the Start button to begin the installation process, wait few moments.
    11. Once completed, you would see “PASS!” message in ID:COM port having green background
    12. Your Tablet should automatically reboot after completion
    13. You can now disconnect your Tablet from computer
    14. Finish
    That’s all to update Android 4.4.2 KitKat official firmware on Galaxy Note Pro 12.2 SM-P905. Hope you get all the above points and successfully completed the tutorial. If you followed everything as mentioned in the above tutorial, then your Galaxy Note Pro 12.2 P905 should now running on the latest Android 4.4.2 KitKat build version XXUANAF. You can verify the firmware update details from Settings-About Tablet. If you have any query or problem with download link, feel free to contact with us and don’t forget to share your experience in the comment below. 
    Read More..

    Friday, August 22, 2014

    Rooting Galaxy S4 I9500 on Official JB 4 2 2 XXUBMGA OS

    Having a rooted handset means that you are an advanced Android user who is always trying to use its smartphone on full power by enjoying all the features, apps and capabilities that are available on the market. So, gaining root access is extremely important especially if you have a high end phone, like the Samsung Galaxy S4 I9500. That’s why by using this tutorial you will be able to learn how easily root the Galaxy S4 that runs on stock / official Android 4.2.2 Jelly Bean XXUBMGA firmware.
    This process will be easy to complete as Odin will be used for applying the root package on your SGS4. Actually you will flash a rooted JB 4.2.2 XXUBMGA OS on your device, which means that the operation will be similar with an update one. Do note that the root task in though unofficial, so the warranty of your S4 will get void. Anyway, this is not permanent, meaning that you can anytime choose to revoke the root access for reclaiming and regaining the warranty back. For revoking root access you will have to update your Galaxy S4 I9500 with an official release of the Android system, or you will have to downgrade to stock Jelly Bean 4.2.2 XXUBMGA software.
    The advantages of root are numerous, but I do have to mention the following ones: on a rooted system you can access the OS and the internal system of the device for performing different operations such as removing in built programs or customize the performances; also on rooted handsets you can install a custom recovery image which can then be used for flashing custom ROMs and custom kernels; then, of course you will be able to overckock your Android device, or undervolt the same in case you need to upgrade the battery life; finally and as you may know, rooting is the first step to do when trying to speed up and upgrade the battery life of your smartphone / tablet.
    Anyhow, before rooting your galaxy S4 just remember that the warranty will get void. So, be careful and try not to mess things up. Read the guidelines from below and everything will be fine.
    Backup the text messages, call logs, internet settings, market apps and everything that’s important for you as the Galaxy S4 system might get wiped out or your data might get corrupted while applying the steps from below. If you want to avoid the unpleasant situation in which you lose all of your personal saves, info and accounts, complete a full backup first. Then, complete the rest of the pre requisites from below:
    • Make sure that a Windows running computer can be used as you will have to download Odin and the root package suitable with your S4 on the same.
    • On the computer there shouldn’t be installed antivirus, antimalware or any other security programs; if different before starting the root operation, deactivate the security protection.
    • Since you will have to connect your phone with the computer, the USB cable should be near you; also due to same considerations, on your smartphone go to “Settings -> Applications -> Development” and enable the USB debugging option.
    • Then, the process will take a while which means that your device might get turned off due to lack of battery. For avoiding that (your handset might get bricked if not) you should charge your SGS4 if there is less than 60% power left.
    • Remember that this tutorial is compatible only with the Samsung Galaxy S4 I9500 that runs on stock / official Android 4.2.2 Jelly Bean XXUBMGA firmware. Trying to root a different device or a different Android software with the steps from below will most likely brick your Android based smartphone, or tablet.

    How to Root Galaxy S4 I9500 on Official JB 4.2.2 XXUBMGA OS

    1. Download the root package by using the link from here.
    2. Unzip the package on desktop.
    3. Then, download and unzip Odin.
    4. Also, launch / run the program.
    5. Download Samsung KIES and install the S4 drivers if on your computer the drivers are not already installed.
    6. Turn off your phone as the fun begins.
    7. Wait a few seconds and then press on Power, volume down and home buttons – the download mode will be displayed.
    8. Connect your phone with the computer – use the USB cable.
    9. On Odin now you should notice the following: ID:COM section is either yellow or blue; the “added” message is there.
    10. If not, try to reinstall the drivers and then repeat the steps from above.
    11. For starting the root operation, first you will have to click on the “PDA” option.
    12. Then, you will have to select the root file.
    13. Finally, select “start”, but don’t make any other changes on Odin.
    14. Wait while your smartphone is being unlocked.
    15. In the end, Odin will display the “pass” message while the ID:COM section will be green.
    16. You can unplug the USB cable and reboot your device.
    Perfect, you are done; so congratulations you have successfully rooted the Jelly Bean 4.2.2 XXUBMGA firmware that runs on your Samsung Galaxy S4 I9500. If you have encountered issues while trying to apply the up-explained steps, use this guide and learn how to resolve the possible problems. Then, return here and share your experience with our team (use the comments area from the end of the present tutorial) or with others that might want to use this step by step guide.
    Read More..

    Tuesday, August 19, 2014

    How to Root Samsung Galaxy S3 I9300 Android 4 1 2 With Guide

    Just a month back Samsung released a minor 40 MB update for Samsung Galaxy S3 I9300 running Android 4.1.2 (  Feels bad stuck on Android 4.1.2 for ages ) , Officially there were no change logs provided for the update but we can assume that it was probably an minor performance  upgrade . As it is with installing an Official software update , My Samsung galaxy S3 was unrooted in this process .
    Once again i had to source for the latest CF auto root and Odin to root my Samsung galaxy S3 . In fact i even tried Framaroot which had previously worked on my Samsung galaxy S3 , but after the update Framaroot was unable to root my Galaxy S3 . So the only option i had left was to root my Samsung Galaxy S3 through Odin .
    If you had installed the same update , then follow the instructions below to manually root your Samsung Galaxy S3 I9300 using Odin and CF-Auto-Root by Chainfire .
    NOTE: This guide is only for users having the international version of the Samsung Galaxy S3 I9300 .

    Instructions to Root Samsung Galaxy S3 using Odin

    • Step 1: Download CF-Auto-Root and Odin from the links below :
    Download CF-Autoroot
    Download Odin ( Use Odin 3.07 from this package )
    • Step 2: Install Odin on your PC and run it as Administrator . Now lets prepare your phone for rooting .
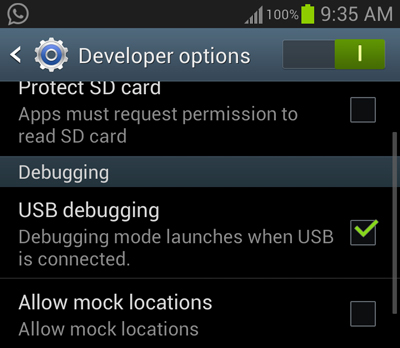
    • Step 3: Enable USB debugging in your phone . To enable USB debugging navigate to Settings > System > Developer options > Debugging > USB debugging .
    turn
    • Step 4: Turn off your phone and turn on your phone into download mode by pressing the Volume down + Home + Power keys together . When your phone displays a warning , press the Volume up button to continue into Download mode .
    • Step 5: Connect your Samsung galaxy S3 to your PC using a Data cable .
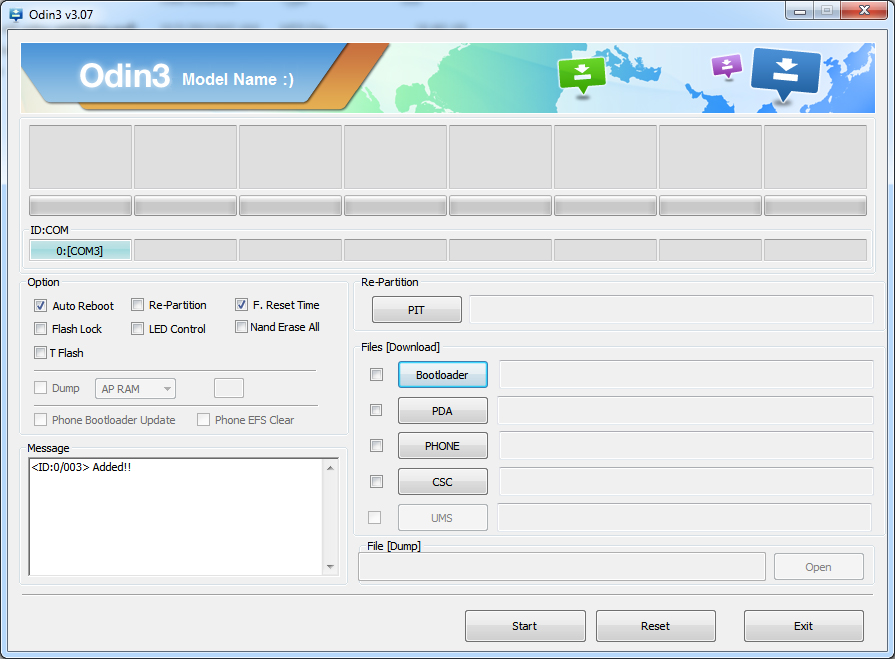
    • Step 6: You should now see the Odin’s ID:COM status change into blue and an Added message will be displayed .
    • Step 7: Check Auto reboot and F.Reset options in Odin .
    Samsung
    • Step 8: Click on the PDA button and select the CF-Autoroot file .
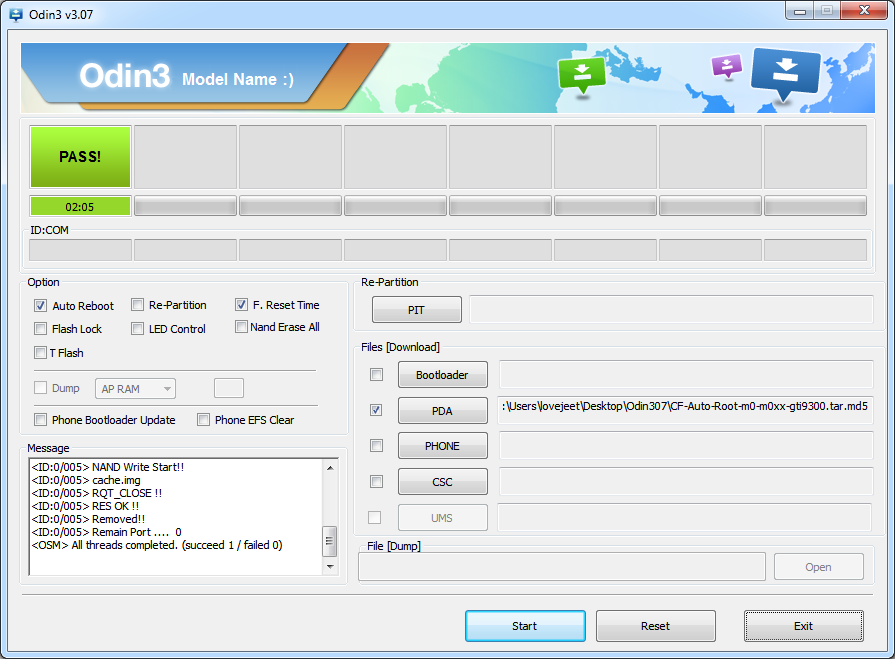
    • Step 9: Double check all the instructions above and Click Start to Root your Samsung Galaxy S3 . Wait for a few minutes and you will see a Success message as below :
    rooting
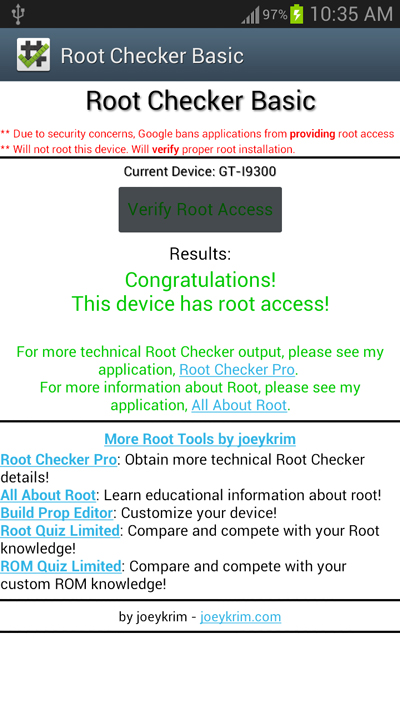
    If you want to confirm whether your Samsung Galaxy S3 is rooted not then Install the Root checker app from the Google play store .Here is a screenshot of root checker app on my Samsung Galaxy S3 .
    samsung

    Incoming search terms:

    • how to root samsung galaxy s3
    • how to root galaxy s3
    • root galaxy s3
    • how to root s3
    • root samsung galaxy s3
    Read More..

    Monday, August 18, 2014

    One Click Root Solution for Galaxy S3 S2 Note 2 and More Available Root guide Included

    When using a high end Android based smartphone is all about customization and optimization operations, as we can’t stop from improving and upgrading our gadgets for receiving more power, latest apps, new features and a better web browsing experience. But for being able to do the mentioned tasks you must first free your device from the factory restrictions and default settings. Because of that you must learn how to gain access over the internal system of your handset, access that can be granted once you root the OS.
    As you know, usually the root procedure is quite complex and risky so not all the Android users are able to safely complete the operation. Furthermore, in some cases, while trying to gain root access the phone gets bricked and since the warranty is void, you will find yourselves in an unpleasant situation. In order to avoid these situations, we have the one-click tool, which offers a safe and fast root solution for the Android based devices. Unfortunately not all the smartphones can be rooted by using the one click root tool.
    Now, as mentioned in the title of the present step by step guide, those of xda-developers had made available a one-click root solution for all the most important Samsung devices, so we will be checking in how to easily root your Galaxy S3, S2, Note and Note 2, Galaxy Camera and more. The process will be easy to understand and to complete as there are only a few steps to take care of. Also, being a one click root solution, you will be able to free your Android powered Samsung smartphone / tablet by running a dedicated app that will do all the work for you.
    But, before heading to the proper root tutorial, you should check the list from below. You have there all the supported Samsung devices that can be unlocked by using the present method. Don’t apply this step by step guide if your phone or tablet isn’t mentioned in the image from below.
    List
    List of supported devices
    Now, you should first prepare your gadget for the process that will shortly follow. Else you will not be able to one-click root your Samsung device, and worst you can even end up in bricking your smartphone. So, take your time and read all the lines from this tutorial and especially the pre requisites which are being presented below.
    • It is more than recommended to backup the data from your handset. Usually the system is not wiped out by using a one-click root tool, but considering that you can save bank accounts and passwords on your smartphone it is a good idea to save all of your personal info before going any further.
    • You can use our backup and restore guides for learning how to save the contacts list, the text messages, the call logs, market apps, internet settings, the EFS folder and even the current ROM.
    • Remember that by rooting, the warranty of your device will be void.
    • Your Samsung handset must be charged (if there is less than 60% power left) before starting the root operation or else it might get turned off in the middle of the process.
    • On your phone the USB debugging option must be enabled; so go to “Settings -> Device Information -> Enable USB Debugging Mode”.
    • Remember to check the list of supported devices before applying something on your Samsung tablet / smartphone.

    How to Root Samsung devices with One Click app

    1. The first thing to do is to download the Framaroot app (this is the one click tool that will be used).
    2. Use the link from here.
    3. Then, install the APK which has been downloaded before on your Samsung smartphone / tablet or camera.
    4. Now, by using the File Manager from your device, search for the APK file and run the same.
    5. The installation will now begin; in the end your handset will be rooted meaning that you are done.
    So, that was all; what do you think about this method? Don’t forget that the present one click root solution can be applied only for a limited numbers of Samsung devices (you have the full list of supported devices above). Also, this guide has been first developed by those of xda-developers so we have them to thanks for this opportunity.
    Now, you can look forward in performing other complex operations on your phone as its system has been unchained. You can install a custom recovery image, update the device with a custom ROM firmware, install apps that requires root access in order to work properly, remove in-built programs for increasing the speeds and a lot more. Do share your thoughts and impressions with us and with other users who might want to try this tutorial by using our comments area from below.
    Read More..