Showing posts with label samsung. Show all posts

Thursday, November 20, 2014

Samsung Galaxy S 4 hard reset sgs4 reset i9500 resetting gt i9500 i9505 gt i9505 code


Samsung Galaxy S の4 hard reset :- by >wzmobile.asia<
Fast Reset  the device {press and hold POWER switch  for 9-11 second}
Unlock samsung Galaxy S4 using hard reset
samsung s4 hard reset  or のreset Galaxy S4 PRESS AND HOLD VOLUME UP key + Home switch  + Power switch 

Press Power key the phone on vibrate Waityou see for Android logo then release 
all the switchのの and keys.Select Wipe data/Factory reset with VOLUME DOWN. 
press Power key [right hand-side]Select YES -- delete all user dataŽwith VOLUME DOWN 
and then press Power After format. press Power key again to reboot phone. 
[select reboot system now]unlock i9500 galaxy samsung cell phone
Read More..

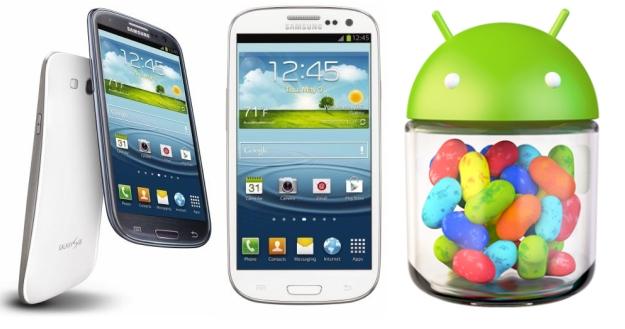
How to update Samsung Galaxy S3 to Android 4 1 2 Jelly Bean

Good news to all Samsung galaxy s3 users, the international version of Samsung galaxy s3, which have been the world’s best-selling smartphone, now already received the much anticipated Android 4.1.2 Jelly Bean update over-the-air. Many major national carriers has released Android Jelly for the device, and other Carrier-branded versions like Verizon Wireless should be able to receive the update soon as Samsung is railroading updates for its devices. But some only offer an update that must completed via Samsung Kies software and is not offered over the air.

The new Android 4.12 Jelly Bean Update brings a list of amazing features now only located in Samsung Galaxy Note 2 to Samsung S3, like highly-anticipated Multi View multitasking system, Smart Rotation function , camera filters, low-light photo mode, an easy mode and so on. For some people you may find it is difficult for you to update or wait any longer. So here I will show you How to update Android 4.1 Jelly Bean on Galaxy S3 immediately.Pre-requisites 
  1. Be sure to backup your data before starting the update
  2. Make sure your battery is at least 50% charged.
  3. Make sure that you have install Kies software on the computer, and if you dont have Kies, you can download it from Samsung website.
For international version: If the software update didn’t popped up in the notifications area, you can update your Samsung Galaxy S3 to Android 4.1.2 Jelly Bean by connecting the terminal to Kies or OTA, by manually checking for the update for the latter method. Just go to Settings > About Device > Software Update > Check for Updates and see whether the new firmware has rolled out for your device.

Heres How to Update Your AT&T Samsung Galaxy S III to Android 4.1 Jelly Bean
  • Connect your Samsung Galaxy S III to your PC or laptop using the supplied USB cable. Ensure that Kies recognizes your device by looking in the upper section of the left-bar navigation menu. Your device should be listed.
  • Kies Device Once Kies recognizes the device you will see a Lcd stating new firmware is available.
  • Click Update.
  • Read through the Caution pop-up and, if you agree, click to populate the I have read all of the above information checkbox.
  • Read the Allow saving of information statement and select Allow saving or Proceed without saving and then click Start upgrade.
  • After a few minutes, Kies will then begin transferring the firmware binary to the device.
  • Then after a while the upgrade is completed.
  • If completed a data backup from your device to Kies prior to performing the update, you can now restore that data back to the device under the new Jelly Bean operating system 
Read More..

Sunday, November 9, 2014

Master Reset Samsung Gravity 2 SGH T469 Hard Reset Samsung Gravity 2 SGH T469


reset to factory settings
    To perform a Master Reset on your Samsung Gravity 2 reset follow the steps below:
    1. From the standby screen on your Samsung Gravity 2, press the left soft key for Menu
    2. Select Settings, which this the fourth one on the list on your Samsung gravity 2 hard reset
    3. Then Select Reset Settings, which is the ninth item on the list on your Samsung Gravity 2 reset
    4. Then you Select Master Reset, which is the second item on the list
    5. Enter the password then press the left soft key for Confirm - the default password on your Samsung Gravity 2 is 0000
    6. Then all you have to do is Press the left soft key for Yes to confirm the Master Reset on your Samsung Gravity 2 master reset
Read More..

Saturday, November 8, 2014

Samsung s5570i power switch ways

Samsung s5570i power switch ways 100% working and tested way . Just check green line connection . if that broken just make a jumper
Read More..

Friday, November 7, 2014

Hard Reset Your Samsung Galaxy y Duos s6102

How To Hard Reset Your Samsung Galaxy Y Duos Gt-s6102 Device Easily

When You Have To Hard Reset Your Device ?

You Can Apply Hard Reset In Many Cases We Will Tell You Some Example
* Forgotten Pattern Lock
* Forgotten Phone Lock
* Forgotten User Code
* If Your Phone Seems Frozen Due To Any Cases.

Take Care oi These Factors Before You Reset Your Phone

* Please Backup Your Datas Using any Backup Software
* Please Maintain 50% Battory Charge

How To Hard Reset Your   Samsung Galaxy Y Duos 

* Switch Off Your Device 
* Take Out Your Sim And Memmory Card
* Press And Hold  Volume Up Key  +  Home Key    +  Then Power On Your Phone
* Hold Pressing Keys Untill The Second Logo Appears
* When Scond Logo . Release All Keys
* Then You Will Get Factory Reset Menu
* Select Wipe Data/ Factory Reset Option . Scroll Using Volume Key . Then Confirm
* By Select Yes Delete All User Data. Using Volume Down Key . Confirm It
* Wait Some Seconds. Then Select Reboot System Now Option And Confirm
* Now Your Phone Will Restarted. After Completing The Hard Reset Prosses
* Done ! 
Read More..

Thursday, November 6, 2014

Hard Reset For Samsung Galaxy S i9000

How to Hard Reset Your Samsung Galaxy S

When You Have To Hard Reset Your Samsung Galaxy S?

You Can Apply Hard Reset In Many Cases We Will Tell You Some Example
* Forgotten Pattern Lock
* Forgotten Phone Lock
* Forgotten User Code
* If Your Phone Seems Frozen Due To Any Cases. 

Take Care oi These Factors Before You Reset Your I9000

* Please Backup Your Data Using any Backup Software
* Please Maintain 90% Battery Charge  

How To Hard Reset Your Samsung Galaxy S

hard
* Switch Off Your Samsung Galaxy
* Take Out Your Sim And Memmory Card
* Press And Hold  Volume Up Key  +  Home Key    +  Then Power On Your Phone
* Hold Pressing Keys Untill The Second Logo Appears
* When Scond Logo . Release All Keys
* Then You Will Get Factory Reset Menu
* Select Wipe Data/ Factory Reset Option . Scroll Using Volume Key . Then Confirm Using Power Key       (Home Key)
* By Select Yes Delete All User Data Using Volume Down Key . Press Power key to confirm.
* Wait Some Seconds. Then Select Reboot System Now Option And Confirm
* Now Your Phone Will Restarted. After Completing The Hard Reset Proses
* Done !
Read More..

Hard Reset Your Samsung Star Deluxe Duos S5292

 Hard Reset Your Samsung Star Deluxe Duos S5292

Press MENU > Settings > Reset settings > Select All (or what you want) and select YES or Use this method to hard reset your Samsung Star Deluxe Duos S5292 phone: Enter *2767*3855#. Warning! All your data including contacts, messages etc. will be lost! Copy all your necessary data/Contacts/Messages etc. to SIM or make backup to your PC before full reset! Take out SIM card before full reset.
Read More..

Sunday, November 2, 2014

samsung e250 hang on start up logo


Thiss hardware problem just reball the main Ic,
Power Ic & charger,tested by me 100times,
Read More..

Samsung B1100 1105T Sim Ways Solution for Insert Sim Problem

Tested Soltion for Smasung E1100/1105T Insert Sim Problem

Read More..

Wednesday, October 22, 2014

Samsung Galaxy Note 10 1 SHW M480S Running 4 1 2 Jelly Bean Firmware Simple Tutorial How to Root

If you are looking for an easy and working method to root your Samsung Galaxy Note 10.1 SHW-M480S (South Korea) Tablet, then youre on right place. Here youll find a simple step by step guide to root Galaxy Note 10.1 M480S running on Android 4.1.2 Jelly Bean official firmware. The device was released with Android 4..0.4 ICS and last updated to Android 4.1.2 Jelly Bean (Latest Firmware for Galaxy Note 10.1 M480S). If you own the device, then you can now root it using the below tutorial.

After having an Android Tablet or, after updating official firmware, many of us prefer to root our device to enjoy some additional features that unrooted android Tablet doesnt offer. With a rooted android Tablet, you can install apps that ask root permission, flash various custom ROMs, install MODs and tweak various features. Root removes default bloatware apps that free-up lots of memory space and extend the battery life. To know more about benefits of rooting android Tablet, read- Complete Note on What is Rooting and Benefits of Rooting Android Tablet.

So, want to root your Galaxy Note 10.1 SHW-M480S? Continue reading this page to get all the necessary steps to successfully root your device. The root file (CF-Auto-Root) we used in this tutorial is safe and have nearly 100% success rate. Well use Odin software to flash the root file.

The tutorial is made with simple step by step guide, so that even an android newbie user can follow and successfully root his/her device. However, in this process you may loss your personal data and settings. So, we recommend you to follow all the backup instructions before proceed to rooting guide.

Caution

  • This rooting tutorial is only applicable for Samsung Galaxy Note 10.1 SHW-M480S model (p4noterfskt). So, dont try this in any other android device. Check your device model number from- Settings-About Tablet
  • Rooting voids your Tablets manufacturer warranty. However, you can get back the warranty anytime by flashing official firmware.
  • This guide is for educational purpose and you should try this at your own risk. We are not responsible if your device experience a soft brick after following this tutorial.

Pre-Requisites:

  • Check battery percentage, charge your device to a decent level of at least 60% battery power. Your device should not turn off during installation.
  • Turn on USB Debugging mode, go to Settings-Developer Options-USB Debugging
  • Backup important data and settings to external storage- follow this guide
  • Install USB driver for your device on your computer- Download Samsung USB Driver
All the above pre-requisites are very important and must be followed before proceed to installation guide. Hope you get all the above points and done as mentioned. Now, you are ready to move to the final step of this tutorial where we have arranged a step by step details guide on how to root Galaxy Note 10.1 SHW-M480S running on official firmware.

How to Root Galaxy Note 10.1 SHW-M480S Running Android 4.1.2 Jelly Bean through Odin:

  1. Download CF-Auto-Root for Galaxy Note 10.1 M480S and extract the Zip fileCF-Auto-Root-p4noterfskt-p4noterfskt-shwm480s.zip
  2. Download Odin 3.07 and extract the Zip file: Odin 3.07.Zip
  3. Now, Switch off your Tablet and boot Galaxy Note 10.1 M480S into Download Mode by pressing and holding the Volume Down and Power buttons together (long press until the boot screen appear), now press Volume Up key to proceed to Download Mode.
  4. Run the Odin3 v3.07.exe file as an administrator (Right click on the .exe file and click on Run as administrator)
  5. Now connect your Galaxy Note 10.1 M480S to your computer via USB cable
  6. In Odin3 screen, you should see a COM Port number like “0:[COM7]” at ID:COM section and “Added!” text at the message box. This means your device has been detected by Odin3.
  7. Make sure that, only the “Auto Reboot” and “F. Reset Time” options are checked.
  8. Now, click on the PDA button and select the CF-Auto-Root-p4noterfskt-p4noterfskt-shwm480s.tar.md5 file.
  9. Finally, click on the Start button to begin the rooting process, wait few moments.
  10. Once completed, you would see “PASS!” message in ID:COM port having green background
  11. Your Tablet should automatically reboot after completion
  12. You can now disconnect your Tablet from computer
  13. Finish
Congrats! You have completed the tutorial to root Galaxy Note 10.1 M480S running on official firmware. Hope you successfully done the rooting process. If you followed everything as mentioned in the above tutorial, then your Galaxy Note 10.1 M480S should now rooted and you have complete control over your device. Now, install apps that ask root permission or flash various custom ROMs. To verify your device is rooted or not, you can download and run the Root Checker App from Google Play Store. If you have any doubt or query about the tutorial, feel free to contact with us using the comment form below, and share your rooting experience with us.
Read More..

Thursday, October 2, 2014

Samsung Galaxy S3 Touch Screen Not Working Solution

Samsung Galaxy S3 Touch Screen Not Working Solution,Samsung Galaxy S3 Touch Screen no response  Working Solution,Samsung Galaxy S3 Touch Screen ways Working Solution,Samsung Galaxy S3 how to working Touch Screen Not Working Solution,Samsung Galaxy S3 Touch Screen line was damage  Working Solution,Samsung Galaxy S3 Touch Screen Not Working which parts are problem to no working this Gui procedure here step by step.
Read More..

Friday, September 26, 2014

Samsung Galaxy Rugby Pro I547 Hard Reset Instructions

Samsung Galaxy Rugby Pro I547 Hard Reset Instructions - The Samsung Galaxy Rugby Pro I547 comes with GSM/HSDPA/LTE network. The phone was released on 2012, October. Its powered by Dual-core 1.5 GHz Krait processor and Qualcomm MSM8960 Snapdragon chipset. It runs on Android 4.0.4 (Ice Cream Sandwich) platform with 1 GB of RAM. The display screen of this phone is 4.0 inches, Super AMOLED capacitive touchscreen, also equiped with 5 MP camera. Ok, here below shows information about the Samsung Galaxy Rugby Pro I547 Hard Reset Instructions also factory data reset guide.

How to Hard Reset for Samsung Galaxy Rugby Pro I547
If you are owner of this phone and want to hard reset for Samsung Galaxy Rugby Pro I547, follow this instructions:
Enter *2767*3855#.  Dont forget backup your necessary data/Contacts/Messages and other because all your data will be lost!
Once again, Copy all  to SIM or make backup to your PC before full reset! Take out SIM card before full reset.

If your Samsung Galaxy Rugby Pro I547 hangs up, or freezes, you may need to reset the device. If your device is frozen and unresponsive, press and hold the Power/Lock Key for 8 to 10 seconds.

Factory Data Reset Tutorial
From this menu you can reset your phone and sound settings to the factory default settings. Follow this tutorial below:
First, from the Home screen, tap Apps ➔ Settings ➔ Backup and reset.
Then, Tap Factory data reset. The Factory data reset screen displays reset information.
Further, Tap Reset device, then follow the prompts to perform the reset.

Warning! Performing a Factory data reset will erase all data from your phone and internal SD card, including your Google account, system and application data and settings, and downloaded applications. It will not erase current system software, bundled applications, and external SD card files such as music and photos.

If you still confused, you can read the Samsung Galaxy Rugby Pro I547 manual or user guide. Download here

Read More..

Wednesday, September 24, 2014

Samsung Galaxy S3 Ringer Ways Solution

Samsung Galaxy S3 Ringer Ways Solution,Samsung Galaxy S3 no Ringer sound Solution,Samsung Galaxy S3 Ringer Ways damage Solution,Samsung Galaxy S3 Ringer Ways print missing Solution,Samsung Galaxy S3 Ringer bell not working Ways Solution Guide,Samsung Galaxy S3 Ringer area Ways Solution Step by step Procedure here.
Read More..

Tuesday, September 23, 2014

Root Samsung Galaxy S GT I9000


Today, we bring up the method to root Samsung Galaxy S GT I9000 as well as process to install CWM Recovery, which is essential to install Custom ROMs. So, in this article we will show you the most simplest way to root Samsung Galaxy S GT-I9000. As you will traverse below, we will surely guide you through the complete process on to how to root Samsung Galaxy S GT-I9000. But, before that please read the prerequisite, disclaimer and other important notes. Let’s start...

Prerequisite:

1. Make sure your mobile should possess 70 to 80% battery
2. Enable USB debugging mode (Menu (app drawer) > Settings > Manage Applications > Development > USB Debugging – check box)
3. Ensure that you have backed up your all important data.
4. Install Root Samsung Galaxy S GT-I9000 USB drivers. (Download USB drivers or download Samsung Kies (drivers included))

How to root Samsung Galaxy S GT-I9000 and Install CWM Recovery

Step 1: To root Samsung Galaxy S GT-I9000, first you have to download “CF-Root“, as per your Android 2.3.6 Gingerbread Firmware Baseband Version from Below: (To check baseband version: Go to Settings > About > Baseband Version)
After downloading CF-Root File, extract it on desktop.
Step 2: Download “Odin” extract it on the desktop.
Step 3: Switch Off your phone, take out the battery and insert it back. Now boot your phone into Download Mode by pressing and holding the Volume Down + Home button together, and then press the Power button till you see the Android Construction logo. Once again press Power/Volume Up button to confirm.
Step 4: Open “Odin.exe” (from extracted folder) and connect your phone via USB cable with your computer in download mode. If your phone is connected successfully the one of the ID:COM boxes will turn yellow.
Step 5: Click on “PDA” button and select file “cf-root-xx_oxa_xxx-xx.x-cwm3rfs.tar” (from extracted folder).
Step 6: Please make sure that only F. Reset Time and Auto Reboot options are checked on Odin.
Step 7: Now, click on the “Start button” on Odin to start the installation process. Installation will take a few minutes to complete so please wait for the complete process.
Step 8: Finally, when the installation process is completed successfully you will see the “PASS” message on Odin and then your device will reboot automatically.
Read More..

Sunday, September 21, 2014

Samsung Galaxy Note 3 the best phone ever

Samsung Galaxy Note 3 the best phone ever : Samsung Galaxy Note 3 is the best phone ever. Its contains 2G, 3G and 4G network.  It consists of Super AMOLED capacitive touchLcd, 16M colors and 1080 x 1920 pixels, 5.7 inches (~386 ppi pixel density) display quality. Corning Gorilla Glass 3, Vibration; MP3, WAV ringtones, loudspeaker and 3.55mm jack is also available. It contains also HSDPA, 42 Mbps; HSUPA; LTE, Cat4, 50 Mbps UL, 150 Mbps DL speed. Camera contains 13 MP, 4128 x 3096 pixels, autofocus, LED flash. Built in Micro SD card slot of 16/32/64 GB storage, 3 GB RAM upgradable to the 64 GB. Having also Dual Shot, Simultaneous HD video and image recording, geo-tagging, touch focus, face and smile detection, image stabilization, panorama, HDR. CPU can perrform Quad-core 2.3 GHz Krait 400 (N9005, N9002)/ Quad-core 1.9 GHz Cortex-A15 & quad-core 1.3 GHz Cortex-A7 (N9000)with Android OS, v4.3 (Jelly Bean), upgradable to v4.4.2 (KitKat) and HTML 5 Browser.

Feature of Samsung Galaxy Note 3 :
-ANT+ support
-S-Voice natural language commands and dictation
-Air gestures
-SNS integration
-Active noise cancellation with dedicated mic
-Dropbox (50 GB cloud storage)
-TV-out (via MHL A/V link)
-MP4/DivX/XviD/WMV/H.264/H.263 player
-MP3/WAV/eAAC+/AC3/FLAC player
-Organizer
-Image/video editor
-Document viewer(Word, Excel, PowerPoint, PDF)
-Google Search, Maps, Gmail,
- YouTube, Calendar, Google Talk, Picasa
- Voice memo/dial/commands
- Predictive text input (Swype)

Read More..

Samsung E251 Sim Card ways Solution

Samsung e25i insert sim card solution100% Tested ,sim ways damage solution,sim ways print missing solution,sim ways line broken jumper solution,how to work it your samsung e250i insert sim problem just see our solution diagram ihope solved your problem maybe its 100% tested working by me .
Read More..

Samsung Nokia Symphony Display and Smart Phone iPhone iPad iPod Touch Screen Problem

Samsung, Nokia, Symphony Display and Smart Phone, iPhone, iPad, iPod Touch Screen Problem : Smart Phone, iPhone, iPad, iPod Touch Screen Problem and Samsung, Nokia, Symphony Display Troubleshooting is major problem in the world. Symphony Mobile User is increasing day by day. Symphony TAB is totally depended on touch. Samsung Galaxy, Samsung DUOS and S4 totally depended on Touch. There is no alternative way instead of Touch. So need proper care and secure using for Touch Mobile Phone. Smart Phone, iPhone, iPad, iPod also depended on touch. The generation of Touch Mobile is increasing like Notebook and Laptop. After Samsung and Symphony Nokia new mobile is also depended on touch. Although Nokia is still now far from generating Andriod operating system in their mobile. If Appears touch problem in your mobile you can take these necessary step as giving below :


1. Restart Your Mobile.
2. Flash Your Phone Memory Or Give Restore Factory Setting Reset.
3. Remove Memory Card Then Try Again.
4. Use Touch Protected Cover
5. If Your Problem Not Solved Then Try With Customer Care Center.

Read More..

Friday, September 19, 2014

Samsung i9003 Camera Not Working Solution

 Samsung i9003 Camera Not Working Solution,Samsung i9003 Camera Not Open Working Solution,Samsung i9003 Camera Open Then Hang Not Working Solution,Samsung i9003 Camera Error Not Working Solution,Samsung i9003 Camera No Working Properly Solution,Samsung i9003 Camera Not Working Open To Restart Solution,Samsung i9003 Camera Not Working Show Only Blue Screen Solution.
Just Work Step By Step i Hope Working Again Your Handset Camera .Tnxx To Visit My Blog Again Plzz Share This Post If You Tested .
Read More..

Thursday, September 18, 2014

AT T Samsung Infuse 4G I997 Android 2 3 6 Gingerbread Stock ROMs


Stock ROM I997UCKK3 [Android 2.3.6] 21.11.2011
Stock ROM I997UCKK2 [Android 2.3.6] 09.11.2011
Stock ROM I997UCKK1 [Android 2.3.6] 09.11.2011
Stock ROM I997UCKJ4 [Android 2.3.6] 28.10.2011
Stock ROM I997UCKJ2 [Android 2.3.6]14.10.2011

Odin Guide for Flashing the Stock ROMs
1) Install Kies on your PC just to ensure that the drivers for the Infuse 4G are already installed
2) Download and unzip the stock ROM files packaged
3) Use and run Odin3 v1.7.exe
4) Set the Infuse 4G into download mode - turn it off or pull battery then in-place it back again ,
( Just press and hold both Volume Buttons while plugging in the USB cable cord)
5) In Odin, the COM: Port box will display that your phone is already connected
If there is multiple files in the packaged you may just put the desired files on each designated slots.
6) Click the PDA button and choose the PDA_.tar.md5
7) Click the PHONE button and choose MODEM_.tar.md5
Bootloader for APBOOT_.tar.md5 and CSC file for CSC slots.
8) Press Start
9) Once it finishes, it will reboot to recovery. Just select "delete all user data" and then select reboot system now.

Heres the stock rooted version, deodexed with busybox and SU and Zipalligned installed. The installation is simple - just download the Zip, Boot into recovery, wipe data and dalvik cache then flash and reboot.

Stock I997UCKK3 Rooted, Deodexed, Busybox, Zipaligned, 2.3.6
by dman3285  
Stock I997UCKJ4 Rooted, Deodexed, Busybox, 2.3.6 
Stock I997UCKJ2 Rooted, Deodexed, Busybox, 2.3.6
Stock I997UCKK1 Rooted, Deodexed, Busybox, ZipAligned 2.3.6
Read More..

Wednesday, September 17, 2014

Samsung E1085 Charging Solution 100 tested


Read More..