Showing posts with label your. Show all posts

Thursday, November 20, 2014

How to Fix Your Nokia Lumia unbootable after a hard reset or updating

Many users need to apply a hard reset our terminals, sometimes malfunction and others simply because we want to erase all personal content and leave no trace. But they have detected some problems with this process and some terminals do not get past the first step showing gears constantly turning. Then I discussed a method to try to recover the terminal.
Many of you know the procedure for performing a hard reset Nokia Lumia any terminal and I discussed a long article above. Thus, before an important event or simply because we want to delete the content problem, we apply the procedure and we can retrieve a phone. But, like everything related to the software, it is not without risks .
So many readers have reported that during the terminal remains unused in the initial state when the recovery is being implemented leaving only a gear on the screen that does not stop spinning for hours.This problem not only what we have when we performed a hard reset, but before a software update via OTA.
The good news is that, before taking the terminal to what Nokia will try to recover, you can now attempt a first terminal recovery at home, and try to fix it yourself. I count the steps.

Step 1: Install Nokia Software Updater for Retail

The first step is to download the software from Nokia that lets you install the firmware on our phone.This software was already discussed when we explain how to upgrade to Lumia Amber has been recently updated. As if you had not installed the hype download and if you had already, just open it and tell you that there is an update.
Updated : If you have problems installing this program, you can try the new software launched by Nokia and I discussed in another article .

Step 2: Connect the phone to your computer

The next step is simply to connect the phone to the computer with the USB cable. Of course, the terminal will light if it was not, but will not be recognized by any application (you may receive a message that a USB device is not recognized.) We start the Nokia Software Update for Retail application and see the image indicates that we connect the phone.
Underneath the drawing, we see a button that tells us: "my device does not boot" . Its what we choose to enter will use in the next step wizard.

Step 3: software reset terminal

In this step, you click Continue, the program tries to find the phone, and then you apply a soft reset . To do this, we pressed the buttons on and volume down until we noticed a vibration. When the phone starts to boot you again, you should see that is recognized by the program.

Step 4: Installing the firmware

In this step, if necessary, download the firmware needed Nokia server, and then proceed with the installation. By installing a complete firmware, is how to perform a clean installation of the software on the terminal, so if there is no hardware problem should be solved and recover your phone. The process is the same as mentioned for upgrade to Lumia Amber .
We hope the tutorial will serve as a support and allows you to recover those terminals that are giving you headaches after the hard reset.
Read More..

Sunday, November 9, 2014

How to Copy Files between your Android Mobile and PC

1.install AirDroid Apps On Your Android Device
2. Download Airdroid Apps click here 
ad

Open the app and start using it to connect your mobile to PC for copying files wirelessly and doing even more between the two platforms.
Read More..

Friday, November 7, 2014

Hard Reset Your Samsung Galaxy y Duos s6102

How To Hard Reset Your Samsung Galaxy Y Duos Gt-s6102 Device Easily

When You Have To Hard Reset Your Device ?

You Can Apply Hard Reset In Many Cases We Will Tell You Some Example
* Forgotten Pattern Lock
* Forgotten Phone Lock
* Forgotten User Code
* If Your Phone Seems Frozen Due To Any Cases.

Take Care oi These Factors Before You Reset Your Phone

* Please Backup Your Datas Using any Backup Software
* Please Maintain 50% Battory Charge

How To Hard Reset Your   Samsung Galaxy Y Duos 

* Switch Off Your Device 
* Take Out Your Sim And Memmory Card
* Press And Hold  Volume Up Key  +  Home Key    +  Then Power On Your Phone
* Hold Pressing Keys Untill The Second Logo Appears
* When Scond Logo . Release All Keys
* Then You Will Get Factory Reset Menu
* Select Wipe Data/ Factory Reset Option . Scroll Using Volume Key . Then Confirm
* By Select Yes Delete All User Data. Using Volume Down Key . Confirm It
* Wait Some Seconds. Then Select Reboot System Now Option And Confirm
* Now Your Phone Will Restarted. After Completing The Hard Reset Prosses
* Done ! 
Read More..

Thursday, November 6, 2014

Hard Reset Your Samsung Star Deluxe Duos S5292

 Hard Reset Your Samsung Star Deluxe Duos S5292

Press MENU > Settings > Reset settings > Select All (or what you want) and select YES or Use this method to hard reset your Samsung Star Deluxe Duos S5292 phone: Enter *2767*3855#. Warning! All your data including contacts, messages etc. will be lost! Copy all your necessary data/Contacts/Messages etc. to SIM or make backup to your PC before full reset! Take out SIM card before full reset.
Read More..

Wednesday, September 24, 2014

How to Make Your Nexus 5 a WiFi Hotspot

This feature allows for your other devices to pick up your mobile hotspot settings on your Nexus 5. This is more preferable when you’re in public trying to locate a WiFi connection. You can share your connection with up to 8 computers or other devices. Check out these steps for easy, convenient and a money-saver internet experience.

1. On your device, head on to Settings

2. Select Wireless and Networks. And tap on More options.

3. Go to Tethering and portable hotspot.

4. And finally check on Portable WiFi hotpost.

Wait for few seconds and your phone will start broadcasting its WiFi network name. Now you’re ready to connect your other device to your portable mobile wifi hotspot.
Read More..

Monday, September 22, 2014

How to Set Up Your Facebook Account on Sony Xperia S

We simply cant get enough of Facebook. And this social networking giant made sure that they still exist even on your smartphones. Now you can set up a Facebook Account right on your Xperia phone which will give you easy navigation on Facebook. Heres how you can set up your Facebook account to work on your Xperia device.

1. On your devices homeLcd tap on
2. Then tap on Settings and go to Accounts & sync.
3. The Active auto-sync checkbox should be marked to make sure that applications can synchronise data automatically.

4. Tap on Add Account and then Facebook.
5. Just follow the registration wizard to create an account or you can sign in if you already have one.
6. Once youre done, select a synchronisation option for your account and tap on Finish.
Your Facebook account is now set up to work on your phone.
Read More..

Wednesday, September 3, 2014

How to save your Smart Phone from problem

How to save your Smart Phone from problem : Smart Phone or iPhone becomes popular day by day at home and abroad. All kinds of people like these phone to complete task instantly. Email check, reading newspaper, facebook notification, online games and others apps are fully controlled by Smart Phone. Peoples are so much interested to do these task using Smart Phone. But must need to safe the Smart Phone at any cost. Need to safe the Smart Phone to protect unexpected attack.

You have to use a licensed Antivirus to protect your Smart Phone from unexpected action of Virus. You have to make a schedule of charging of your Smart Phone. Dont give extra and over charge to your mobile Phone. You must give a protection to your mobile phone to make sure perfect using of mobile for longevity. Never keep your Mobile in high temperature area, never insert unexpected memory card without scanning for viruses. Never install unnecessary apps, unnecessary software. Always try to keep your Smart Phone safe from all attack. Keep trying to know more tips and tricks. Learn more how to save your Smart Phone from Problem. Thanks to all.
Read More..

Friday, August 29, 2014

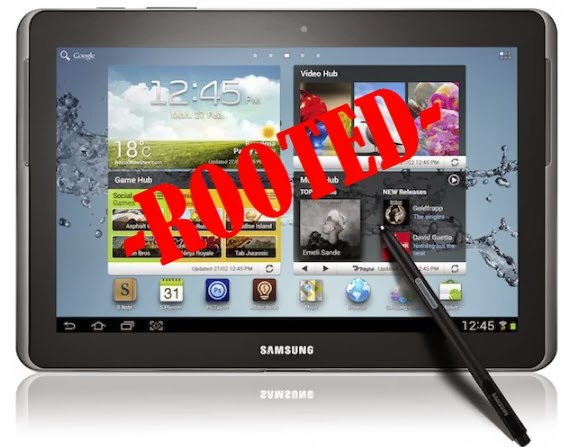
How To Root Your Galaxy Note 8 0 GT N5110 Android 4 2 2 Firmware Running on Guide

Samsung Galaxy Note 8.0 GT-N5110 (WiFi) recently get updated to the N5110XXCMK1 4.2.2 Jelly Bean Firmware. If you yet to update the firmware, then update the same by following the above link. Hope you updated this latest firmware on your device and now you can root the same using our simple tutorial below. The below guide will help you to root XXCMK1 4.2.2 Jelly Bean Firmware running on Galaxy Note 8.0 GT-N5110. Continue reading the tutorial for complete guide.
After updating official firmware, your device no longer belongs to rooted device. So, after official firmware update, many of us prefer to root our device to enjoy some additional features that unrooted android device doesnt offer. With a rooted android device, you can install apps that ask root permission, flash various custom ROMs, install MODs and tweak various features. Root removes default bloatware apps that free-up lots of memory space and extend the battery life. However, once rooted, manufacturer warranty will be void. But you can regain the warranty by following proper unroot process. To know more about benefits of rooting android device, read- Complete Note on What is Rooting and Benefits of Rooting Android Tablet.

So, want to root Galaxy Note 8.0 GT-N5110 Running N5110XXCMK1 4.2.2 Jelly Bean Firmware? Continue reading this page to get all the necessary steps to successfully root your device. The root file (CF-Auto-Root) we used in this tutorial is safe and have nearly 100% success rate. Well use Odin software to flash the root file.

The tutorial is made with simple step by step guide, so that even an android newbie user can follow and successfully root his/her device. However, in this process you may loss your personal data and settings. So, we recommend you to follow all the backup instructions before proceed to rooting guide.

Warning!

  • This rooting tutorial is only applicable for Samsung Galaxy Note 8.0 GT-N5110 model (konawifi). So, dont try this in any other android device. Check your device model number from- Settings-About Tablet
  • Rooting voids your Tablets manufacturer warranty. However, you can get back the warranty anytime by following proper unroot process or by flashing official firmware.
  • This guide is for educational purpose and you should try this at your own risk. We are not responsible if your device experience a soft brick after following this tutorial.

Pre-Requisites:

  • Check battery percentage, charge your device to a decent level of at least 60% battery power. Your device should not turn off during installation.
  • Turn on USB Debugging mode, go to Settings-Developer Options-USB Debugging
  • Backup important data and settings to external storage- follow this guide
  • Install USB driver for your device on your computer- Download Samsung USB Driver
All the above pre-requisites are very important and must be followed before proceed to installation guide. Hope you get all the above points and done as mentioned. Now, you are ready to move to the final step of this tutorial where we have arranged a step by step details guide to root Galaxy Note 8.0 GT-N5110 running  N5110XXCMK1 4.2.2 Jelly Bean firmware.

Steps to Root Galaxy Note 8.0 GT-N5110 Running N5110XXCMK1 4.2.2 Jelly Bean through Odin:

  1. Download CF-Auto-Root for Galaxy Note 8.0 N5110 and extract the Zip file: CF-Auto-Root-konawifi-konawifixx-gtn5110.zip
  2. Download Odin 3.09 and extract the Zip file: Odin3_V3.09.Zip
  3. Now, Switch off your Tablet and boot Galaxy Note 8.0 N5110 into Download Mode by pressing and holding the Volume Down+Power buttons together (long press until the boot screen appear), now press Volume Up key to proceed to Download Mode.
  4. Run the Odin3 v3.09.exe file as an administrator (Right click on the .exe file and click on Run as administrator)
  5. Now connect your Galaxy Note 8.0 N5110 to your computer via USB cable
  6. In Odin3 screen, you should see a COM Port number like “0:[COM7]” at ID:COM section and “Added!” text at the message box. This means your device has been detected by Odin3.
  7. Make sure that, only the “Auto Reboot” and “F. Reset Time” options are checked.
  8. Now, click on the PDA button and select the CF-Auto-Root-konawifi-konawifixx-gtn5110.tar.md5 file.
  9. Finally, click on the Start button to begin the rooting process, wait few moments.
  10. Once completed, you would see “PASS!” message in ID:COM port having green background
  11. Your Tablet should automatically reboot after completion
  12. You can now disconnect your Tablet from computer
  13. Finish
Congrats! You have completed the tutorial to root Galaxy Note 8.0 N5110 running N5110XXCMK1 4.2.2 Jelly Bean Firmware. Hope you successfully done the rooting process. If you followed everything as mentioned in the above tutorial, then your Galaxy Note 8.0 N5110 should now rooted and you have complete control over your device. Now, install apps that ask root permission or flash various custom ROMs. To verify your device is rooted or not, you can download and run the Root Checker App from Google Play Store. If you have any doubt or query about the tutorial, feel free to contact with us using the comment form below, and share your rooting experience with us.
Read More..

Friday, August 15, 2014

How to Factory Reset Your Phone when you Forgot Lock Pattern

How to Factory Reset Your Phone when you Forgot Lock Pattern
It will delete all your phone data and but will not harm your sd data


  1. Switch off yout phone 
  2. Press volume up button and the power button (press volume down in case up button not work)
  3. keep on pressing until the logo appears
  4. After logo appeared release volume button
  5.  keep on pressing the power button and u will enter in the recovery mode 
  6. select the wipe data/factory reset option.
  7. Once you have chosen the factory reset option, you will see a confirmation screen. 
  8.  Select Yes delete all user data option and touch the Home button to select it.
  9. Now Select the reboot button and Your phone will reboot in normal mode


Read More..